
If you’re old enough (or artsy enough) to be familiar with film camera negatives, then you probably know what an image with inverted looks like shadow areas appear bright, highlights are dark, and colors appear as their opposites on a hue spectrum color wheel. Blue becomes orange, purple becomes yellow, green turns magenta, and so on.
Most image editing apps have a quick and easy tool for experimenting with inverse colors, but did you know that it’s possible to invert the colors of a picture in Preview?
Yes, that’s right, the default macOS Preview app can handle your color inversion jobs in just three easy steps, as long as you know the trick.
Here’s how it works!
Table of Contents
Step 1: Open Your Image in Preview
Depending on the type of image file you want to invert, you may just be able to double-click the image file to open it in the Preview app.
The Preview app can open a wide range of file types, including JPEG, JPEG 2000, PNG, TIFF, and PDF files. You can even use this technique to edit files that use Photoshop’s native PSD file format without using Photoshop!
However, many file types will open their default associated apps when double-clicked instead of opening in Preview.

To open your file without accidentally opening the wrong app, select the File menu in the Preview app and click Open. You can also use the standard keyboard shortcut Command + O.
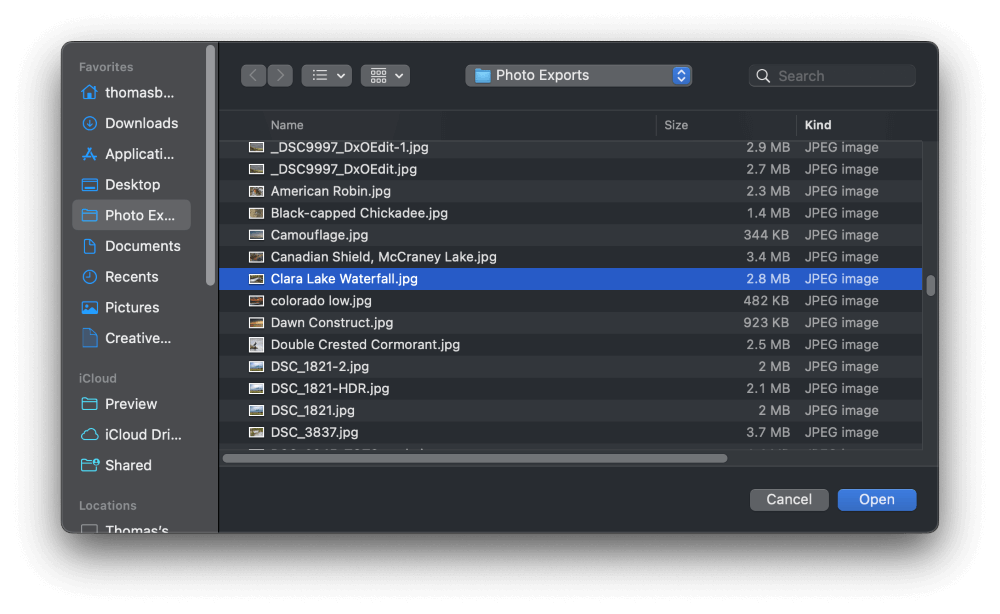
Browse to select the picture you want to invert and click the Open button.
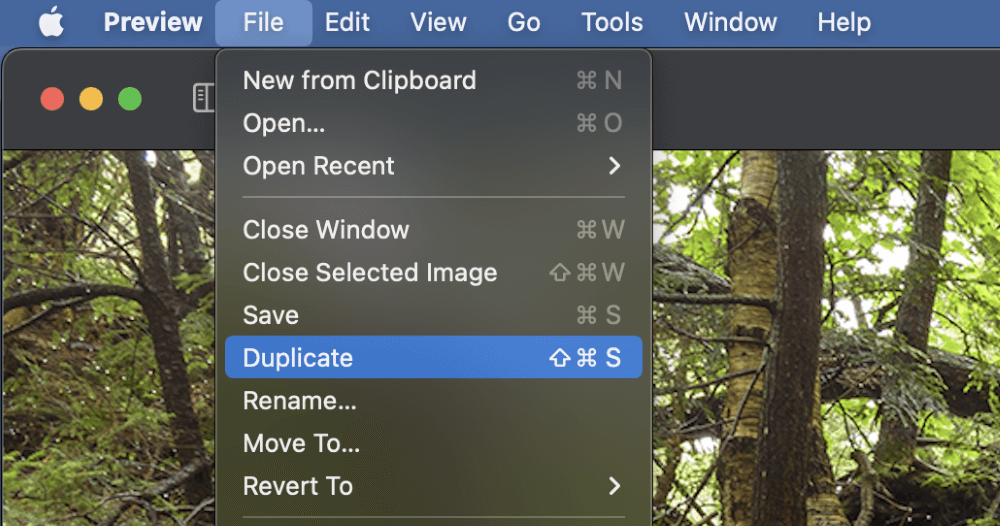
If you want to keep a copy of the original version of your picture, open the File menu and click Duplicate. Preview will create another copy of your image so that you can apply the color inversion effect without destroying the original.
Step 2: The Adjust Colors Window
Once your image is open in the Preview app, it’s time to start editing.
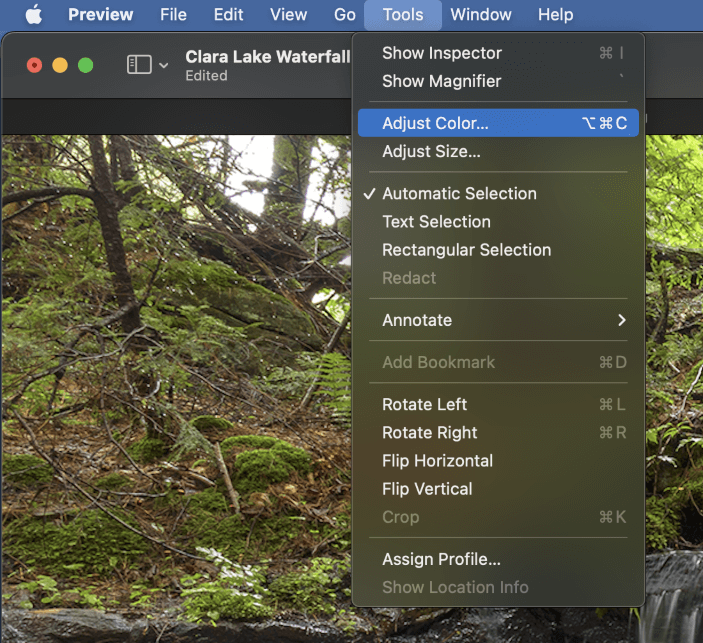
Open the Tools menu and select Adjust Color. If you’re in a hurry, you can also use the keyboard shortcut Command + Option + C instead.
The Adjust Colors panel will open, giving you a range of basic editing options that you can use to tweak the exposure, contrast, saturation, color temperature, and more. I don’t recommend using these tools for professional-level image editing, but they’re very useful for quick one-off tasks where image quality isn’t the primary concern.
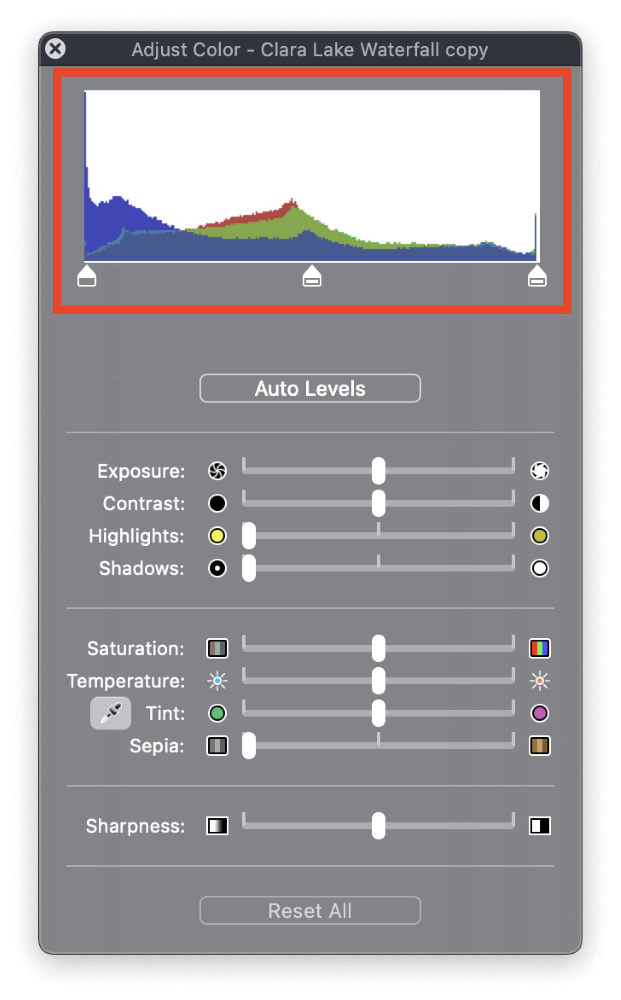
The area that allows you to invert the colors of your picture is located at the top of the window (as highlighted above). This type of graph is known as a histogram, and it’s a way of representing the various amounts of colored pixels contained in your image.
As you can see in my example, there are three different overlapping graphs: a red graph, a green graph, and a blue graph, representing the three color channels used to make an RGB image.
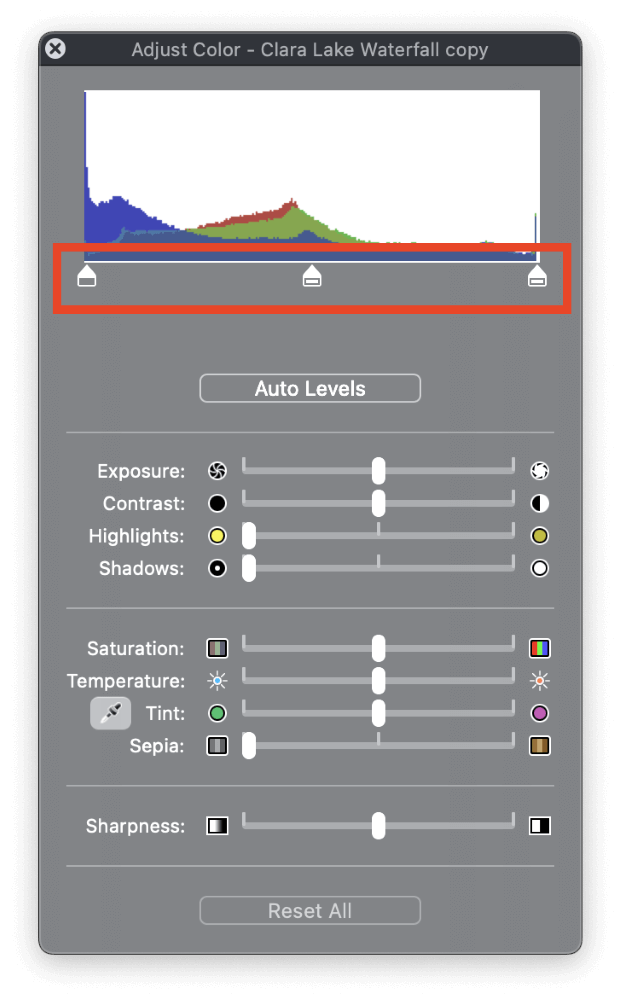
Below the histogram are three different sliders: the black point slider on the left, the mid-tone slider in the center, and the white point slider on the right. These three slider controls can be moved around to adjust the display of the associated pixels, as you can see if you play around with them a bit.
If you want to experiment with the different settings, feel free to do so. Just click the Reset All button at the bottom of the window, and your image will return to its original, unedited state.
Step 3: Time for the Color Swap!
Some of you who are more experimental may have already guessed how you can use this knowledge to invert the colors of a picture.
First, click and drag the black point slider over toward the right half of the histogram. Make sure that you don’t drag it all the way over to the right edge yet, because it can overlap the white point slider and make it difficult to click on.
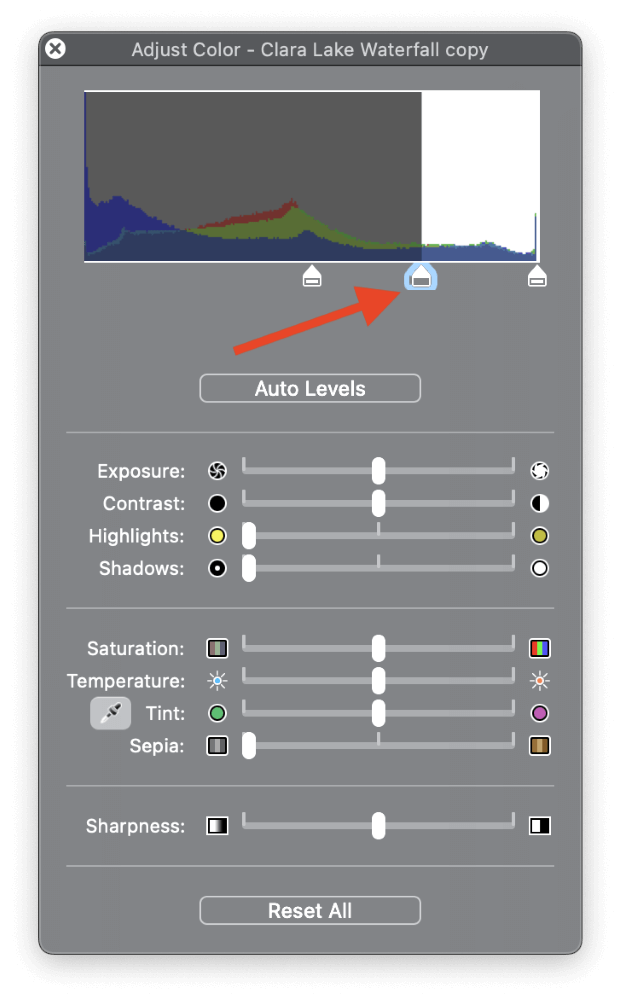
You’ll start seeing changes to your image exposure and colors, but don’t worry; we’re not done yet.
Once you’ve moved the black point slider over to the right a bit, click and drag the white point slider all the way over to the left edge of the histogram. Once it passes the black point slider, you’ll see a dramatic change in the colors of your image.
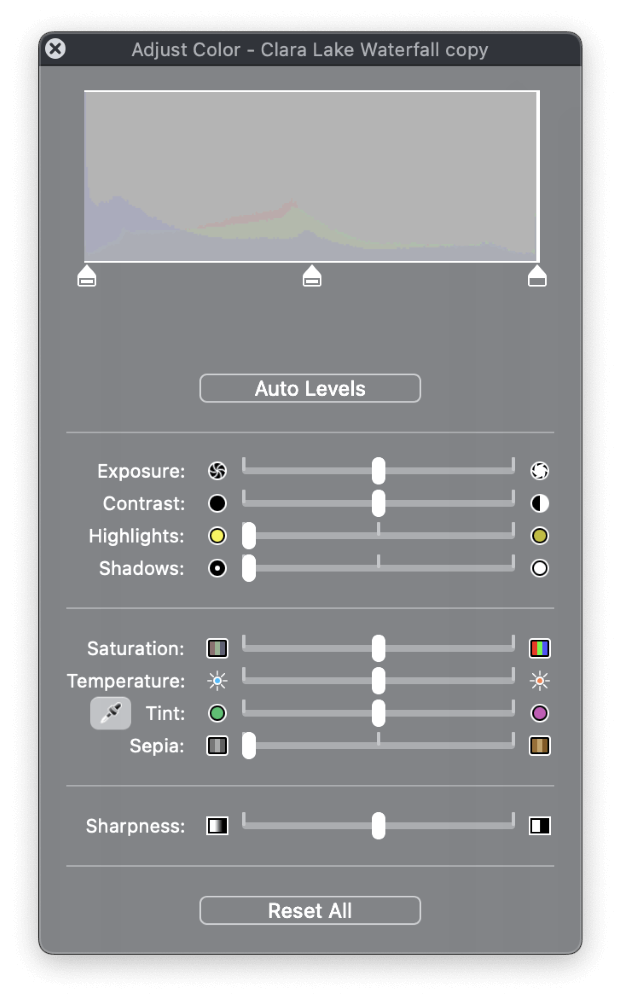
Now that the right edge is clear, click and drag the black point slider again, but this time it’s ok to move it all the way to the right edge.
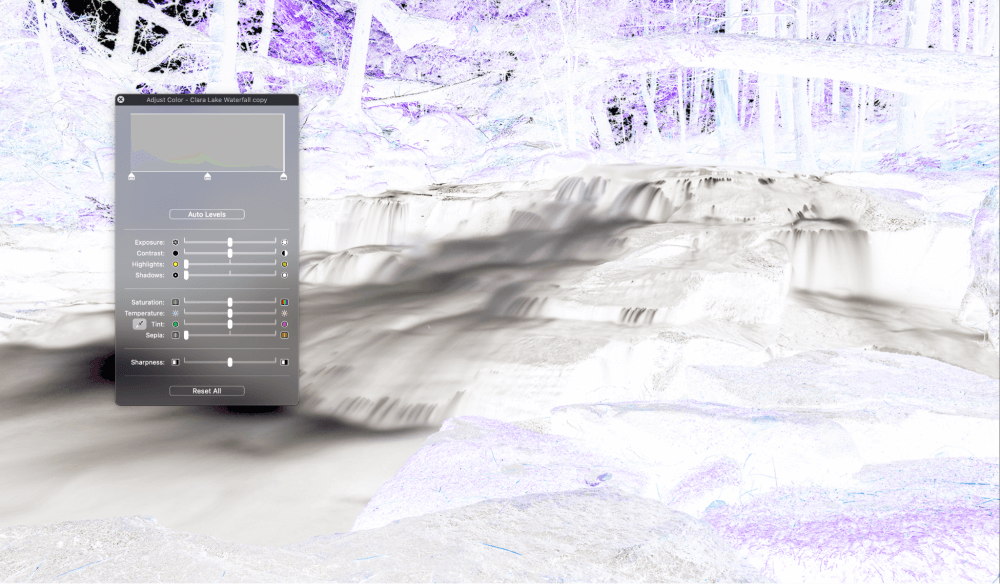
That’s all there is to it! Close the Adjust Color window by clicking the close button in the upper left corner, then save your file, and you’re done.
A Final Word
That’s everything there is to know about how to invert the colors of a picture in Preview! The Preview app has come a long way over the years, and it’s now one of the most useful built-in apps in macOS. While some of its talents can be a bit hard to find, they’re easy to use once you know where to look.
Happy inverting!