
Have you ever wondered why your mouse pointer on Mac suddenly gets larger when you shake it? You might have been surprised one day while using your Mac. But, the reason why is quite simple.
The main reason why the mouse pointer gets bigger on Mac when you shake it is that the computer believes that the way you are moving the mouse indicates that you have lost it, so it gets larger for a moment to ensure that you know where it is located on the screen.
Pretty cool, right? Let’s explore this feature in more detail and talk about some of the other important mouse and trackpad features you can find on your Mac.
Table of Contents
Key Takeaways
- macOS includes a handy little accessibility feature called “Shake Mouse to Locate.”
- This feature is turned on by default and makes the mouse pointer larger when you shake the mouse quickly, making it easier to locate on the screen.
- You can turn this feature on or off in the System Settings under Accessibility > Display > Pointer.
- Other accessibility settings related to the mouse and pointer include double-click speed, spring-loading/spring-loading speed, mouse keys, alternate pointer actions, and head pointer, which can all be accessed under Accessibility > Pointer Control.
- Apple also offers trackpad-specific settings, including gestures that use the trackpad and one or multiple fingers to complete tasks.
- Some of these settings include Point & Click, Scroll & Zoom, and More.
Reasons Why Your Mouse Gets Bigger on Mac
There are three common reasons and I’ll explain what they are and what to do about it.
1. Shake Mouse to Locate
In 2015, Apple released MacOS X 10.11. With this release, there was an addition of an accessibility feature called “Shake Mouse to Locate.” This is a default feature that is turned on when you receive a Mac.
This means when you “lose” your mouse, and you shake it quickly, then the mouse will get bigger to make it easier to find.
You can turn this feature on or off if you want. The process is pretty simple. Just follow these steps:
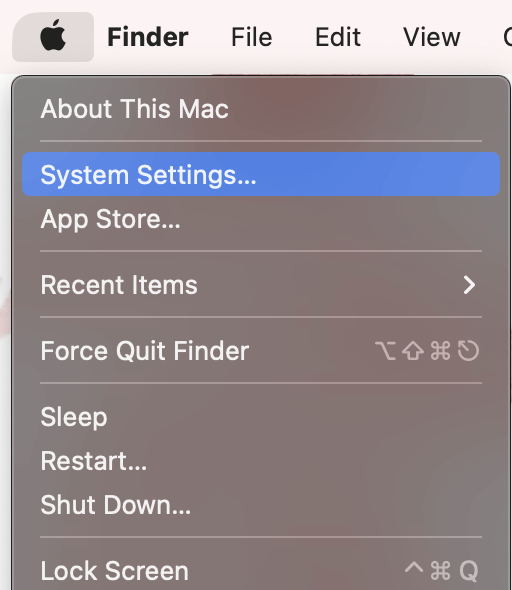
Step 1: In the Apple Menu, click System Settings.
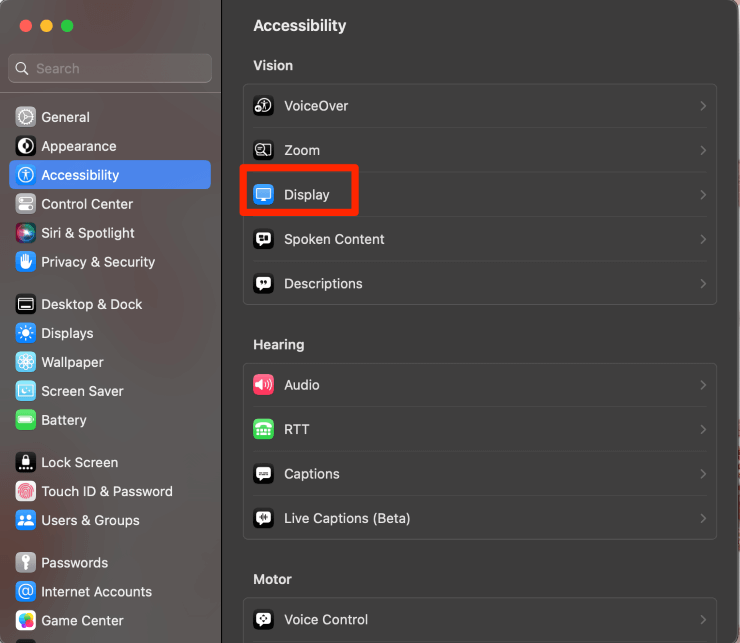
Step 2: Navigate to Accessibility on the left and select Display.
Step 3: Under Pointer, use the slider to turn on/off Shake Mouse to Locate.
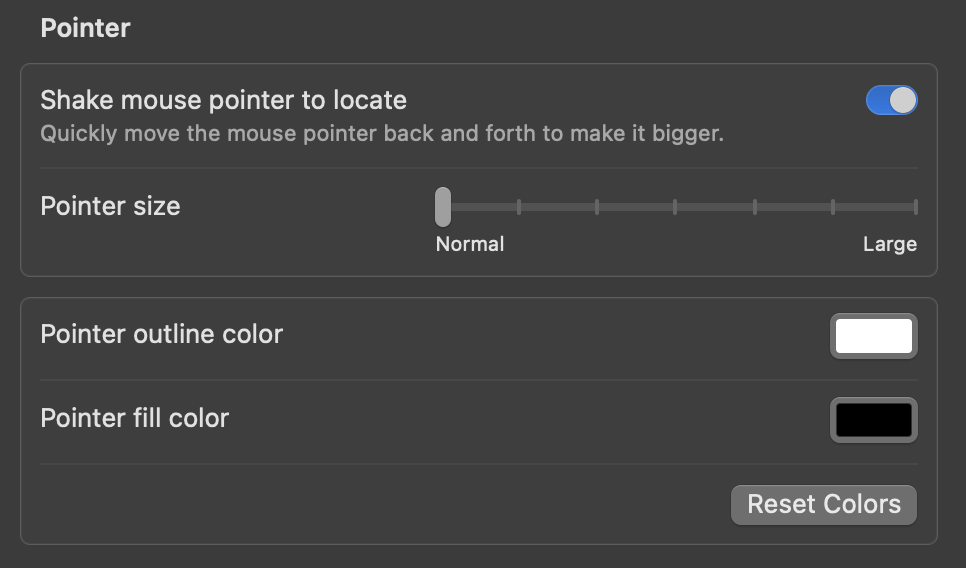
As you can see by the screenshot above, in this settings location, you are also able to increase/decrease your pointer size or change the pointer color to make it easier to find on your screen (or just to give it a cool color).
Let’s check out some of the other handy settings!
2. Other Pointer Control Accessibility Settings
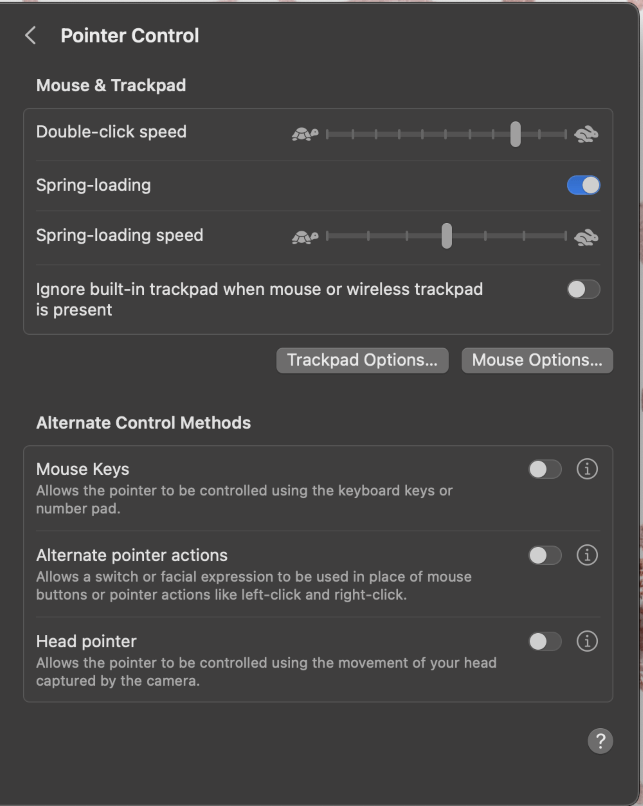
Apple also offers other accessibility settings that are related to the mouse or the “pointer.” These settings include double-click speed, spring-loading/spring-loading speed, mouse keys, alternate pointer actions, and head pointer.
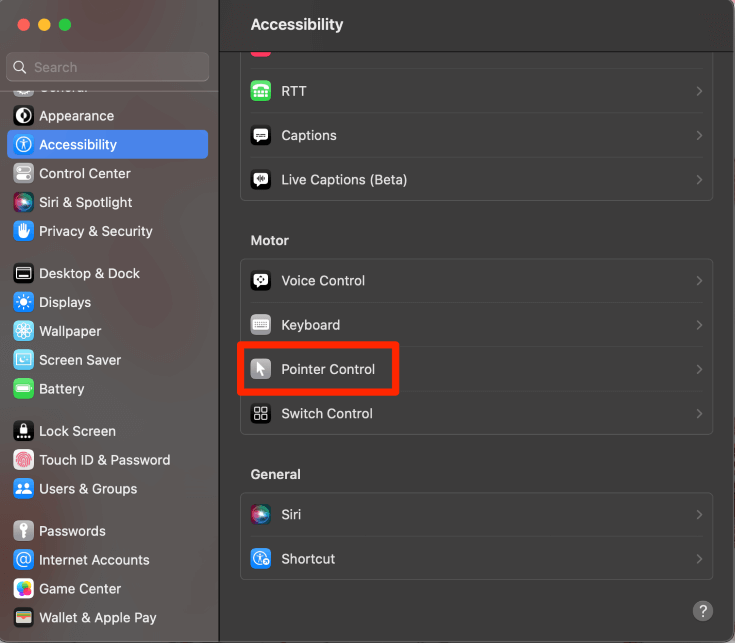
To access these settings, open them from the Apple Menu > System Settings > Accessibility, and click Pointer Control.
You will see a bunch of available options on this screen. Just move the sliders to suit your preferences.
3. Other Trackpad Settings
Apple also offers Trackpad-specific settings. In these settings, you can choose what Apple calls “Gestures.”
Gestures use the trackpad and one or multiple fingers to complete tasks. For example, you can use two fingers to double-click on something. You can also use three fingers and swipe left or right to swipe between full-screen applications.
Gestures were designed to make using the trackpad on a Mac as easy and natural as possible. These settings are fun to play with to see what is most comfortable for you.
To get to your Trackpad settings, follow these steps:
Still in the Apple Menu > System Settings, navigate to Trackpad on the left side menu.
Here you will see three different settings menus:
- Point & Click
- Scroll & Zoom
- More Gestures
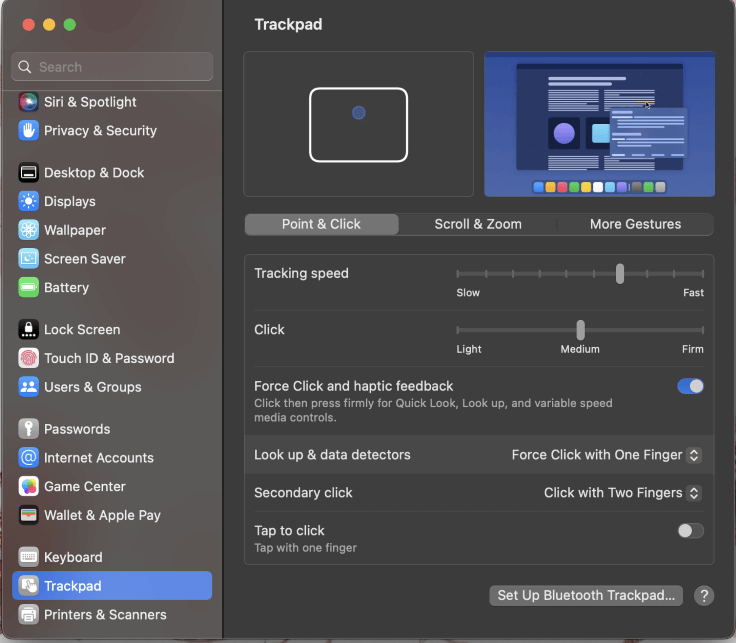
In the first tab, you’ll find your basic pointing and clicking settings. This is where you can set tracking speed (how fast your mouse moves), clicking pressure (how hard you need to press for a click to register), force click and haptics (pressing all the way down to click rather than tapping), look up and data detectors, secondary click (double click) and tap to click.
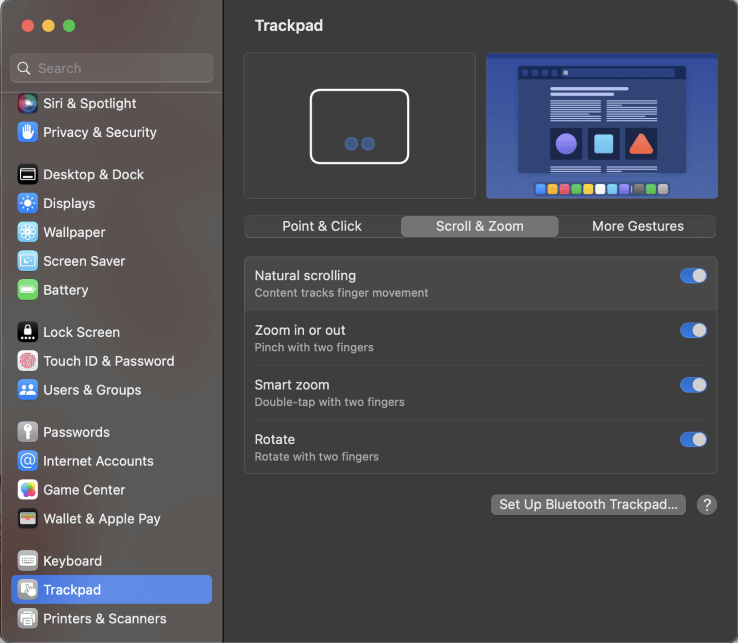
Scroll over to the next tab, and you’ll see your scroll and zoom settings. This is where you can set natural scrolling (tracking finger movement on trackpad, zoom in or out using pinching with two fingers on trackpad, smart zoom, and rotating with two fingers.
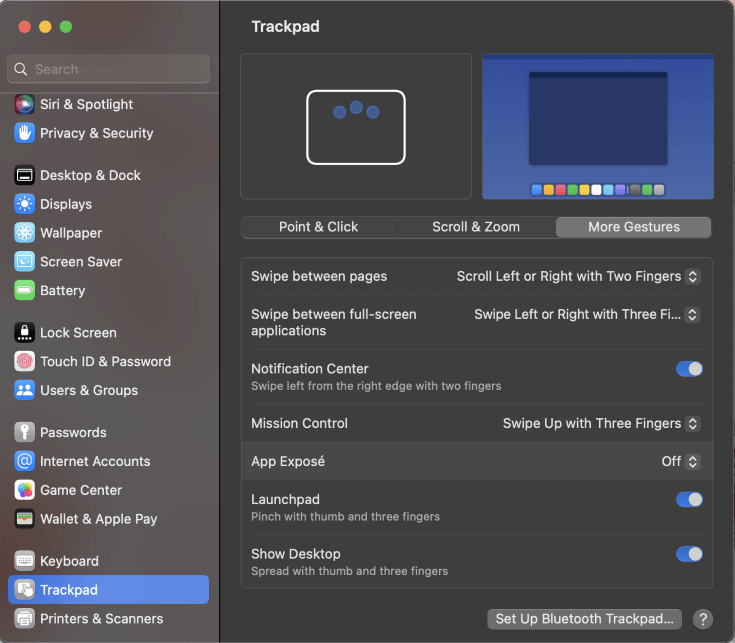
Finally, the last tab will contain your more complex gesture settings. You can set up how you are able to swipe between pages, swipe between full-screen applications, if you can access the notification center using a gesture, how to access mission control, app exposé, how to access launchpad, and even how to show desktop.
These gestures are very cool and are able to make your life as easy as possible when you are utilizing your Mac. Go through these gestures and see which you can add to your daily life!
My personal favorite is swiping up with three fingers to switch between apps. If you’re a productivity fiend like I am, you’ll love gestures like this.
Final Thoughts
When your mouse is getting bigger on your Mac, the computer likely believes with the speed and way you are moving the mouse that, you have lost it. macOS only wants to help you!
So, Mac has an accessibility feature called “Shake Mouse to Locate” that is designed to make the mouse pointer larger on the screen when it is “shaken” to show the user where it is located. This is not the only cool feature that Apple has for its mouse and trackpads.
Today, we explored not only Shake Mouse to Locate, but also Pointer Control Accessibility Settings, and Trackpad Accessibility settings. Hopefully, you learned something new and useful.