
The free and open-source audio editing software Audacity provides various built-in fading options. At the basic level, to fade in and fade out in Audacity, select the audio you want to fade, then click Fade In or Fade Out from the Effect > Fading menu.
Hi, I’m Andrew Gilmore, a long-time Audacity user, and the core Fade In and Fade Out effects are just the tip of the fading iceberg. The software includes various types of fades, including crossfades, adjustable fades, and customized effects.
In this article, we’ll cover all of these options, so you can get your audio sounding just the way you want.
Let’s get started.
Table of Contents
How Do You Fade Out and Fade In Audio in Audacity?
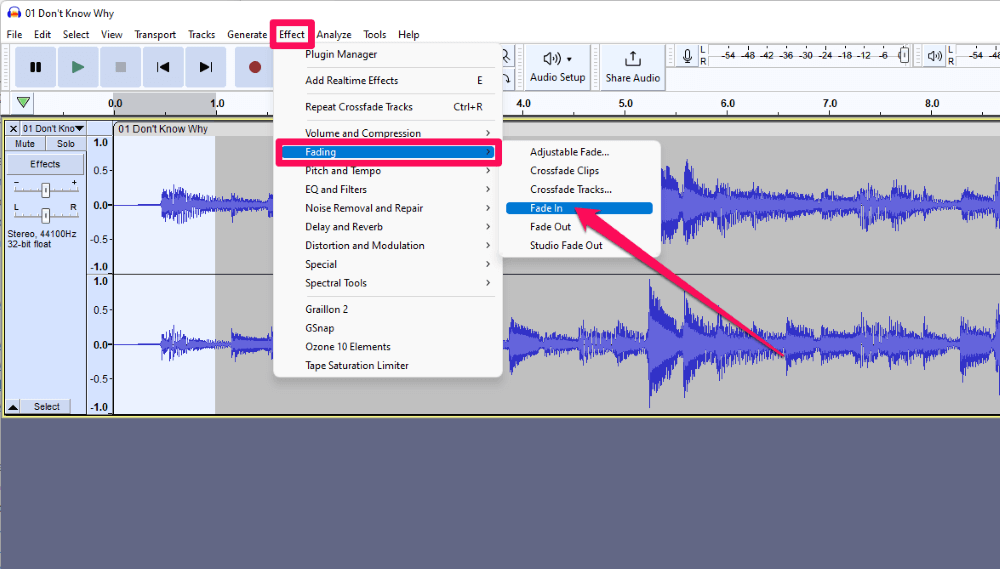
The basic Fade In and Fade Out effects are the quickest and easiest to apply to your audio tracks. To use these effects:
- Select the audio you want to fade.
- Click Effect > Fading from the menu bar, then select either Fade In or Fade Out, depending on your preference.
These basic fading effects have no adjustable settings or customizations. Once you select the effect, it is instantly applied to your selection.
The Fade In and Fade Out options apply a linear fade to the audio–a constant increase (or decrease) from (or to) zero. You can apply the same effect multiple times to achieve a more pronounced change in amplitude.
What is Adjustable Fade in Audacity?
Although the basic Fade In/Fade Out options are convenient, Audacity offers many custom fading options using the Adjustable Fade effect. To use Adjustable Fade:
- Select the audio you want to fade.
- Click Adjustable Fade… from the Effect > Fading menu.
- Use the Fade Type dropdown list to select one of four types: Fade Up, Fade Down, S-Curve Up, or S-Curve Down.
Fade Up and Fade Down are linear fade types just like the effects described above. S-Curve stands for sine curve, and this type of fade is based on the mathematical wave, also known as a sinusoid.
Rather than a constant rate, decrease, or increase in amplitude, as with the linear fade, an S-Curve fade starts off gradually before decreasing or increasing sharply and ultimately leveling out again.
Proponents of the S-Curve fade say the result sounds more natural, especially when fading out music.
- Type in a percentage or use the slider to change the Mid-fade Adjust (%) setting.
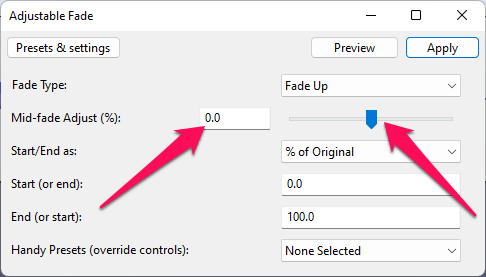
Mid-fade Adjust allows you to customize the shape of the fade curve. A negative value will result in a more gradual amplitude increase on a fade-in and a sharper decline on a fade-out. A positive value will have the opposite effect: a sharper rise on a fade-in and a more gradual decline on a fade-out.
- Use the Start/End as dropdown to determine if you want the next two settings measured in % of Original or dB Gain.
Unless you want your audio at specific dB levels, leave this setting on % of Original.
- Set the Start (or end) and the End (or start) values.
The default settings are 100.0% and 0.0%, which results in a fade from silence to 100% of the original audio amplitude for a fade up and vice versa for a fade down. You don’t need to worry about which box to use for your start and end percentages; the Fade Type will automatically determine the direction of the fade.
- Click the Preview button to listen to the effect and adjust settings as necessary.
- Click Apply to save your settings.
The last option in the Adjustable Fade effect is Handy Presets. As noted in parenthesis in the effect window, this setting will override any other settings.
So if you change your Fade Type to S-Curve Up but then select Linear Out from the Handy Presets dropdown, the effect will honor the latter and apply a linear fade out. Therefore, if you want to manually apply your fade settings, ensure the Handy Presets option is set to None Selected.
I won’t go into detail on all of the preset options here, but you can easily experiment with them and read more from Audacity’s manual page.
We’ve already covered linear, and S-curve fades. Another option worth highlighting is Exponential In/Out. Rather than apply a consistent gain or decrease in amplitude, the exponential fade applies a parabolic curve to your audio.
The exponential fadeout is popular because, according to the good folks at Audacity, the effect “closely models the way in which sounds naturally decay.”
Audacity Fade Out Vs. Studio Fade Out
Studio Fade Out is another popular fade-out option in Audacity.
Studio Fade Out is similar to the S-Curve Out preset in the Adjustable Fade effect, but Studio Fade Out also fades higher frequencies more quickly than lower frequencies to give the fade out a more natural sound.
This makes sense because lower frequencies travel farther than higher sounds. As a result, Studio Fade Out gives the listener a more realistic sound of moving away from the audio source.
Using Studio Fade Out is easy. Simply select the audio you want to fade, then click on Studio Fade Out from the Effects > Fading menu. Since Studio Fade Out has no customizations, choosing this option immediately applies the effect.
Envelope Tool: Another Way to Adjust Fade in Audacity
The Envelope Tool is yet another way to fade audio in Audacity. Unlike the other options above, you access this tool from the menu bar, not the Effects menu.
Here’s how to use the Envelope Tool:
- Click the Envelope Tool button from the toolbar. The icon looks like a line segment with two points.
- Click on the blue bar that appears above your track at the point you want the amplitude to be the highest.
- Locate a second point where you want to reduce the amplification, and then click and drag the blue bar down toward the middle of the track.
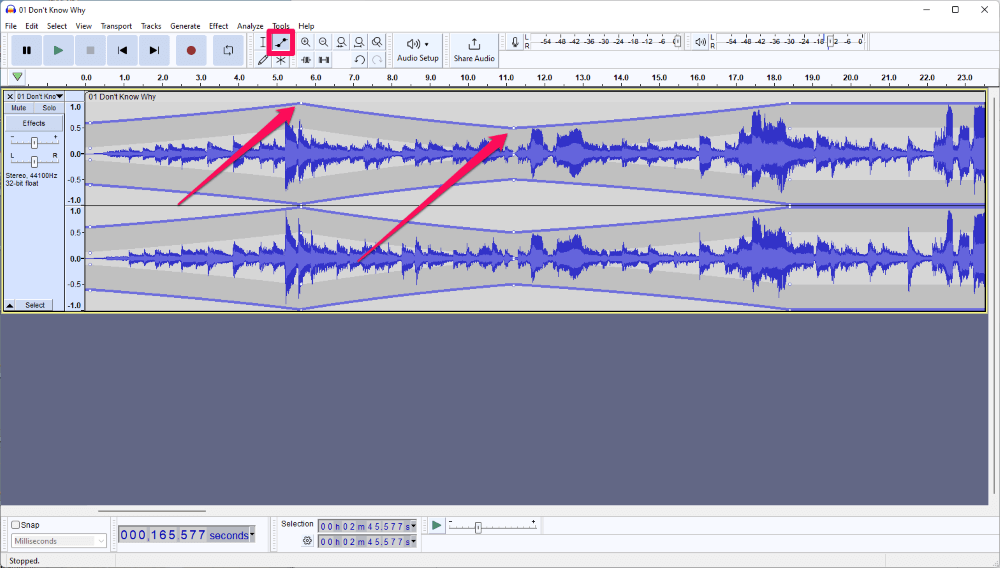
- Repeat if desired for other portions of your audio.
Clicking the blue bar adds a Control Point, which serves as a kind of anchor for your track’s amplitude. You can add as many control points as you’d like. To remove a control point, click and drag the point outside of its track.
Unlike the fading effects, the Envelope Tool option is non-destructive, so you can remove your changes at any time.
How to Fade Two Tracks or Clips Using Audacity Crossfade
If you have two tracks or clips, you can crossfade them, i.e., fade the second clip in while the first fades out. Audacity provides two convenient options to render a crossfade, one for clips and one for tracks.
To crossfade two adjacent clips:
- Click and drag to select the end of the first and the beginning of the second clips to crossfade.
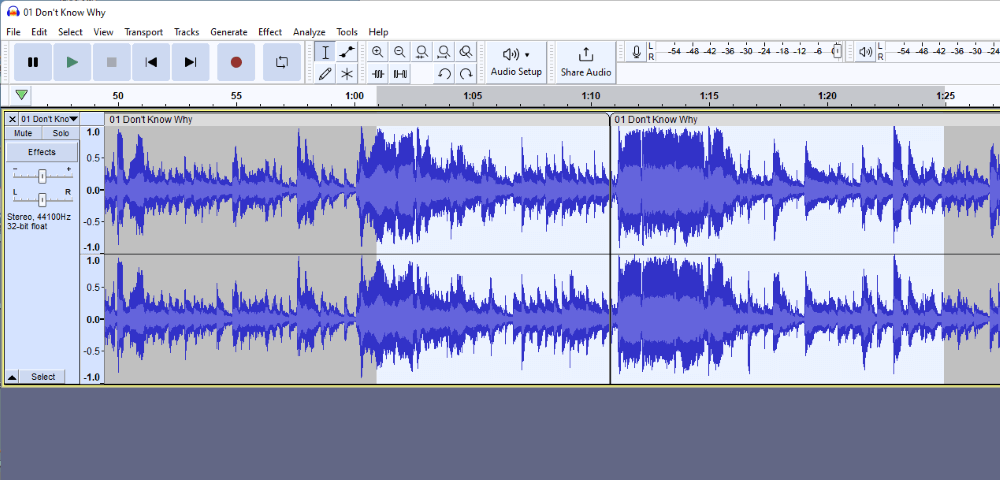
- Click Crossfade Clips from the Effects > Fading menu.
When selecting Crossfade Clips, Audacity instantly applies the effect and combines the two clips into one.
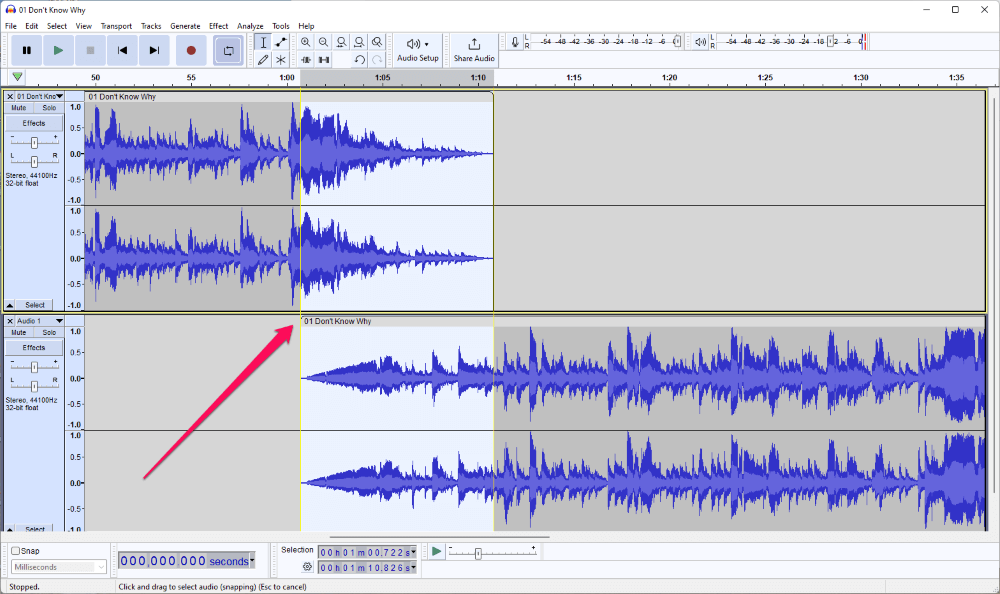
To crossfade two separate tracks:
- Align your tracks so they overlap for the desired crossfade duration.
- Select the audio to crossfade by first clicking the beginning point in the first track and then dragging your cursor to the endpoint on the second track.
- Click Crossfade Tracks… from the Effects > Fading menu.
- Select your Fade Type and then click Apply.
Constant Gain is a linear fade. You can specify custom curve settings only if you select Custom Curve as your fade type.
FAQs
Here are some other questions about fade-in and fade-out in Audacity.
How do you remove a fade-out in Audacity?
If you applied the fade out using the Envelope Tool, simply adjust or remove the control points. If not, assuming Undo is no longer an option, you’ll want to use the Adjustable Fade effect to apply the inverse fade to your audio.
Select the portion of your audio containing the fade-out, then choose the Adjustable Fade effect from the Fading menu. From there, apply the inverse operation of the fade out.
Even with a simple linear fade-out, reversing the effect can be tricky, so play around with the adjustable fade settings until you get the desired audio levels. You can also use the Envelope Tool to assist.
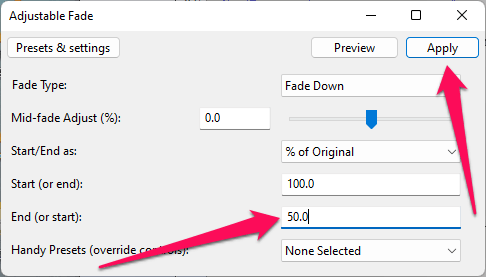
How do you fade out but not to zero in Audacity?
You can fade out but only some of the way to zero in Audacity using the Adjustable Fade effect.
Select the audio you want to fade, then, in the Adjustable Fade settings, select Fade Down from the Fade Type dropdown menu. Set your End (or start) setting to something greater than zero, then click Apply.
How do you zoom in in Audacity?
The quickest way to zoom in in Audacity is to use the keyboard shortcut Ctrl + 1. For a more detailed answer, check out our other article, How to Zoom in and out in Audacity.
Fading in Audacity: As Simple As You Want It to Be
As you can see, the fade options in Audacity range from a simple one-click option to complex mathematical fading in or out. To perform a basic fade in and fade out in Audacity, use the Effect > Fading menu, then choose Fade Out or Fade In as desired.
Audacity provides a plethora of fading options so you can produce high-quality fades. Which fade option do you prefer?