
As an Apple product made exclusively for Macs, Final Cut Pro defaults to exporting movie files in Apple’s own .mov format. But exporting in the .mp4 format to share with Windows-based computers or upload to websites that require it is easy – once you know where to look.
Over the decade that I have been making home movies and professional films I’ve learned that converting my Final Cut Pro exports from .mov to .mp4 is not that hard (they are in fact very similar formats), but if you know you need .mp4 it is easier and slightly more reliable to just export it from Final Cut Pro in that format.
Below, I will show you exactly the steps you need to take to export .mp4 files from the current (10.6.4) version of Final Cut Pro. It was a little more obvious in earlier versions, but sometime in 2021 Apple changed it for reasons unknown, and now you really need to know where to look to find it!
Table of Contents
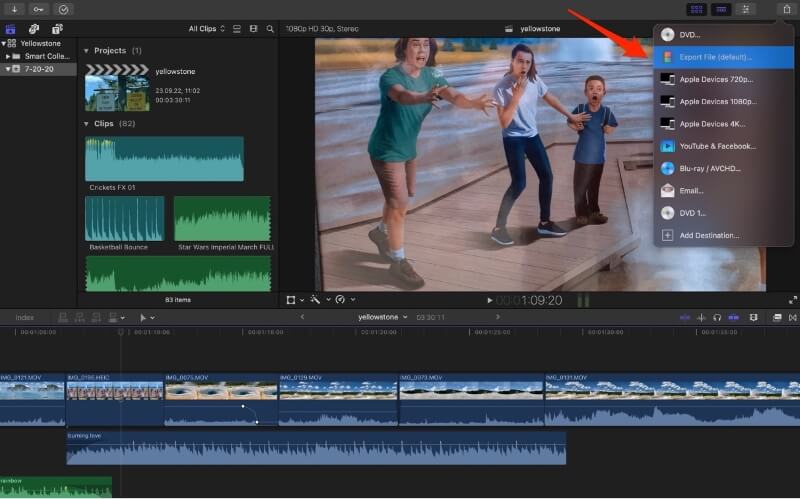
The Sharing menu appears when you click the sharing icon in the top right corner of the Final Cut Pro window. From the menu, you want to choose the second item “Export File (default)”.
Note that your list may look slightly different than mine because you can add your own custom formats to this list. But “Export File” should always be there and near the top of the list.
Step 2: Switch to the Settings Tab
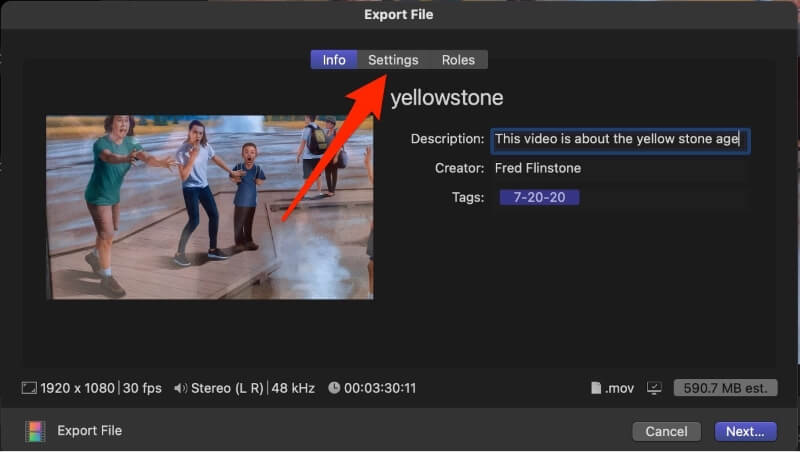
After you select “Export File”, a dialogue box will pop up that looks like the screenshot below. Here you can enter the title of your move, enter a description, and so on.
But we want to switch to the Settings tab (which the red arrow is pointing at in the screenshot), so click on Settings.
Step 3: Change the Format
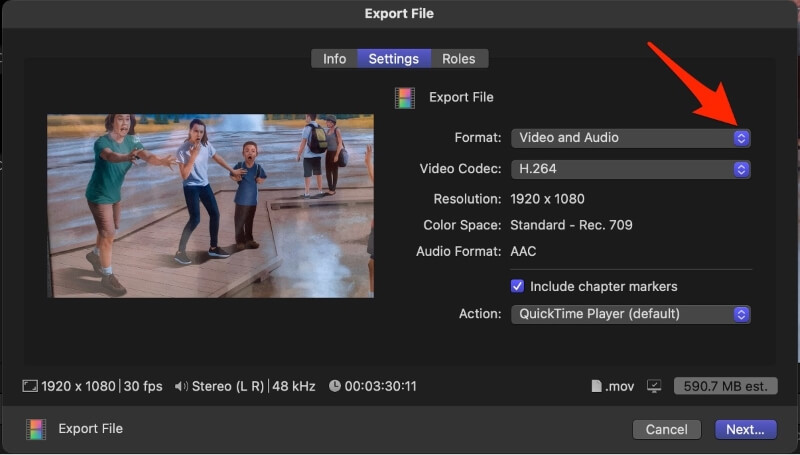
The dialogue box should now look like the screenshot below. From here, we want to change the Format option, by clicking on the Format drop-down menu, identified by the big red arrow in the screenshot.
Step 4: Select “Computer”
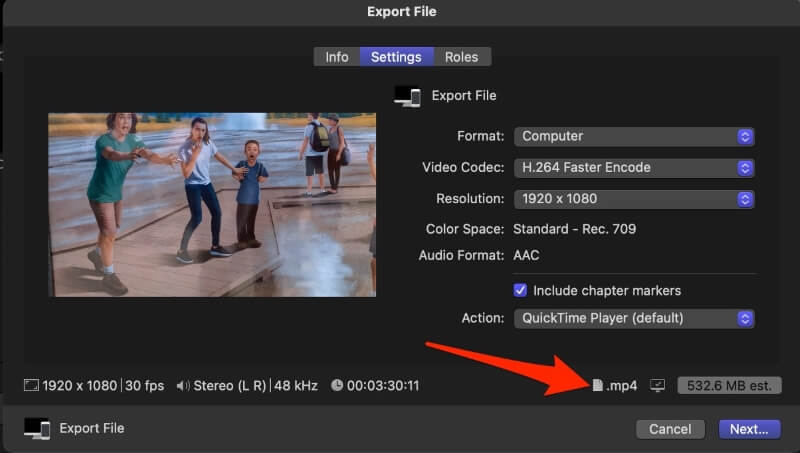
In the menu that drops down, which is shown in the screenshot below, select Computer. Note that NO other option will result in an .mp4 file being exported, only Computer.

But, once you’ve selected Computer the Export File dialog box should now look like the screenshot below, and the file extension shown at the bottom of the screen (see the red arrow in the screenshot) should now read “.mp4”. If it does, you’ve done it!
All you need to do now is click the Next button at the bottom right corner of the dialog box and a Finder window will open so you can select where on your computer you want to save your shiny new original .mp4 file.
Final (Vaguely Conspiratorial) Thoughts
Why did Apple bury the steps needed to export an .mp4 file from Final Cut Pro after 2021? I honestly don’t know, but I suspect it was because they wanted to encourage the users of its video editing software to stick with their .mov format.
And Apple does claim that .mov files allow for better viewing than .mp4 when played back on a Mac so it makes some sense they would make the default export format .mov.
But whether you or I would notice the difference between a .mov and .mp4 file is unclear, and why burying the steps for exporting an .mp4 file helps either video editors or those watching the movies to see the best quality videos is even more unclear.
In the meantime, know that Final Cut Pro can easily export .mp4 files and now you know exactly the steps needed to do it!