
The Portable Document Format (PDF) is one of the most popular file types for sharing documents. Originally developed by Adobe way back in 1993, it was turned into an open standard in 2008, and it wasn’t long before almost every computer in the world could open PDF files.
The Preview app that is available on all Macs can open PDF files, and it can even do some basic PDF editing tasks as long as you know where to find the tools. You won’t find any of the complex editing tools that are available in dedicated PDF editors like Adobe Acrobat, but you can still make some simple adjustments.
Table of Contents
What Kind of Edits Can I Make to a PDF in Preview
You can add, delete, and rearrange pages within your PDF, and you can annotate the document with arrows, shapes, handwritten notes, text, signatures, and highlights. You can even redact selected objects like text and images for permanent deletion.
If you’re hoping to resize, reformat, or alter the individual graphic or text elements within a PDF, you’re probably out of luck. In most situations, that type of editing takes place during the actual document creation process and cannot be done once a file has been exported as a PDF.
Here’s how you can take advantage of Preview’s PDF editing features!
If you want to edit the page structure of your PDF file in Preview, the first step is to open the sidebar panel. The sidebar panel gives you a quick overview of your document in a variety of ways, from page thumbnails to annotations to bookmarks.
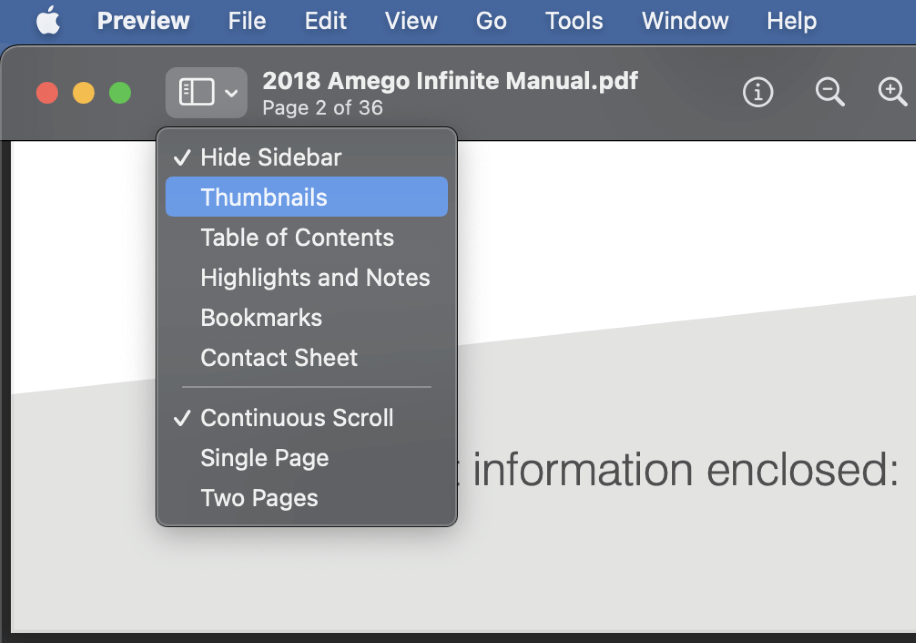
To open the sidebar panel in Preview, click the Choose Sidebar Display icon next to the document file name (shown above), and select the Thumbnails option. You can also open the View menu and select Thumbnails to display the sidebar or use the keyboard shortcut Command + Shift + 2.
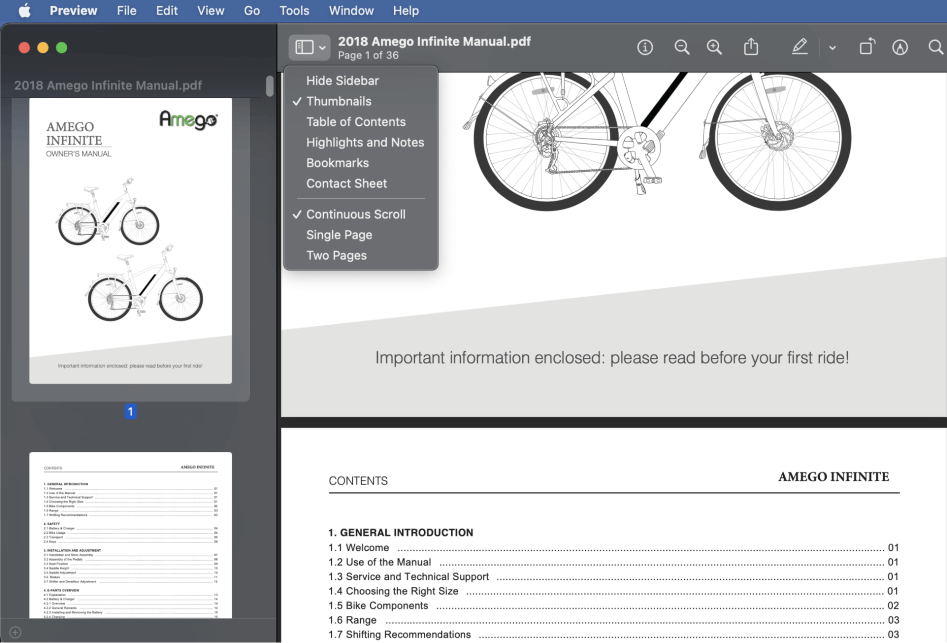
Reorder Pages in a PDF
You can rearrange the pages within your PDF by selecting the appropriate page thumbnail in the sidebar and then clicking and dragging the thumbnail into the desired spot in the page order.
Delete Pages in a PDF
To delete pages from a PDF, select the page thumbnail in the sidebar and click the Delete key. You can also select the page thumbnail, and then open the Edit menu and select Delete.
Insert New Pages into a PDF
You can also insert completely new pages into a document in several different ways. Select a page in the sidebar panel, and any new pages will be inserted after the selected page.
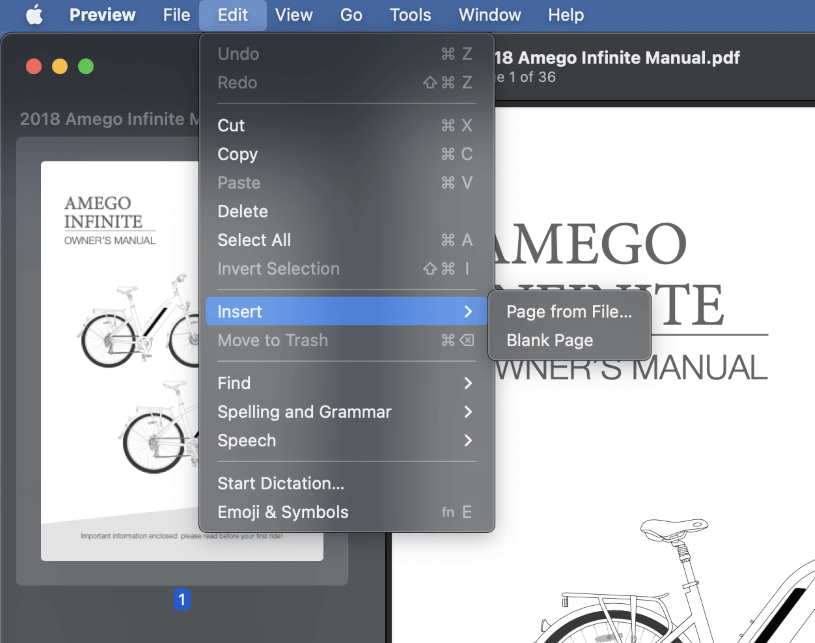
Open the Edit menu, select the Insert submenu, and select either Page from File or Blank Page. If you choose Page from File, the Preview app will open a dialog window so that you can select your desired file.
You can insert any file that Preview is capable of opening, so most image formats and even other PDF files can be inserted.
A new page will be created using the same page size as the rest of the document, and your selected file will be placed at the exact center of the new page.
Unfortunately, there are no additional options about how the page should be formatted or how your file will be positioned, but this is still a pretty good result for the humble Preview app!
If you choose the Blank Page option from the Insert menu, a new blank page will be inserted with the same dimensions as the rest of the document.
Combine Multiple PDF Files in Preview
To get really fancy, you can also insert one or more pages from another PDF.
Open both of your PDF files in Preview, and open the sidebar panel in both document windows.
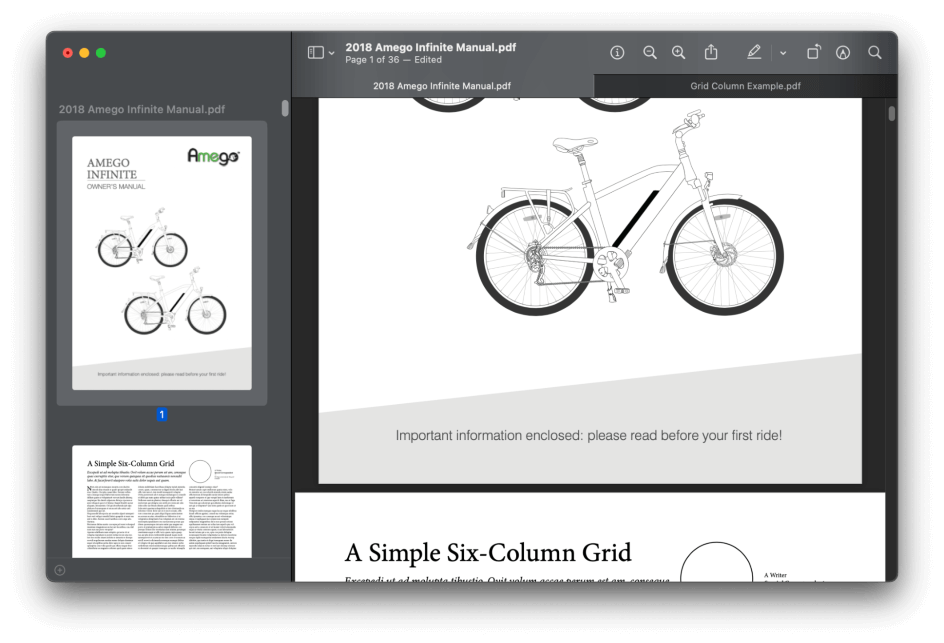
Drag and drop the page thumbnail from one document into the other, and Preview will insert the new page at your specified location. If you want to select multiple pages, hold down the Command key and click additional page thumbnails to add them to your selection.
If you use the tabbed document view in the Preview app instead of separate windows, you can still use this trick. Just hover your mouse cursor over the appropriate tab while dragging and dropping your page, and Preview will allow you to insert the page(s).
Using the Markup Toolbar
It’s also possible to add several different graphical annotations to a PDF file in Preview using the Markup toolbar. The Markup toolbar is hidden by default, but you can enable it by clicking the Show Markup Toolbar icon in the upper right corner of the Preview window (shown below).

The Markup toolbar will appear below the main toolbar, as you can see below.

The Markup toolbar contains three primary tools for adding details to your PDF file: Sketch, Shapes, and Text.
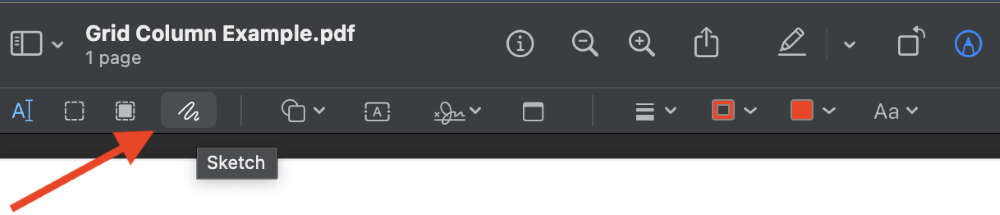
The Sketch tool allows you to add freeform content such as handwritten text and shapes, but it can also detect certain patterns. If you draw something close to a straight line, it will offer to convert your slightly crooked line into a perfectly straight line, and the same applies to other basic shapes.
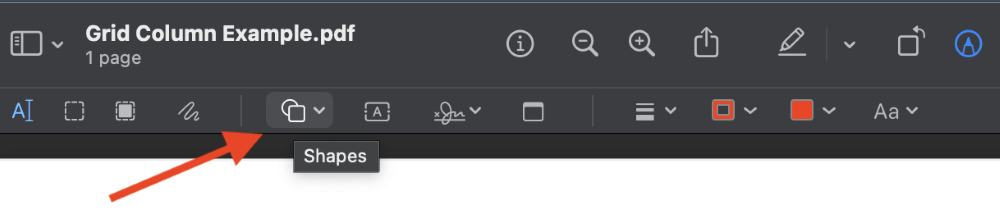
The Shapes tool is used to add preset geometric shapes to your PDF. Click the Shapes tool to open a popup window displaying the available shapes. Select your chosen shape, and then click and drag in your PDF document to set the shape’s size and position.
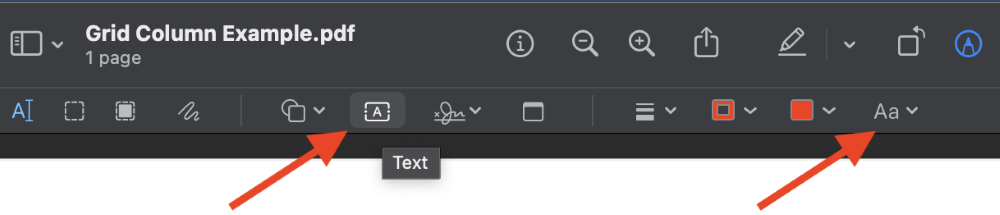
The Text tool allows you to add precise text to your PDF file. By clicking the Text Style button at the right-hand side of the Markup toolbar, you can customize the typeface and font style, just the same as you would in a word processor app.
You can adjust the color of all your additions, as well as the line thickness and pattern, and even add automatic arrowheads to one or both ends of a line.
Redacting Your PDF
The last tool that you can use to edit a PDF file in Preview is an impressive one since it’s the only way you can actually delete elements from a PDF file.
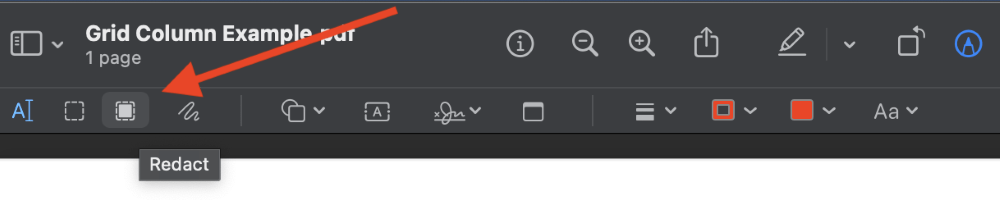
Click the Redact tool in the Markup toolbar (as shown above). Click and drag to specify the area that will be removed from the PDF file, regardless of what content is located below.
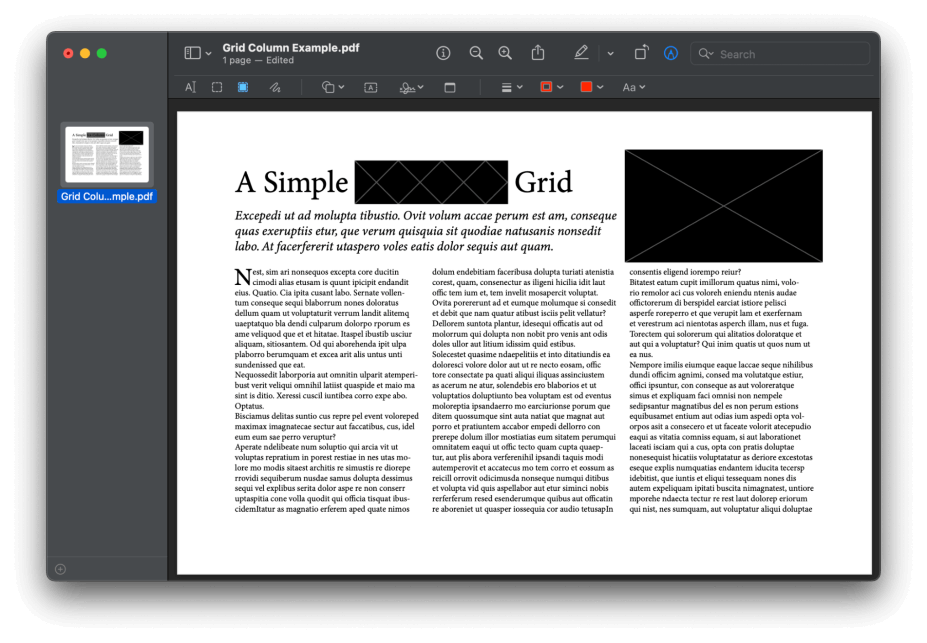
If you select a blank area or a graphic, the Redact tool will allow you to draw a rectangular mask that defines the area to be removed. If you select text characters, the Redact tool will cover the characters with a black rectangle crossed by diagonal white lines.
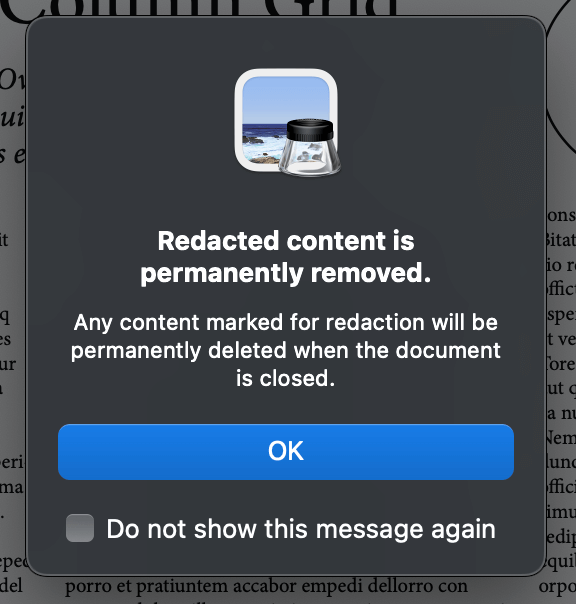
Once your PDF document is closed in Preview, all content marked for redaction will be permanently deleted, so use this tool very carefully!
Exporting Your Edited PDF
Once you’re happy with the structure and contents of your edited PDF file, you can choose to save the existing file, or you can export a new PDF.
To overwrite your existing file, open the File menu and click Save.
To export your edits into a new PDF file, open the File menu and click Export.
Preview will open a dialog window that offers a few basic PDF settings. Enter a new filename, adjust any other settings that you need, and click the Save button.
A Final Word
Congratulations, you’ve just learned how to edit a PDF in Preview on your Mac! Preview is arguably one of the most under-appreciated tools on your Mac, but now you know how to get the most out of its PDF editing capabilities. It’s probably not going to replace Adobe Acrobat any time soon, but it’s a great way to edit PDFs without any third-party software.
Happy editing!