
Curving text in Adobe Illustrator can feel like a daunting task, but with Effects > Warp, and Type on a Path it’s easy. All you need is a few minutes to spare, and you’ll be curving text in a few simple clicks.
My name is Elianna. I have a Bachelor of Fine Arts in Illustration and have been using Adobe Illustrator for over six years. I use Adobe Illustrator to create posters, illustrators, business cards, and more. Needless to say, I’ve done my fair share of text curving.
In this post, I will show you how to curve text in Adobe Illustrator using Effects > Warp and Type on a Path.
Let’s get into it!
Table of Contents
Key Takeaways
- Use Effects > Warp > Arc (Upper Arc, or Lower Arc) to curve text.
- Draw a curved path with the Pen, Curvature, or Ellipse tool and use Type on a Path to type on a curved path.
- Click on Type > Type on a Path > Type on a Path Options to open the Type on a Path Options menu.
Method 1: Curve Text with Effects >Warp
The easiest way to curve text in Adobe Illustrator is by using Effects > Warp. Here’s how:
Step 1: Select the text you want to curve using the Selection tool. (If you select your text with the Text tool, you will not be able to complete the following step.)
Step 2: In the top menu bar click on Effects > Warp. Select Arc, Arc Upper, or Arc Lower. For this example, I am choosing Arc.
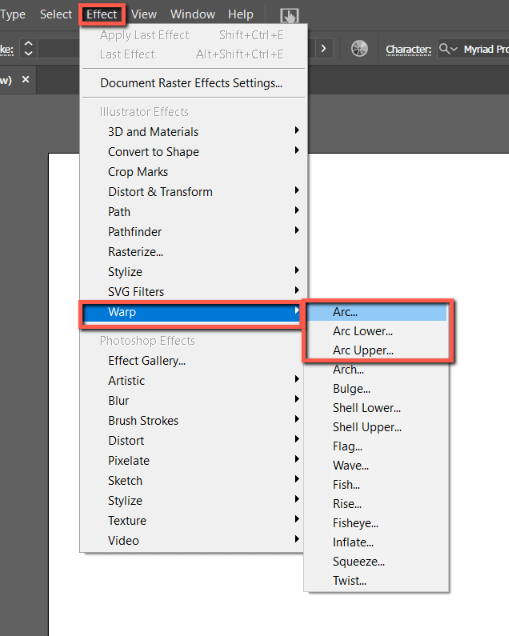
If you are uncertain about which effect option to select, here is a brief description of the aforementioned three arc options, with a visual example of each. Select which best fits your design purposes, but if need be, you have the option to modify your effect selection in the next step.
| Effect | Function | Result |
| Arc | Curves text to create an arc that can be modified horizontally and vertically. |  |
| Arc Upper | Curves text to create an upper arc that can be modified horizontally and vertically. |  |
| Arc Lower | Curves text to create a lower arc that can be modified horizontally and vertically. | 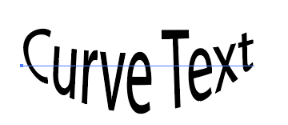 |
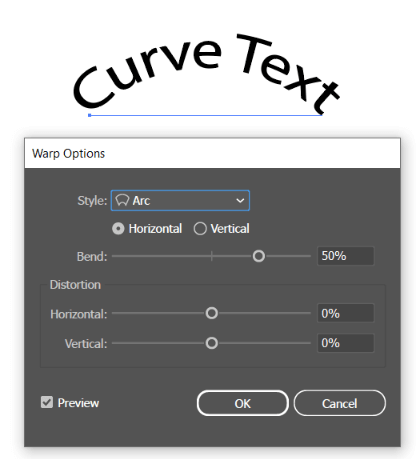
Step 3: Modify your arc using Warp Options. When you are finished modifying your arc, click OK.
| Option | Function | Result |
| Style | Modifies your Warp style. | Depends on the style selected. |
| Horizontal/Vertical | Toggles your arc curve horizontally or vertically. (Vertical curve pictured) |  |
| Bend | Modifies the bend of your arc. Higher bend values will result in a more dramatic arc. (100% horizontal bend pictured) |  |
Distortion | Modifies the horizontal and/or vertical distortion of your arc. Can help to imply perspective. (-97% horizontal distortion pictured) | 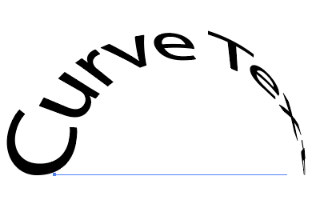 |
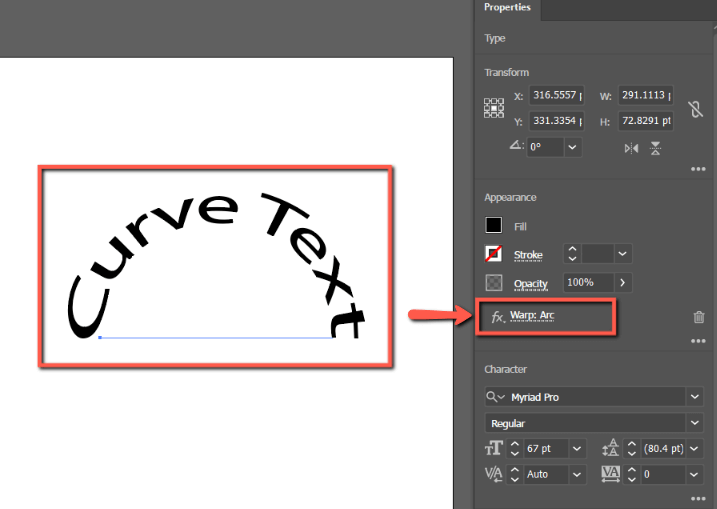
To modify your Arc after applying it to your text, click on your text and find Warp Arc in the Fx section of the Properties menu. Double-click to reopen the Warp Options menu.
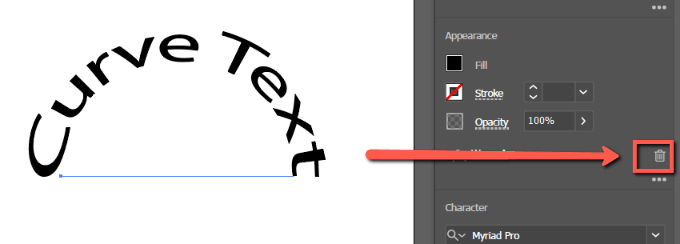
If you want to delete your warp effect, click on the trashcan.
Method 2: Curve Text with Type on A Path
Another, more precise way to curve text in Illustrator is to use Type on a Path. Here’s how:
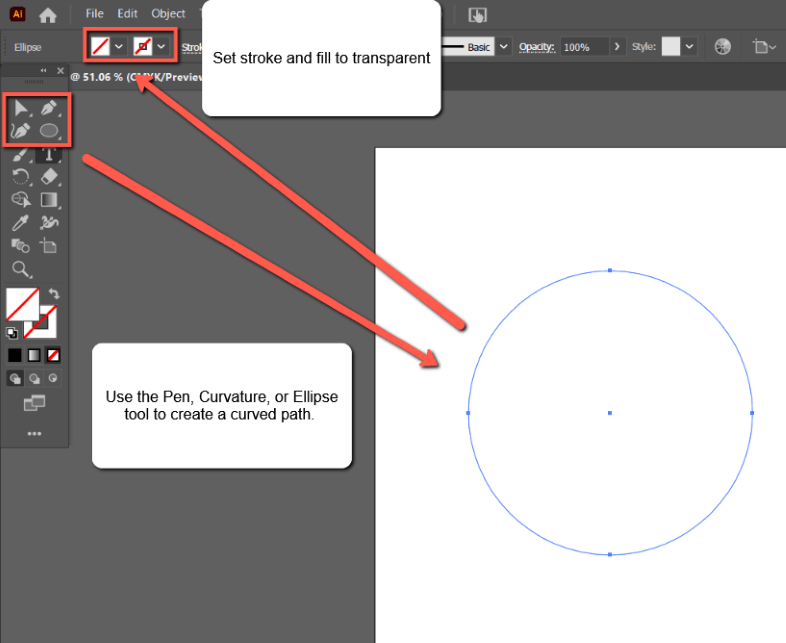
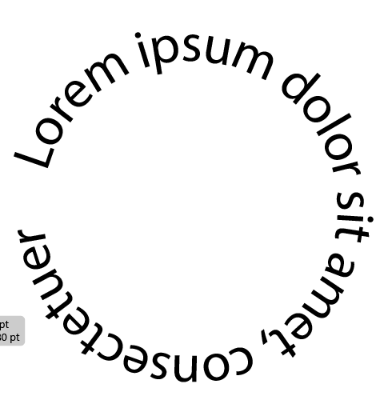
Step 1: Using the Pen, Curvature, or Ellipse Tool, draw a curve or circle to apply your text to. For this example, I will be using the Ellipse Tool to create a circle. Make sure to set the Stroke and Fill of your path/ellipse to transparent.
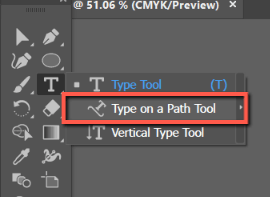
Step 2: Click on the Type on a Path Tool. It may be hidden under the Type tool. To access it, right-click on the Type tool and select Type on a Path.
Step 3: Click on your path with the Type on a Path tool. This will fill your path with text. Retype your text as desired.
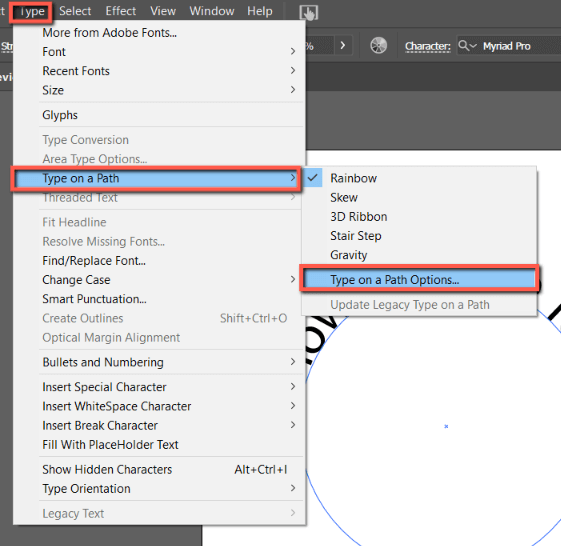
Step 4: Select Type in the top menu bar and click on Type on a Path > Type on a Path Options to open the Type on a Path Options menu.
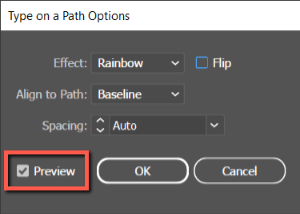
Step 5: Use the Type on a Path menu options to modify your text as desired. Here is a breakdown of each option and what it does. However, before modifying your text, select the Preview box to see live previews of your modifications.
Effect: Modifies the effect of your Type on a Path. Includes Rainbow (default) Skew, 3D Ribbon, Stair Step, and Gravity.
| Rainbow (default) | Skew | 3D Ribbon | Stair Step | Gravity |
 |  |  |  |  |
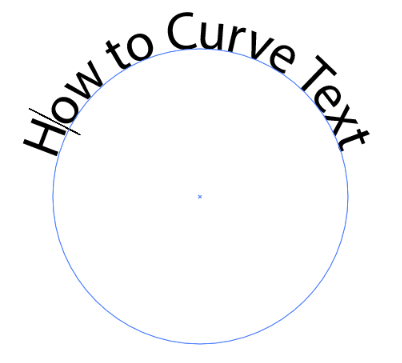
Flip: Flips the direction of the type along your path.
| Before Flip | After Flip |
 |  |
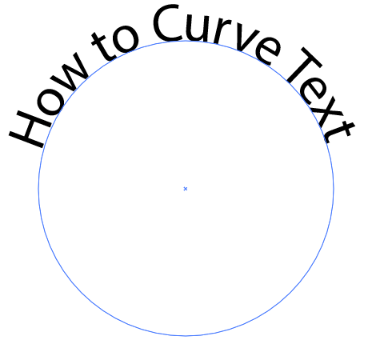
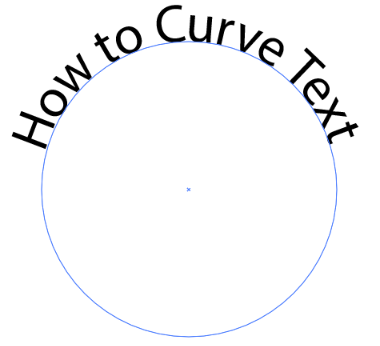
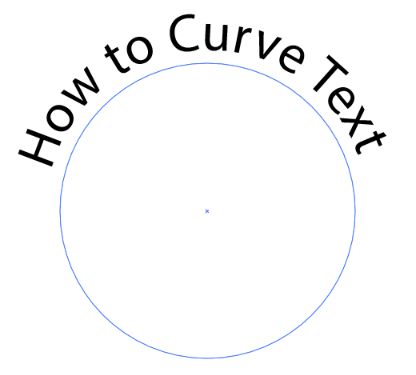
Align to Path: Modifies the alignment of type on a path with four options.
| Ascender Aligns type above the path (will appear inside in an ellipse path) | Descender Aligns type below the path (will appear outside in an ellipse path) | CenterAligns type in the center of the path. | Baseline (default) Aligns type on the baseline of the path (is the default option) |
 |  |  |  |
Spacing: modifies type spacing.
Step 5: When you are done with your modifications click OK.
Final Thoughts
Curving text in Adobe Illustrator is easy using Effects>Warp and the Type on a Path Tool can add interest to your design in a few simple clicks. While both can achieve similar effects, they have their own properties and limitations: Use Warp for simple text edits, and Type on a Path for more intricate text curve designs.
If you use the Type on a Path Tool, remember to access additional options with Type > Type on a Path > Type on a Path Options. Learning how to navigate this menu will provide you with the best tools to execute your design vision the right way.
Do you have another method to curve text in Adobe Illustrator? Tell me in the comments below!