
Sometimes you need to change the size of a video, cut off an unwanted edge, or do any number of video transformations.
No matter what you need, DaVinci Resolve has made many features easy to learn and execute. One of the features is the crop tool. Learning how to crop a video will be an essential skill in becoming a video editor.
My name is Nathan Menser. I am a writer, filmmaker, and stage actor. When I am not on stage, on set, or writing, I am editing videos. Video editing has been a passion of mine for six years now, so I am no stranger to cropping my videos!
In this article, I will go through a few different methods to crop a video in DaVinci Resolve.
Table of Contents
Method 1: Using the Cropping Tool
Step 1: In the top right corner of the screen, you’ll see a tool titled Inspector. Click on it, and a large menu will appear beneath it.
Step 2: Scroll down and select Cropping. This will pull down a menu with several different options of how to crop. Pick one of the sliding tab options and drag the button left and right.
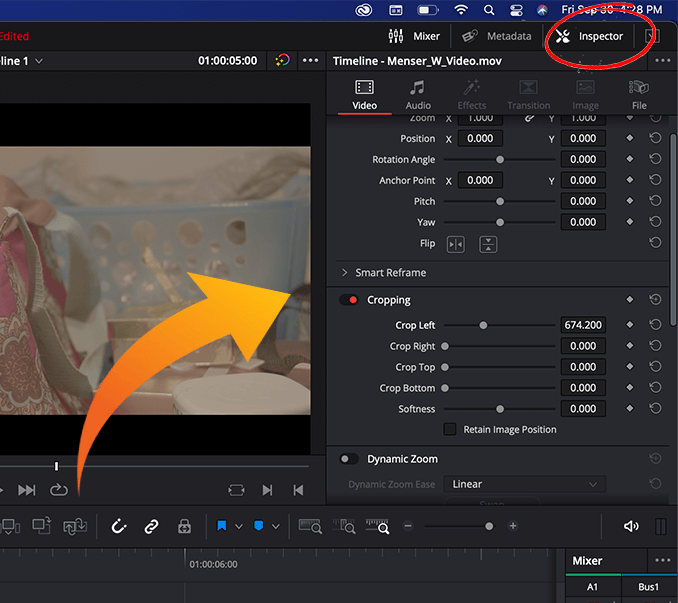
A black bar will appear and cover the corresponding part of the screen. Test out the sliding bars until you have the desired effect.
Method 2: Changing the Aspect Ratio
Keep in mind that changing the aspect ratio alters the aspect ratio of the entire project.
You can also crop by pillarboxing, or adding vertical black bars to either side of the video. You can also letterbox, to add horizontal top bars to the top and bottom of the screen.
To do this:
- Find the menu bar in middle at the bottom of the screen.
- Hover over each symbol until you find the Edit tab.
- Navigate to the horizontal menu bar in the top left corner of the screen.
- Select Timeline. This will open a drop-down menu with various useful options.
- Look for Output Blanking at the very bottom of the menu.
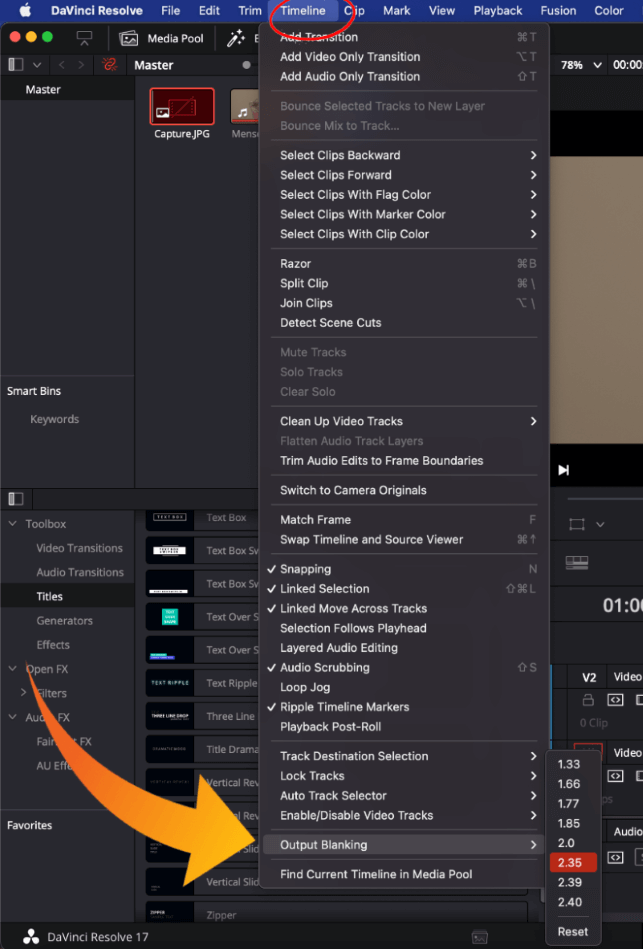
From there, a menu of several decimals will appear. These are the various possible aspect ratios you can choose for your films.
Every number below 1.77 will crop the sides of the video, and every ratio above 1.77 will crop both the top and bottom. If you are wanting the “cinematic look” use 2.35.
Method 3: Using the Crop Icon
Step 1: Navigate to the cut page. To get there, find the 7 icons in the middle of the screen at the bottom. Hover over them until you find the option titled Cut. It’s the second icon from the left.
Step 2: From the cut page, you will see your view page on the right. Directly underneath the video playback screen, there are several buttons. Click on the slider icon at the bottom left corner of the view page. This is called the Tools button.
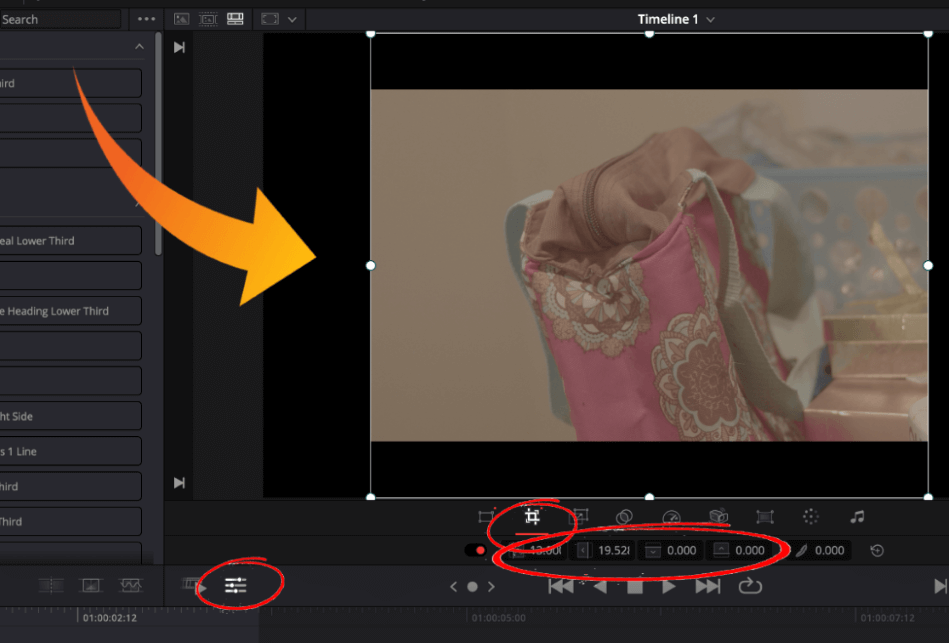
Step 3: This will make your viewing page a little smaller because a menu of symbols will pop up beneath it. Hover over the buttons and find the option titled Crop. It’s the second option from the left.
Step 4: Then a white box will appear around the video playback screen. Drag the white dots from the sides inwards to crop as needed.
Conclusion
Cropping your video is simple, and can be done in many different ways. Remember that if you are wanting the “cinematic bars” do not crop the video, but instead change the aspect ratio.