
There are several ways to change the color of your lineart in PaintTool SAI. You can accomplish this using Lock Opacity, the Hue and Saturation filter, the Color blending mode, and the Color linework tool.
My name is Elianna. I have a Bachelor of Fine Arts in Illustration and have been using PaintTool SAI for over 7 years. I know everything there is to know about PaintTool SAI, and soon you will too.
In this post, I will show you four different ways to change lineart color in PaintTool SAI. Whether you just want to experiment with different colors in your piece or change the look altogether, I will give you step-by-step instructions on how to make it happen.
Table of Contents
Key Takeaways
- Always create your lineart on a separate layer than your sketch and color to make future edits painless.
- Use Lock Opacity to change the color of pixels in a selected lineart layer.
- Use the hotkey Ctrl+U to access the Hue and Saturation Panel to change the color of your lineart. Remember to check the box Colorize, and Preview to see live edits.
- Color blending modes in PaintTool SAI, such as Color, will be preserved in Photoshop if you save your SAI document as a .psd (Photoshop document).
- Use the Color tool to change the lineart color of a linework layer.
Method 1: Using Lock Opacity
If you want to change your lineart color on PaintTool SAI, the easiest way is by using Lock Opacity. Selecting this option protects the opacity of pixels in selected layers, or in simple terms, selects all the pixels in your lineart layer so you edit only that.
Quick Note: Remember to keep your sketch, lineart, and color on separate layers to improve workflow and make future edits painless. This option works best on a separated linework layer.
Now follow these steps:
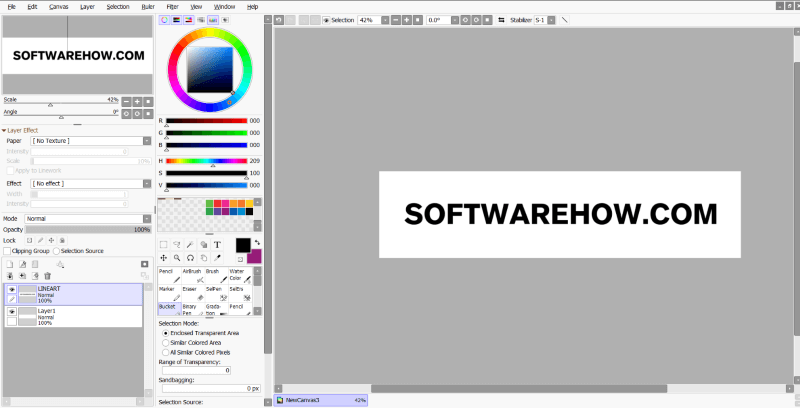
Step 1: Open the document you want to change the lineart color in SAI.
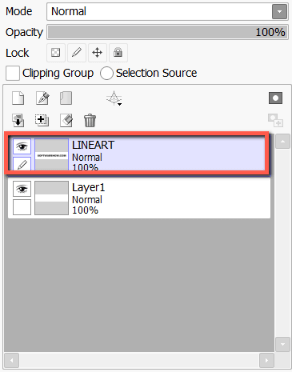
Step 2: Locate and click on the layer in which your lineart is present.
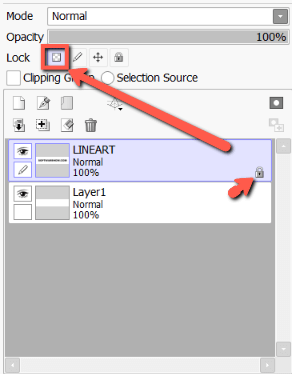
Step 3: Click on the Lock Opacity icon. When lock Opacity is activated, a lock icon will appear on your selected layer.
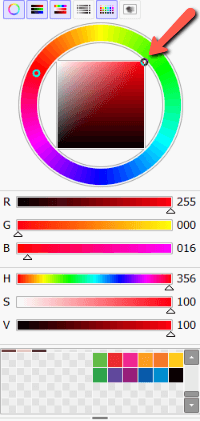
Step 4: Select your new desired color in the Color Picker. For this example, I chose red.
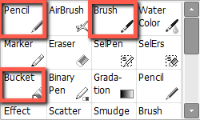
Step 5: Click on the Paint Bucket. If you are looking to change a specific section of your lineart, the Pencil or Brush tool also works.
Step 6: Change the color of your lineart.

Method 2: Using the Hue and Saturation Filter
There are two color adjustment filters in PaintTool SAI: Hue and Saturation, and Brightness and Contrast. The Hue Saturation Filter can be used to easily change the color of your lineart in SAI.
This method is optimal with an isolated lineart layer, as it will change the color of all the pixels in a selected layer. Follow these steps below:
Step 1: Locate and click on the layer in which your lineart is present.

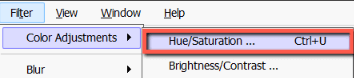
Step 2: Click on Filter in the top menu toolbar and select Color Adjustments.

Step 3: Select Hue and Saturation or use the hotkey Ctrl+U.
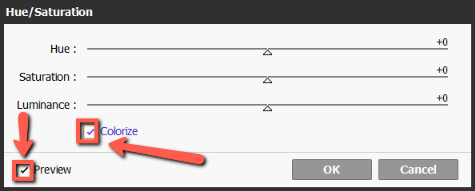
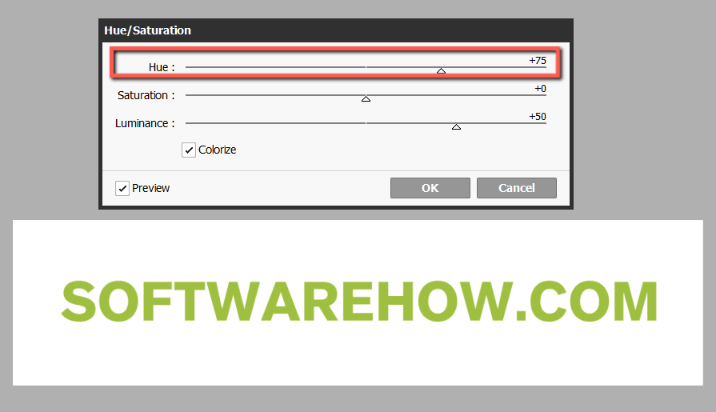
Step 4: If unchecked, check the Colorize and Preview boxes. This will allow you to see a live preview of your edits.
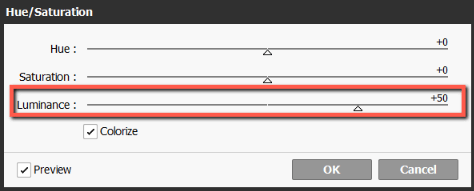
Step 5: If your original lineart color is black, first set the Luminance level above 0. For this tutorial, I have set it to +50.
Step 6: Using the Hue and Saturation bars, change the color of your lineart as desired.
Step 7: When finished, press OK or hit Enter on your keyboard.

Method 3: Using Color Blending Mode
Blending modes are effects that can be added to manipulate the colors on lower layers and are present in almost all drawing and design software. In fact, if you save a .sai file as a .psd, these blending modes will be preserved in Photoshop as well.
Note: this option to change the lineart color will only work if your lineart color is NOT black.
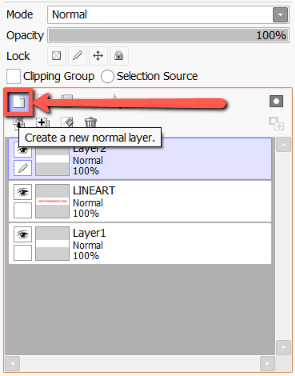
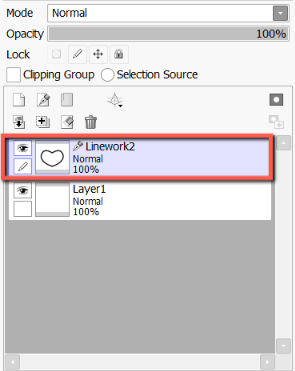
Step 1: Select your lineart layer.

Step 2: Click on the New Layer icon to create a new layer about your lineart layer.
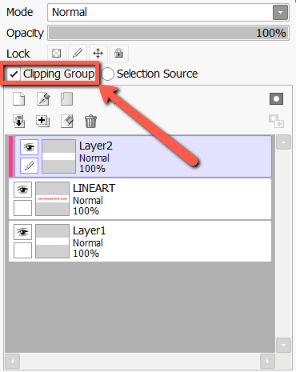
Step 3: Click on the Clipping Group box. You will see it is activated when the box is checked and the layer turns pink.
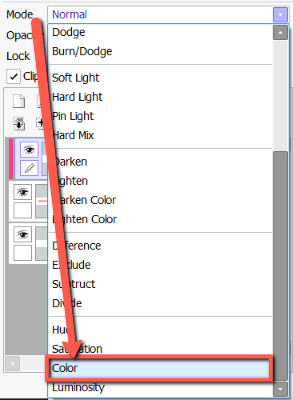
Step 4: Click on the Blending Mode dropdown menu.
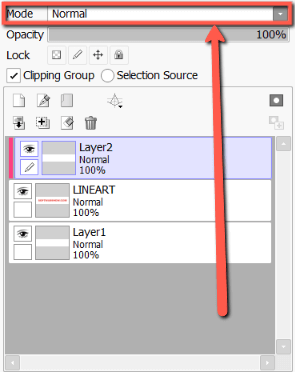
Step 5: Click on Color.
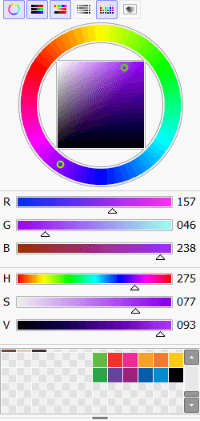
Step 6: Use the Color Picker to select a new color for your lineart. For this example, I have selected purple.
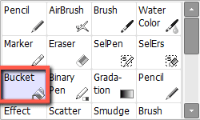
Step 7: Click on the Paint Bucket in the Tool Menu.
Step 8: Click anywhere on the canvas and watch the color of your lineart change.

Method 4: Using Color Linework Tool
Changing the lineart color of a linework layer in PaintTool SAI is easy, but slightly different than a normal layer, and it requires using the linework layer Color tool. As written in PaintTool SAI, this tool “changes the color of a clicked stroke.”
Follow these steps to change lineart color of lineart layers in PainTool SAI.
Step 1: Click on your linework layer in PaintTool SAI in which your lineart is located.
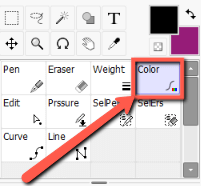
Step 2: Select the Color tool in the Linework layer tool menu.
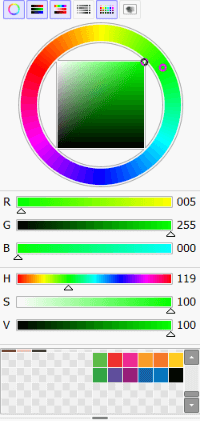
Step 3: Use the Color Picker to select your new desired lineart color. For this example, I have chosen green.
Step 4: Click anywhere on your lineart stroke and watch the color change.

Final Thoughts
Learning how to change the color of your lineart in PaintTool SAI is an invaluable skill in the design process. And as you can see, you can achieve it with a variety of tools and methods, including Lock Opacity, the Hue and Saturation filter, the Color blending mode, and the Color Linework tool.
Changing the color of your lineart can change the identity of your artwork or provide new innovation in your piece. Take some time to experiment and find which method feels the most comfortable for you in your workflow.
Have you ever changed the color of the lineart in your piece? What effect did it have? What method do you like best? Let me know in the comments below.