
Looking to change the DPI on an image in Microsoft Paint. I’ve got bad news for you, the program doesn’t provide a way for you to do it. But I’ve come up with a workaround for how to do it.
Hey there! I’m Cara, and as a professional photographer, I use editing software quite frequently. Microsoft Paint, though a simple program, is easy to use and is handy for people looking to make quick edits to pictures.
DPI is a somewhat complex topic, so let’s stick to the basics as much as possible.
Table of Contents
Why Change the DPI
DPI only matters when you’re planning to print an image. An image with too low (or too high) DPI will not print as sharply. At a really low DPI, your image will look pixelated like an old video game.
That’s great if that is the look you’re going for. If not, you’ll need to change the image’s DPI.
However, in order to be a simple program, Microsoft Paint has a lot of limitations and this is one of them. In Paint, you can only check the DPI, you can’t change it. But if you get resourceful, you can trick the program into changing it.
So let’s look at how to do that.
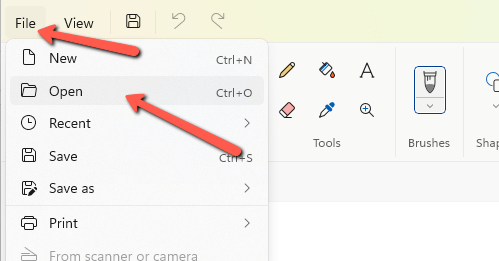
Step 1: Open the Image in Paint
First, open the image you want to check. Open Paint and go to File in the menu bar. Choose Open and navigate to the image you want to use. Press Open again.
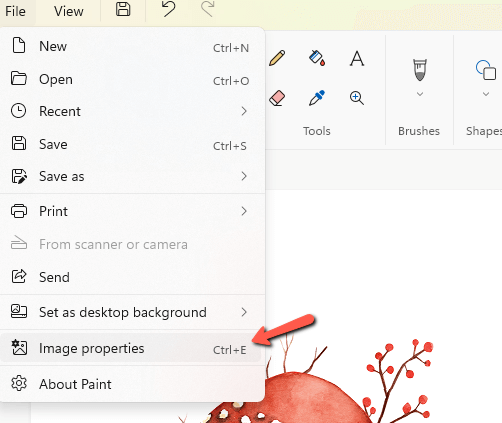
Step 2: Check the DPI
With your image open, go back to File in the menu bar and go all the way down to Image Properties. You can also press Ctrl + E on the keyboard to jump straight to it.
You’ll get this box giving you some information about the image. Notice that near the top, it lists the resolution as 96 DPI.
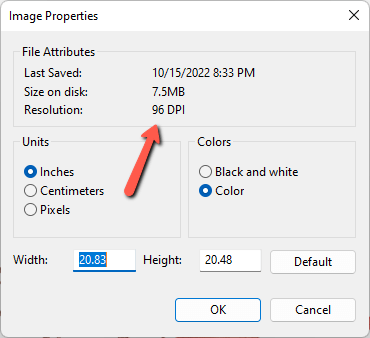
It doesn’t matter what you do as far as resizing the image or making other changes. The DPI will stay at 96.
So here’s my hack.
Step 3: Open Another Image
Open another instance of Paint. Then, open any other image that has the resolution you want. You can check the DPI after opening it in Paint to ensure it has what you need.
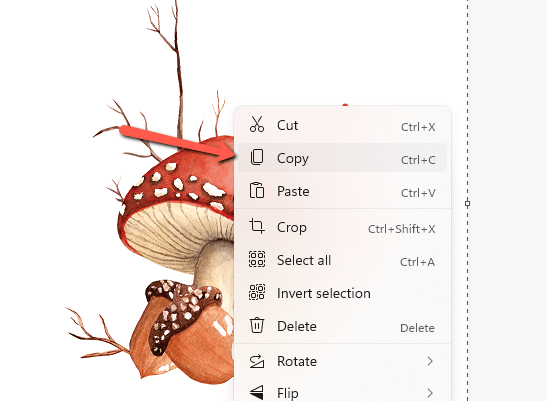
Now go back to the image you want to change. Press Ctrl + A to select the entire image. Then right-click on the image and choose Copy or press Ctrl + C on the keyboard.
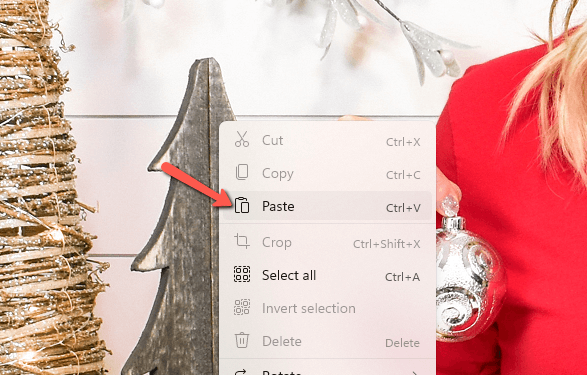
Return to the second image. Right-click and choose Paste or press Ctrl + V on the keyboard.
If your pasted image is smaller than the second image, you’ll have to crop it.
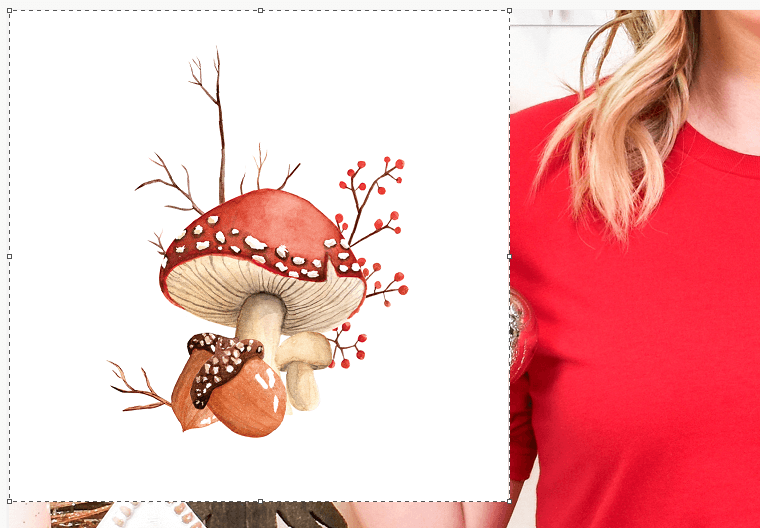
Zoom out with the slider bar in the bottom right corner of Paint until you can see the whole image.

Click and drag on the corner of the image until you can only see the pasted image on top.
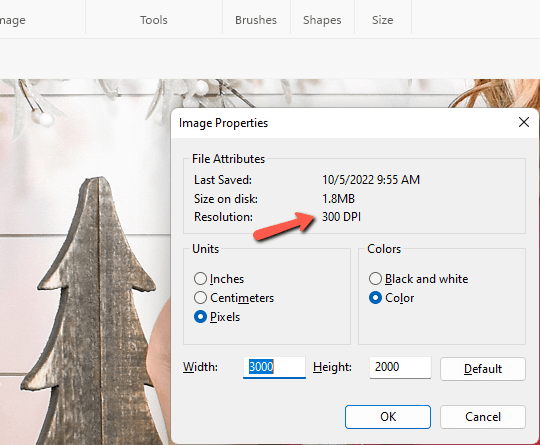
Now, let’s check our DPI to see how it’s doing. Go to File and choose Image Properties or press Ctrl + E on the keyboard.
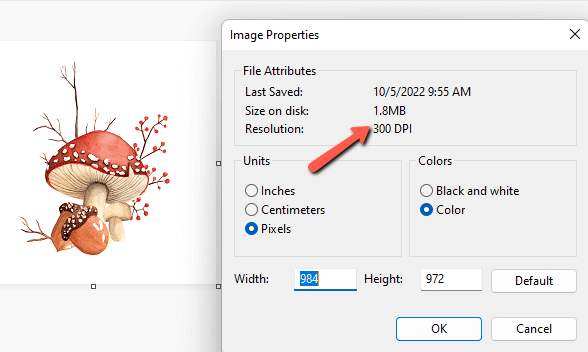
Boom! Now it shows the image at 300 DPI, which is perfect for printing!
Curious about what else you can do with Microsoft Paint? Check out this tutorial about how to work in layers in MS Paint here.