
Paint.NET doesn’t have a built-in alignment tool, but that doesn’t mean there’s no way to align text to the center. Paint.net hosts plugins, which can be found on the paint.net Forum. For aligning text, I recommend installing the Align Object plugin.
Knowing how to properly justify elements in your work is imperative for clear and professional design. Centered text is a ubiquitous design choice and it’s convenient to have a tool for it on hand.
So while you can move text manually using the move tool (keyboard shortcut M), it can sometimes be difficult to position it perfectly, and will often end up appearing off-center to an attentive eye.
If you want a better option than doing it manually, you can download the Align Object plugin.
Table of Contents
How to Install the Align Object Plugin
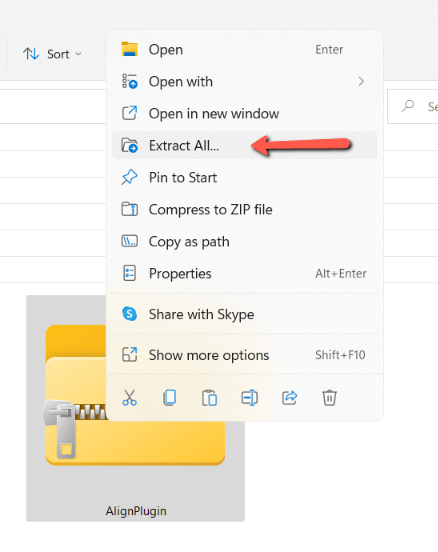
You can download the Align Object plugin from the official paint.net Forum. With the plugin downloaded, go to the files on your computer and Extract or Unzip the files.
Next, you’ll manually move these files into the program files of paint.net. This works differently depending on where you first downloaded the program from.
Using the Version of Paint.NET from Getpaint.net
Open your files system and navigate to Program Files. In this file find paint.net and then Effects.
Move the Plugin into the Effects folder by copying (CTRL + C on your keyboard) and pasting (CTRL + V) or manually dragging.

Using the Version of Paint.net from the Windows Store
Open your files system and navigate to your Documents folder. Create a new folder and name it paint.net App Files. The spelling is necessary for paint.net to recognize it, but capitalization isn’t important.
Create another folder within your new folder. Name it Effects. Move the Plugin into the newly created Effects folder. Start or restart paint.net to use the plugin.
For a further explanation go to paint.net’s information page for installing plugins.
How to Use the Align Plugin in Paint.NET
Now that everything is set up nicely, follow these steps to use the plugin to center text in Paint.NET.
Step 1: With Paint.NET restarted or newly opened, set up your workspace. Make sure your toolbar and Layers panel are shown, if they are not, click on the icons at the top right of the workspace.

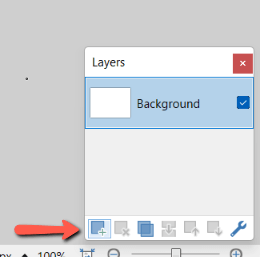
Step 2: Create a new layer by clicking the icon at the bottom left of the Layers panel.
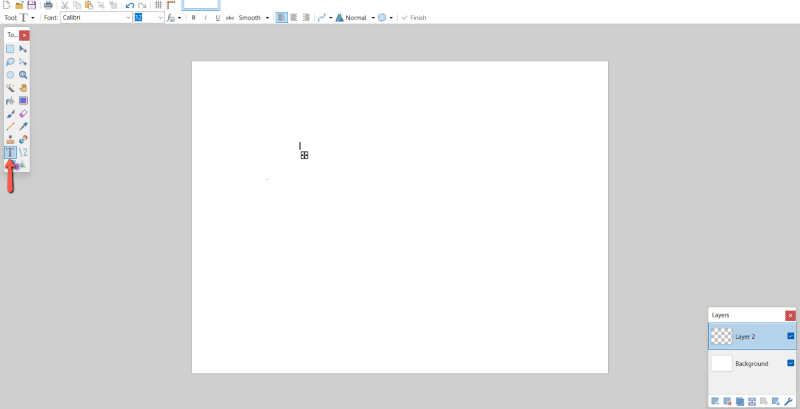
Step 3: Select the Type tool toward the bottom of the toolbar, or hit the keyboard shortcut T. Type out your text on the new layer.
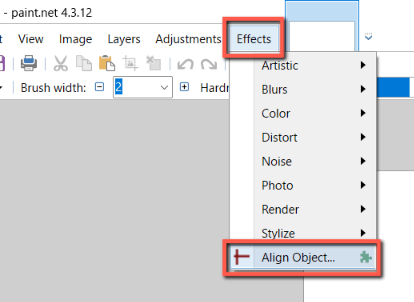
Step 4: On the Menu bar click Effects, then from the dropdown menu find and select Align Object.
Step 5: The Align Object pop-up menu will give you a number of options for how to justify your text. Choose the circle under the heading “Both” to align to the center.

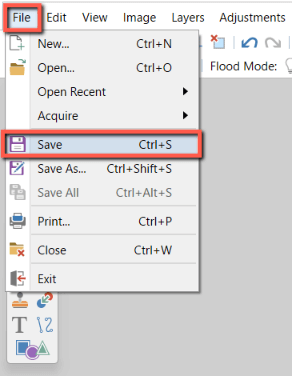
Step 6: Save your work by clicking File and Save or by pressing CTRL + S on your keyboard.
Final Thoughts
With your text centered, you may want to make an aesthetic judgment as to whether it appears balanced, and if necessary to change the position slightly so as to improve the composition. A quick way to make small controlled movements is to use the keyboard arrow keys.
What do you think about this tool? Do you use any other Plugins in Paint.NET? Share your perspective in the comments and let us know if you need anything clarified!