
To AirDrop photos from your iPhone to your Mac, enable Airdrop on both devices, select “Share” on your iPhone, and hit “Airdrop”. Then select your Mac from the list and accept the Airdrop on your Mac.
I’m Jon, an Apple expert. I own an iPhone and a few Macs; I AirDrop photos between the devices weekly. I made this guide to help you do it too.
The following guide outlines how to enable AirDrop on your iPhone and Mac for quick and easy transfers, so continue reading to learn more!
Table of Contents
Enable AirDrop on Each Device
Before you start, enable AirDrop on your iPhone and Mac. It’s quick and easy, but if the settings aren’t correct, the transfer won’t work.
Follow these steps to enable AirDrop on your iPhone:
Step 1: Unlock your iPhone and open the Settings app. Scroll down until you see “General.”
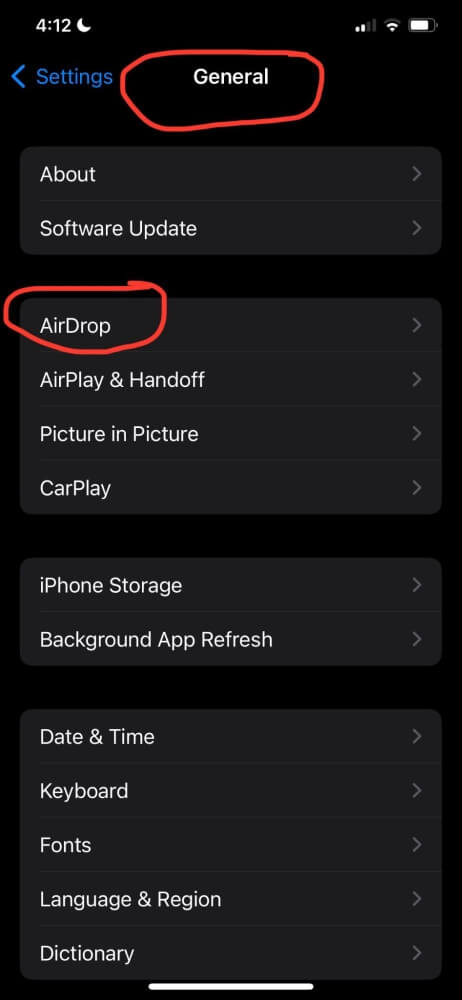
Step 2: Click to open the folder, then tap “AirDrop.” You can then adjust the settings as needed. If you want to allow, your contacts list to transfer files to you, select “Contacts Only.” Or, to allow anybody within range to transfer files to you, select “Everyone.” For this process, enable “Everyone.”

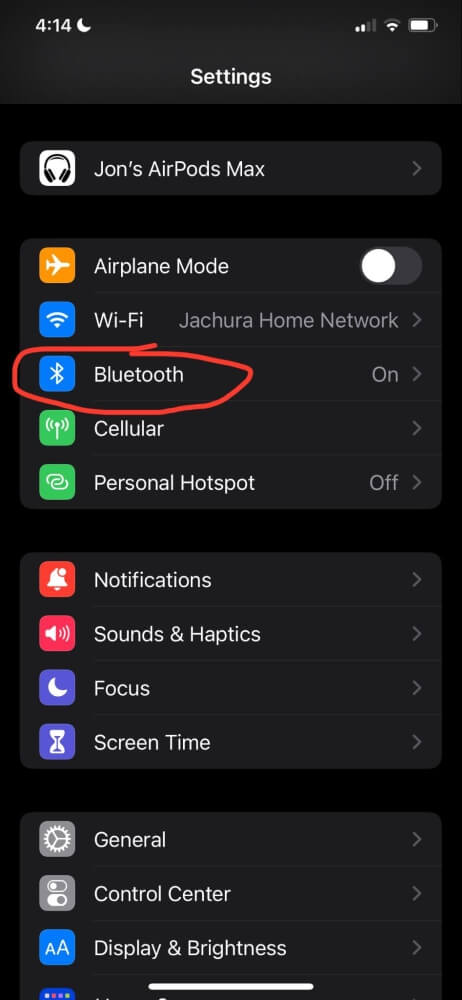
Step 3: Next, ensure your iPhone’s Bluetooth is on – go to Settings > Bluetooth to check.
Next, verify you have AirDrop enabled on your Mac. Follow these steps:
- Open your Mac and sign in.
- Open Finder.
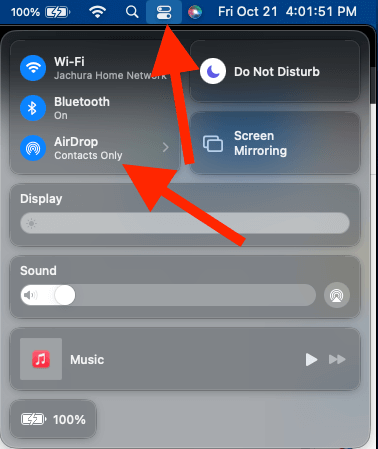
- In the menu bar, open the Control Center and turn on “AirDrop” by clicking on it. You can choose to receive AirDrops from “Contacts Only” or “Everyone.”
- Lastly, make sure your Mac has Bluetooth on. You can turn it on and off in the same Control Center menu.
Transfer The Photos
Once you adjust the settings on each device to enable AirDrop, you can transfer your photos from your iPhone to your Mac.
Follow these steps:
Step 1: Open your Photos app on your iPhone and locate the photos you want to AirDrop.
Step 2: Select the photo you want to transfer. To transfer multiple pictures and videos, tap “Select” to choose each image you want to AirDrop.
Step 3: Once you select the photos you want to transfer, tap the share icon in the lower-left corner of your screen.

Step 4: Choose “AirDrop” out of the available options.
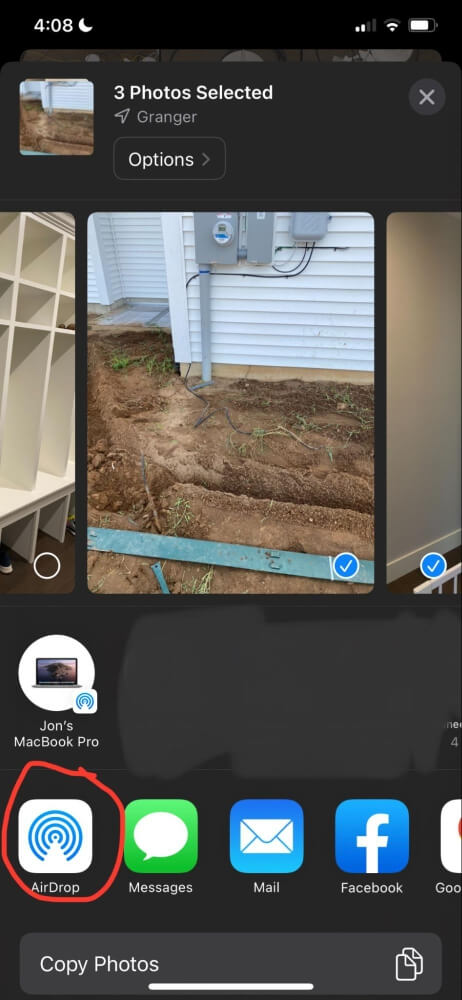
Step 5: Find and select your Mac from the menu. Once you tap your Mac’s icon, a blue circle will appear around it with the word “Waiting” beneath it, then “Sending,” and finally “Sent.”

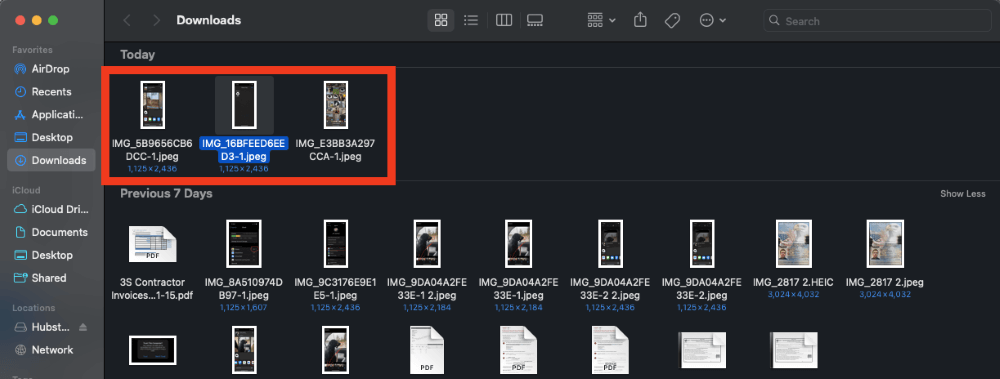
Step 6: After the photos and videos send, tap Done. Now, you can access the transferred files in your Mac’s Downloads folder.
FAQs
Here are some common questions on AirDropping photos from iPhones to Macs.
Can I AirDrop More Than A Few Photos?
Although there technically isn’t a limit to how many photos you can AirDrop, it might be inconvenient to wait for the upload process.
The file size, the number of images you’re transferring, and how powerful each device is will determine how long it takes to complete the transfer process.
Sometimes, it can take longer than twenty minutes to complete, and you can’t use either device while it processes. Instead, I recommend using iCloud if you want to transfer many photos from your iPhone to your Mac.
Why Isn’t AirDrop Working?
Although AirDrop is a convenient and easy-to-use feature, you need to ensure everything is set correctly, or it won’t work.
So, if the feature isn’t working between your devices, here’s what you should check:
- Ensure your Mac is set to discoverable by “Everyone.” You don’t have to leave your device on this setting once you finish the process, but you’ll need to set it to “Everyone” while you complete it.
- Double-check that you have Bluetooth enabled and connected on both devices. If it is off, your devices will not be able to connect and transfer photos and videos.
- Be sure both devices are on. If your Mac display falls asleep, it won’t appear in AirDrop. Keep both devices on and active until the photos are sent.
Conclusion
AirDrop is a handy feature for conveniently sending a photo or two to other Apple devices without the headache of using a third-party service. However, while it works great for a couple of photos, it can be an inconvenient option for large files or more than a few photos, so an alternative option (iCloud, third-party data transfer service, etc.) might be helpful.
How often do you use AirDrop to move photos between your iPhone and Mac?