
To adjust the audio volume in Audacity, click and drag the gain slider in the Track Control Panel to the left or right to decrease or increase the volume as desired.
Hello, I’m Andrew, and I’ve been using the open-source Audacity software to record and edit audio for over a decade.
In this article, we’ll examine multiple ways to adjust the volume in Audacity. While the gain slider provides a convenient volume adjustment option, the software has many other methods for adjusting volume depending on your desired outcome.
We will look at adjusting the recording volume, playback volume, the Amplify and Normalize effects and discuss the gain slider in more detail. I’ll also answer some commonly asked questions at the end.
Let’s dive in.
Table of Contents
How to Increase Recording Volume in Audacity
If you are recording audio, you must set your recording level properly. If the gain is too high, your audio will clip and sound distorted. If the recording level is too low, you can amplify the volume at the cost of increased noise.
Fortunately, adjusting your recording input level is easy. To do so:
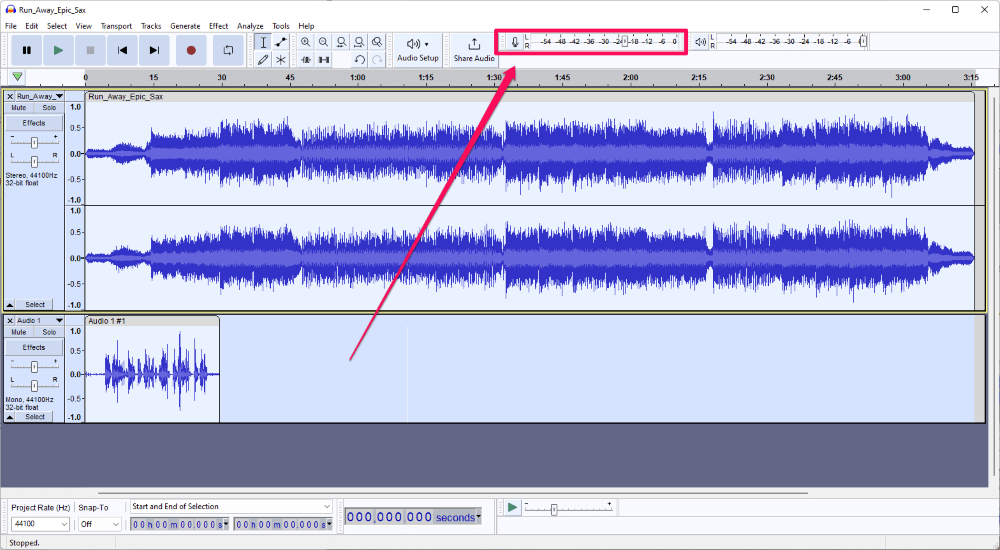
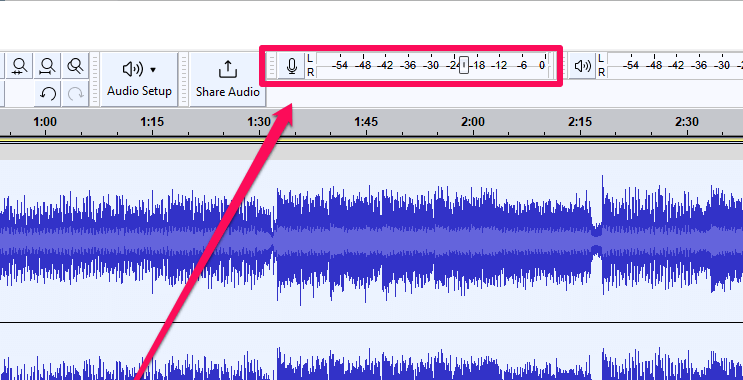
- Locate the Recording Meter Toolbar.
Although you can move toolbars around in Audacity, the default location for the Recording Meter Toolbar is to the right of the Share Audio button. Look for a microphone icon and a slider on a meter ranging from -54 to 0.
If you can’t find the toolbar, you can enable it by clicking Recording Meter Toolbar from the View > Toolbars menu.
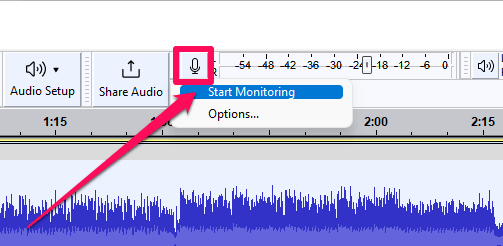
- Click the Microphone button and select Start Monitoring.
- Begin speaking, singing, or playing your instrument with the same volume you intend to record.
- Watch the recording meter and click to drag the level slider to the desired amount of gain.
Lower the slider (move the button to the left) if your peaks approach 0 dB. Ideally, position the slider as far right as possible without the meter turning red. Red indicates clipping–distortion caused by audio that is too loud.
I like to move the slider a little bit more to the left than necessary to compensate for unexpected moments of loudness. It is much easier to increase volume after recording than to try and fix clipping after the fact.
- Click the Record button and record some sample audio to verify your input gain is set correctly.
How to Adjust Playback Volume in Audacity
You can increase the volume in Audacity without modifying your source audio using the Playback Meter Toolbar. Think of this option as simply turning up (or down) the volume on your computer speakers. In essence, the playback volume slider does exactly the same thing.
To adjust the playback volume in Audacity:
- Locate the Playback Meter Toolbar.
The Playback Meter Toolbar is to the right of the Recording Meter Toolbar by default. Look for a speaker icon.
If the toolbar is not visible, you can enable it by navigating to View > Toolbars from the menu bar and then clicking Playback Meter Toolbar.
- Click and drag the volume slider to the right or left to increase or decrease the volume, respectively.
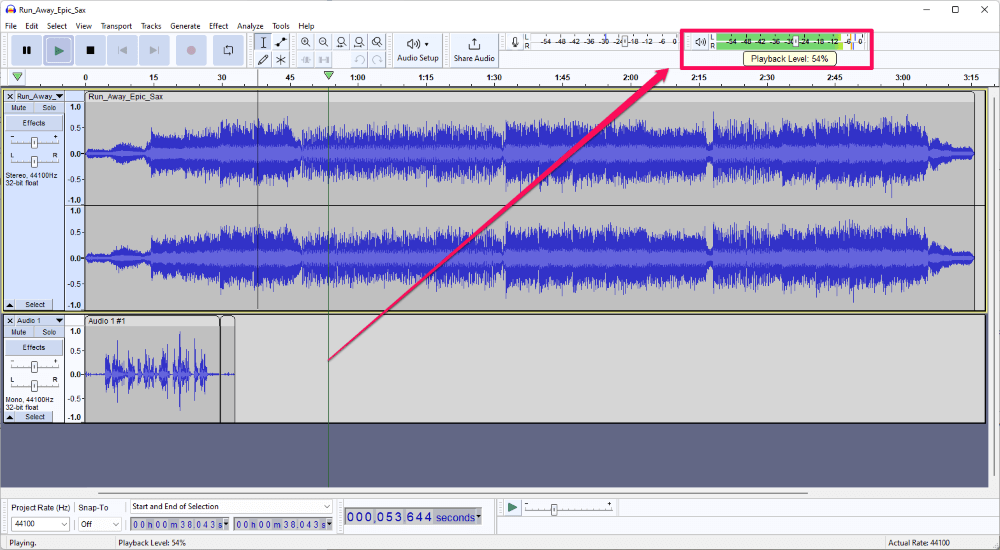
Again, adjusting the playback volume has zero effect on your source audio. As the Audacity manual states, “Moving the slider will control the volume delivered to your speakers but will not affect the amplitude of the audio.”
As proof, move the slider all the way to the left, then click the play button. Watch the meter, and you’ll see that the playback decibels, as indicated by the green/yellow/red colored bars, do not decrease as the playback volume is decreased.
How to Increase Volume in Audacity without Distortion
If you want to alter the volume of your recording or other existing audio, use one of two Audacity effects: Amplify and Normalize. Both of these effects will boost (or decrease) the volume of your audio without the distortion caused by clipping.
To amplify your audio:
- Select the audio to adjust.
- Click Amplify… from the Effect > Volume and Compression menu.
- Adjust any of the three settings–Amplification (dB), the amplify slider, or New Peak Amplitude (dB). All three are interdependent and change as you adjust one option.
- Click the Apply button to apply the effect.
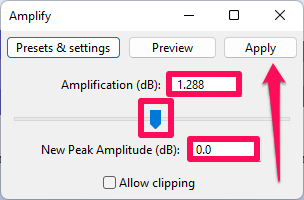
You can use the Preview button to hear how a portion of your audio will sound with the current settings before applying the effect. If your new peak amplitude exceeds 0.0 dB, you won’t be able to click Apply unless the Allow clipping box is selected.
Allowing clipping is generally not recommended as doing so will result in distortion caused by audio that is too loud in places.
To normalize your audio:
- Select the audio to adjust.
- Click Normalize … from the Effect > Volume and Compression menu.
- Click the Apply button.
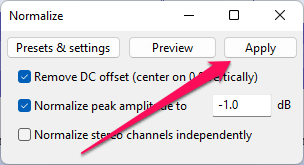
The default peak amplitude setting is -1.0 dB, but you can adjust this if desired.
What’s the difference between Amplify and Normalize, and when should I use them?
Although these effects have different use cases, they are very similar. In fact, applying either Amplify or Normalize to a single mono track has the same effect. The differences come in when dealing with stereo tracks or working with multi-track projects.
Applying Amplify to multiple channels or tracks will boost each at the same level. In other words, if you have a stereo track in which the right channel is much quieter than the left, Amplify will uniformly increase the volume, preserving the level differences between the channels. (The same applies to multiple tracks.)
On the other hand, normalize will independently process amplification to each channel. So applying Normalize to the same stereo track in the example above would yield left and right channels with the same volume peaks.
Therefore, generally, use Amplify when you want to preserve volume differences in tracks or channels but want to raise (or lower) the volume as a whole. Use Normalize when you want to bring all tracks or channels to roughly the same volume levels.
Another big benefit of Normalize is its DC offset feature which can correct recording voltage faults and give your track more audio headroom. DC offset is beyond the scope of this article, but you can read more about the phenomenon here.
How to Adjust Audio Levels in Audacity
Another option for adjusting Audacity audio levels is using the gain slider in the Track Control Panel. Repositioning the gain slider modifies the entire track that corresponds to its slider, and this action adjusts the volume level on top of the audio levels in the waveform.
To adjust audio levels in Audacity using the gain slider:
- Locate the Gain slider for the track you wish to modify.
The Gain option resides to the left of the track just below the Effects button and is marked by “-” and “+” signs.
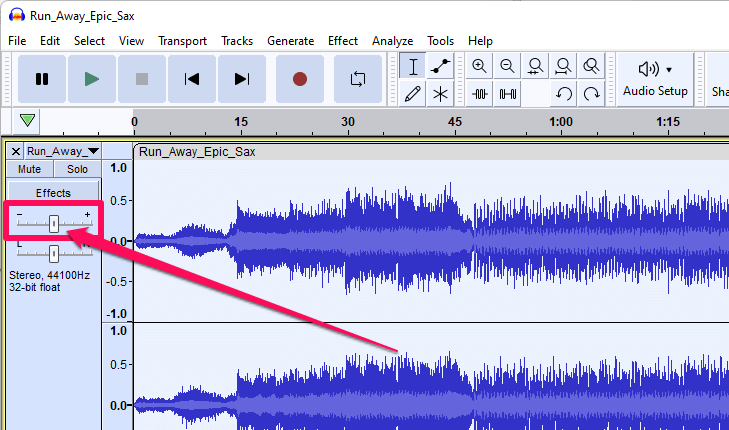
- Click and drag the slider to the left or right to decrease or increase the gain, respectively.
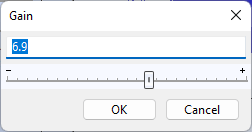
You can also hold the Shift key while dragging for more granular control or double-click the slider button to input a gain modifier manually.
The gain slider is a great way to quickly modify the volume of a track. This option is useful when balancing the volume of one track with other tracks in your project.
Note that since the slider affects the entire track, it will not affect the balance between left and right channels in stereo recordings. Instead, use the Pan option just below the gain slider.
FAQs
Here are some frequently asked questions about adjusting audio volume in Audacity.
How can I reduce voice volume in a song?
If your vocals reside on a separate track, drag that track’s gain slider to the left. If vocals are mixed, try the following:
- Duplicate your track.
- Apply the Removal Vocals effect from Effect > Special > Vocal Reduction and Isolation… to the first track.
- Apply the Isolate Vocals effect from Effect > Special > Vocal Reduction and Isolation… to the second track.
- Use the gain slider on the second track to reduce the voice volume.
For more information on the Vocal Reduction and Isolation effect, check out this article: How to Isolate or Remove Vocals from a Song in Audacity (editor: please link to this article if it has been published).
How can I change the volume over time in Audacity?
To change the volume over time, use Audacity’s Envelope Tool.
How do I make part of a track quieter in Audacity?
- Click and drag to select the portion of the audio for which you wish to reduce the volume.
- Click Amplify from the Effect > Volume and Compression menu.
- Drag the slider to the left to the desired level.
- Click Apply.
Summary
Who knew there could be so many volume options in Audacity?
Your desired outcome determines which of the many volume options you should use. The simplest option for adjusting audio volume in Audacity is to click and drag the gain slider to the left of your track to your desired level.
I hope this article helped you better grasp the volume options at your disposal. Let us know if you have any questions or comments!