
iMovie makes it easy to add text to your movie while providing a wide range of good-looking templates to help you craft titles, add descriptive text on screen, or even create an end-credits sequence.
And while iMovie makes it simple to get started, each of its many templates is customizable, offering an even wider range of possibilities for the creative use of text in your movie.
After a decade of working in film editing, I have learned that the key to a good movie is your own creativity as an editor. The more options you have, and the better you understand the effects they will create, the more likely you will find a way to tell your story the way you see it.
So below I will cover the steps to add text to your movie, talk about customizing the templates, and provide you some tips on which templates might be good in different situations.
Table of Contents
Adding Text in iMovie
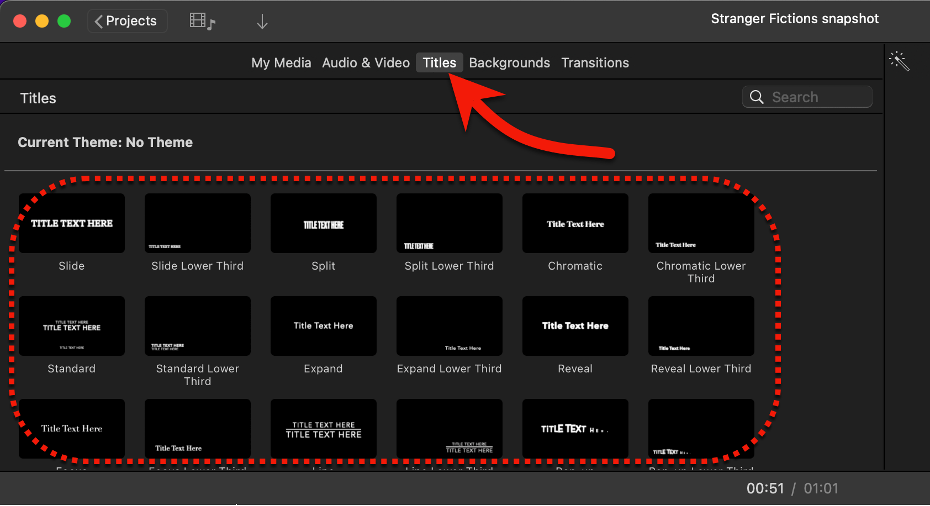
iMovie considers all text a type of title. So regardless of what kind of text you might want to add to your movie, you start with the Titles tab in the Media Browser.
After clicking the Titles tab (highlighted by the red arrow in the screenshot below), you will see a series of thumbnails (inside the dotted red line in the screenshot below), each representing a different title template.
Note that you can scroll up and down in the Media Browser to see more templates. There are over 50 of them, so keep scrolling!
You can preview any template by slowly dragging your pointer across the thumbnail. This is particularly helpful for animated templates – where the text animates onto or off the screen.
We’ll talk more below about what kind of templates might work best in different situations, but when you’ve found the one you want, simply drag it onto your timeline wherever you want your text to start.
In the screenshot below I have clicked on the “Pop-up” template (highlighted by the red arrow), which turns its border yellow.
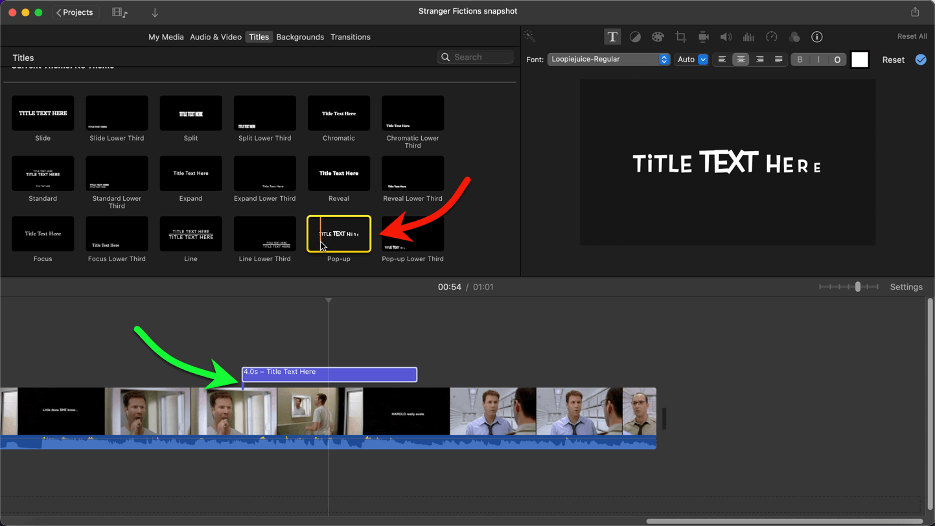
Then I dragged it onto my timeline, dropping it where the green arrow is pointing in the screenshot above. The template is now represented by the narrow purplish box just to the right of the green arrow.
In editing jargon, this box is called the Text Effect because it is an effect that changes the appearance of any video below it, and in this case, the effect is to add some text.
Customizing a Text Template in iMovie
Speaking of jargon, Apple calls these text effects Titles, but I have been calling them templates. Sorry for any confusion, but I think of titles as a special kind of text – the dramatic text that opens a movie. And I think of iMovie’s Titles as more like templates because each one is so customizable.
So, honestly, I’m trying to help here, but if you can remember that text, titles, and templates are all really the same thing you’ll be fine…
That out of the way, how exactly do you customize a template/title/text?
If you place your playhead (highlighted by the red arrow in the screenshot below), over a clip which has a text effect above it, a T will appear (highlighted by the green arrow in the screenshot below) at the left side of the row of setting icons in the viewer.

If you click on the T, a new row of settings appears just below it, highlighted by the green oval in the screenshot below.
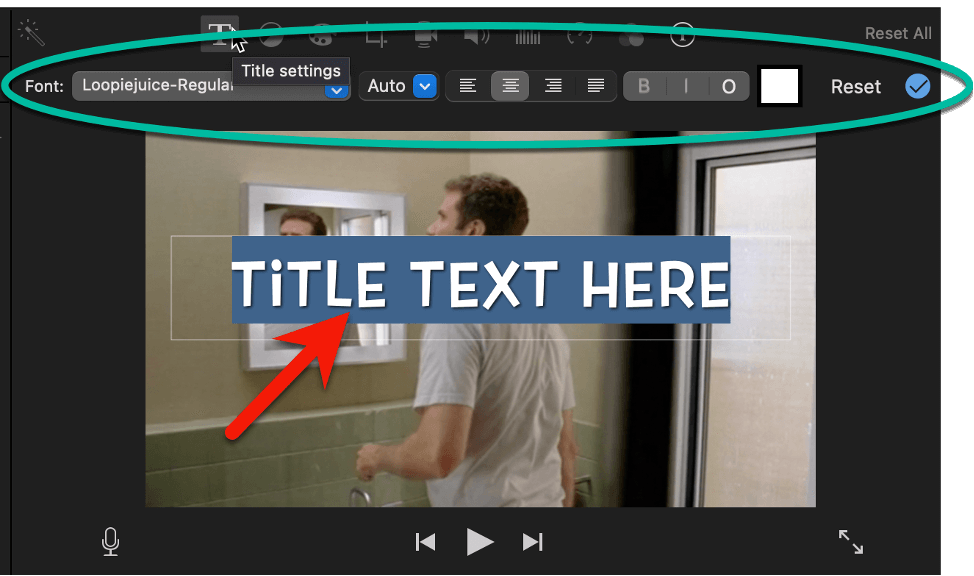
From left to right, these settings allow you to change the font, the size of the text (set to “Auto” in the screenshot above), and then the usual alignment options as well as buttons to make the text bold (B) or italic (I).
The O after the italic setting is an option to outline your text. And the (currently) white square to its right allows you to change the font color.
Finally, pressing the word Reset at the far right will reset any changes you’ve made, restoring all settings to the template’s defaults.
When you are happy with your settings, place your playhead somewhere in your timeline before the text effect starts, and press the spacebar to play your movie. As it reaches the start of the text effect box, your text will appear and then disappear when the playhead reaches the end of the text effect.
If the timing of your text effect is not right, you can always drag and drop the text effect box to the left or right to get the start or end point just where you want them.
And if you want to lengthen or shorten the time the text effect is, um, in effect, you can click on either side of the text effect box, and your pointer will change to small black left/right arrows, as highlighted by the red arrow in the screenshot below.
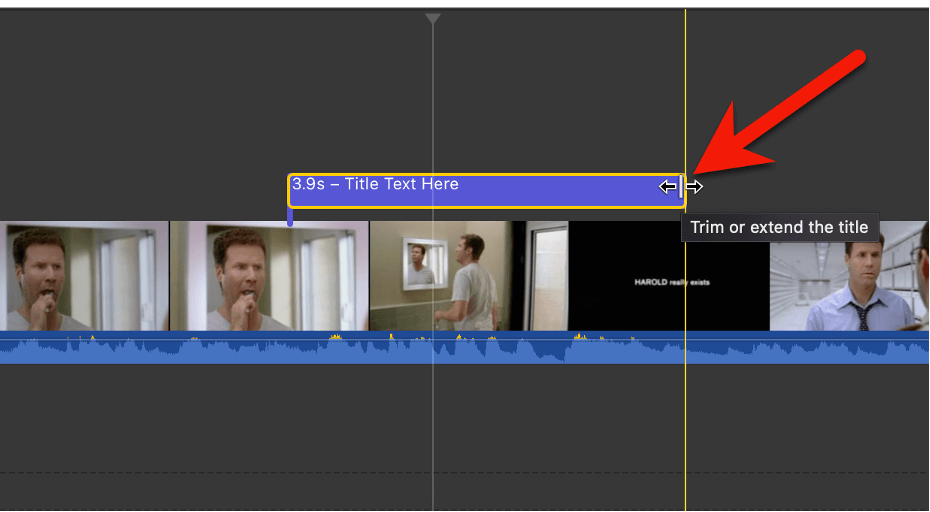
Once those arrows appear, you can drag the edge of the text effect box left to shorten the time your text is on screen or drag it right to extend it.
Choosing the Right Template
One of the joys of working with a movie editing program like iMovie is discovering all the different templates and settings they provide. I mean, if you go to a party, are you bummed that there are so many people, or are you excited by all the possibilities all those people provide?
Either way, I expect it will help identify a few broad categories of templates. Like people, some are better suited for specific goals than others.
First, you may have noticed many of the templates are repeated but with the phrase “Lower Third” added at the end. For example, the template called “Focus Lower Third” is just to the right of the template called “Focus”.
The phrase “Lower Third” is editing jargon for text that appears in the lower third of the screen. This is the traditional place to put information that you want displayed a little… quieter. Like the name of somebody being interviewed in a documentary, you want it on screen, but not in the way of the action.
Second, if you just want some centered text on the screen, perhaps to signal a change in date or location, you’ll want to choose from the simpler templates.
“Centered” is the most basic, with text that doesn’t animate on or off the screen. But if you think it will look better with a little fade in or fade out, try templates like “Expand” or “Reveal”.
Third, if you’re looking for text for your opening title sequence, generally centered (both left/right and top/bottom) is a good starting point. Then it really is a question of the mood you are looking for. For example, “Split” is a little edgier while “Reveal” is a little more mysterious.
Fourth, when it comes to your end credits, iMovie provides only one option for the traditional scrolling credits called, very earnestly, “Scrolling Credits”. But it is darn handy.
This doesn’t mean you can’t use a series of other text templates, perhaps displaying each actor and actresses’ name with a (very Hollywood) template like “Lens Flare” over a still image of them. Or maybe for a more dramatic look, try using “Pull Focus” to create a kind of zoom from their image to their name.
The End
I hope the above has not only taught you how to add text in iMovie but also given you both the tools and inspiration to be confidently creative with everything iMovie has to offer.
So please do let me know in the comments section below if you have any questions, ideas, or cool text tricks you’d like to share with the rest of us. Happy editing and Thank you.