
The more I use the Preview app, the more I appreciate it. It’s a lightweight image and document viewer, but it’s also got a great suite of simple tools for making edits to your files.
One common editing task it can handle is adding an image to a PDF file, although there are at least two ways you can do it, and one of them can cause problems!
I’ll share the correct method first and then show you the other option and explain why it’s better to use Method 1 (even if it seems a bit limited.
Table of Contents
Method 1: Insert a Picture into a PDF with Mac Preview
Once your PDF is open in Preview, adding an image only takes a few clicks. Open the Edit menu, select the Insert submenu, and click Page from File.
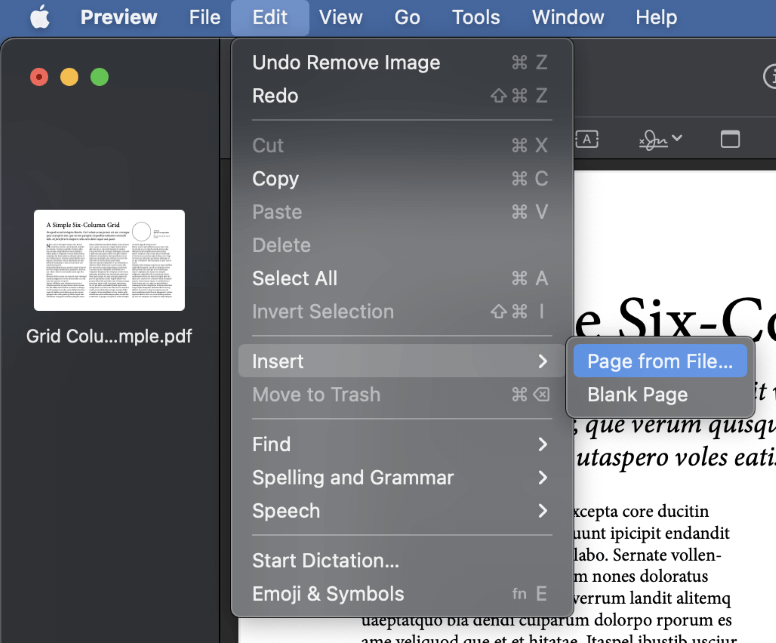
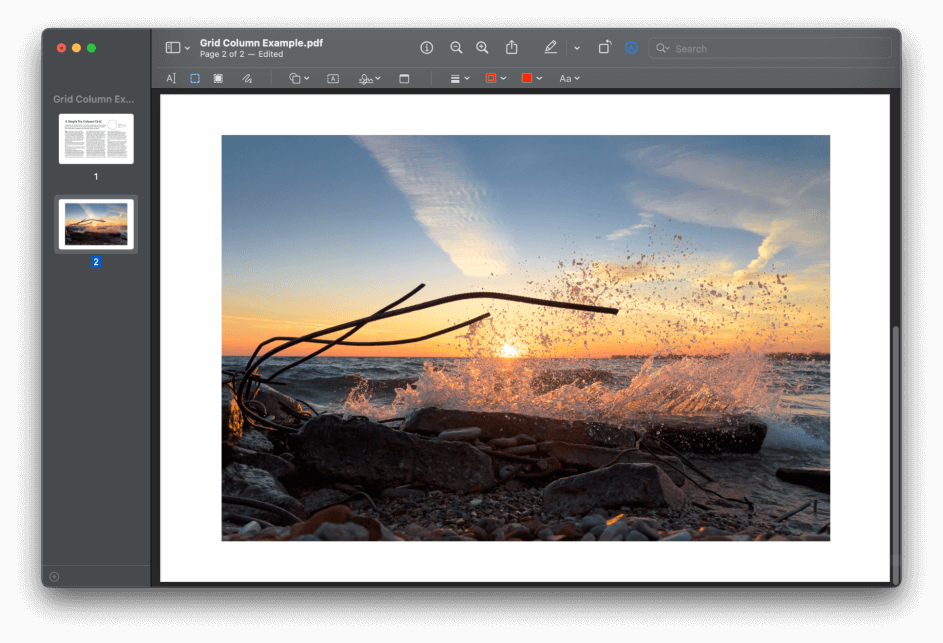
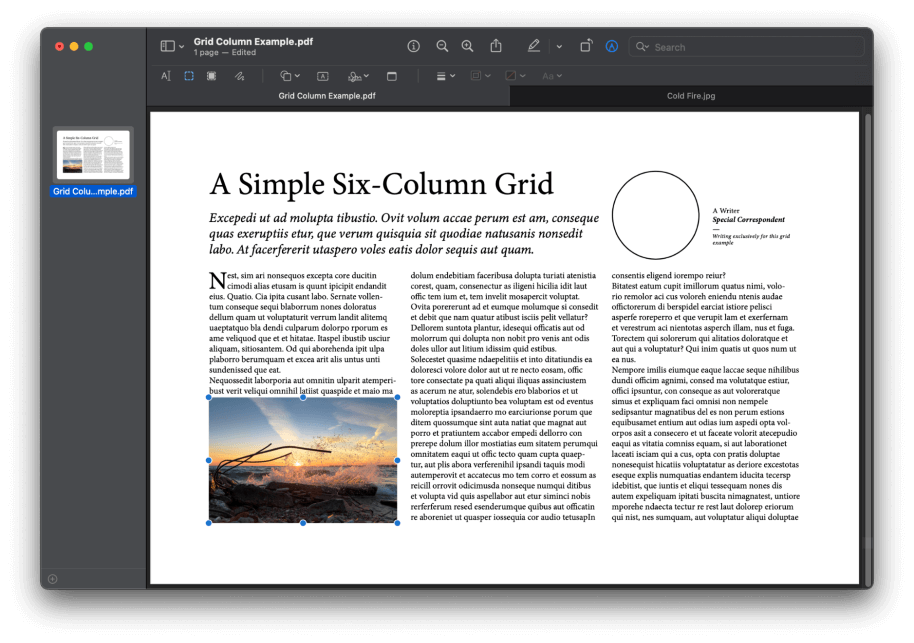
Preview will open a new window where you can select the image file to be added. Browse to select your image file, and click the Open button. A new page will be created with the same page dimensions as the rest of your document, and your image will be positioned in the exact center of the page.
On the plus side, that’s all it takes to add an image to a PDF – but on the negative side, that’s also all there is to it. There are no image import options and no way to control where your image is positioned on the page, what size it is, or what orientation it has.
It is possible to control where the new image/page is added to your document by using the Sidebar panel, but this is the full extent of your import options.
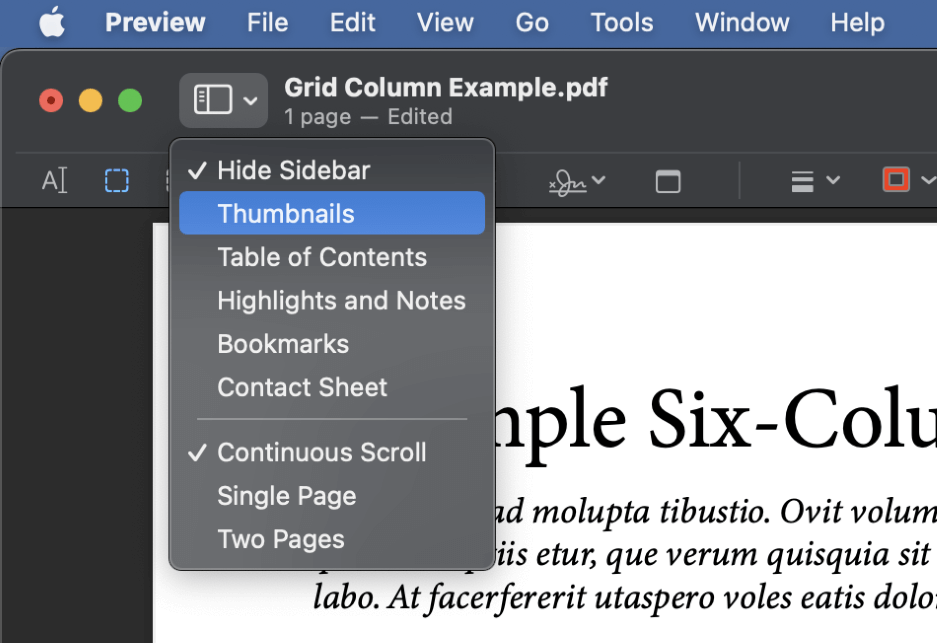
If the sidebar panel isn’t already visible, click the Show Sidebar Display icon and select Thumbnails (as shown above), or you can open the View menu and select Thumbnails. You can also use the keyboard shortcut Command + Shift + 2.
Once the Sidebar panel is open, just select a page thumbnail, and any new images that you insert will be added after that page.
If you don’t want to bother messing around with menus, you can also add an image to a PDF in Preview directly through the sidebar.
Open the sidebar using one of the methods described above, and then drag and drop your image file icon from Finder directly into the sidebar at your chosen position.
A new page will be created, just the same as if you had used the menus to insert the image into your PDF.
Method 2: Add an Image to a PDF as a Stamp
This method uses a very different process for adding an image to a PDF, and I hesitate to recommend it for a couple of reasons. Several tutorials recommend this method, but they never bother to explain why it’s different from the “Page from File” method that I described earlier.
Instead of actually modifying the PDF structure, this method adds your image as a “stamp” that is placed overtop of your PDF file in a separate layer. A stamp is a PDF tool that should be used as a temporary placeholder for administrative and collaborative purposes.
For example, if you’re sending out a digital document, you could add a “Sign Here” stamp to draw your viewer’s attention to the signature field. Stamps are not intended as a layout design tool, and you should be extremely careful about how you use them.
Stamps can be moved, resized, and deleted by any person who opens the file, and they may not print properly if sent to a professional printer (or even a home printer). To learn more about the intended usage of PDF image stamps, visit the Adobe Acrobat help documentation.
If you want to add an image as a stamp on purpose, that’s fine! Just be aware that this is not the same as actually adding an image to the PDF document structure.
If you want to give it a try for a quick mockup of a document, or you just want to test out how another image would look in your layout without going back to your design app, here’s how you can add an image as a PDF stamp.
Open your image and your PDF in the Preview app, then switch to the window containing your image, and press Command + A to select all the pixels in the image. You should be able to see a selection marquee around the outer edges of the document window.
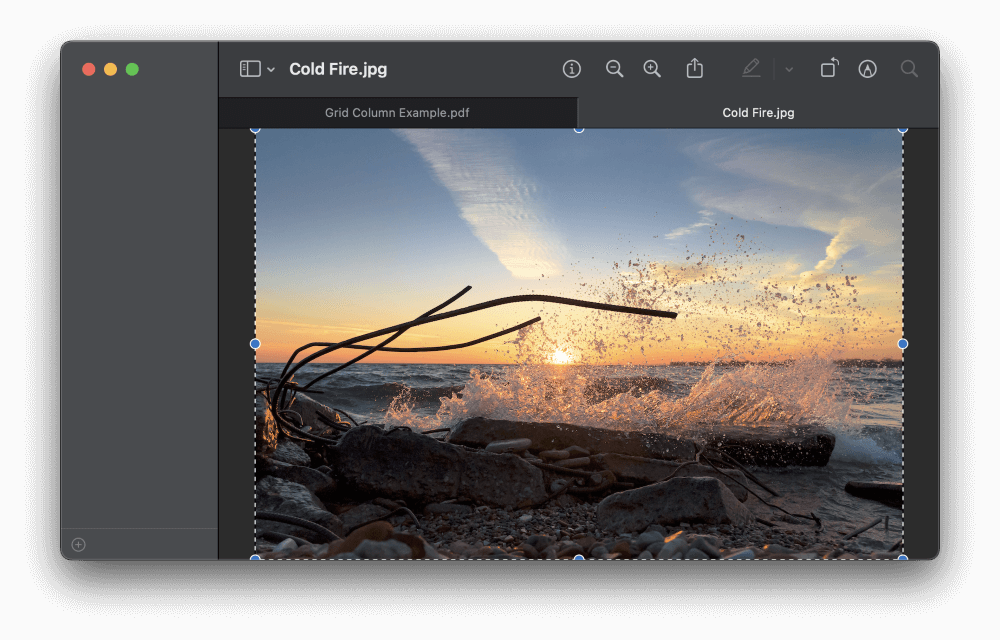
This next part is going to sound a little weird, but trust me – or just test it yourself! Press Command + C to copy the selected pixels to your Mac’s clipboard, and then press Command + V to paste them back into the same image.
Yes, paste the copied image data back into the source image! If you try to paste it directly into your PDF at this point, nothing will happen.

Instead of replacing the source pixels the way you’d expect, Preview will convert the pasted pixels into a separate image object, positioned over the top of your source.
Click once on the new image object to select it, then press Command + C to copy the image object into your Mac’s clipboard.
Switch back to the Preview window containing your PDF file, and navigate to the page where you want to insert the image. Press Command + V to paste the image object, and it will appear in your PDF.
You can resize it, reposition it, and even mirror it as needed using the blue anchor handles around the edges of the object.
Part of the reason I don’t recommend this method is that most casual users won’t understand the difference between adding an image and adding an image stamp, which can cause a whole lot of confusion.
Anyone who opens your PDF document can delete images added using this method, and they may not print properly, or they may not print at all – so be careful how you use it!
How to Remove an Image from a PDF
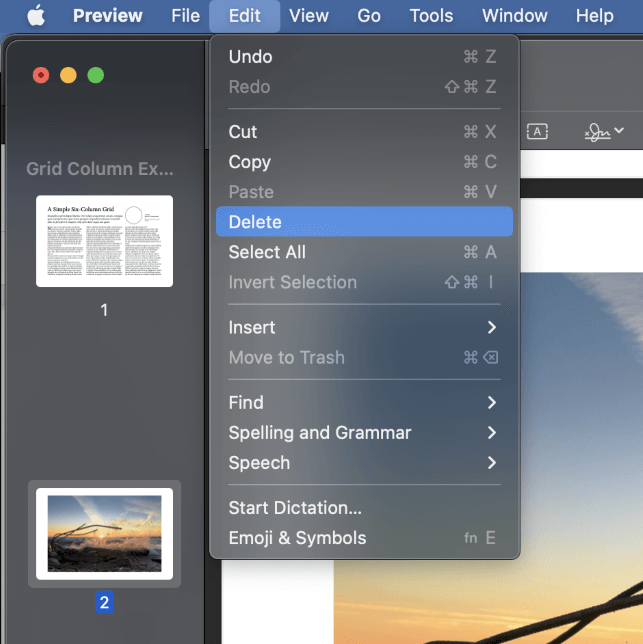
If you made a mistake when adding an image to your PDF, the simplest way to remove it is to delete the entire page.
Make sure that the Sidebar panel is set to Thumbnails, and then make sure that the page you want to remove is selected. Press the Delete key to remove both the image and the entire page, or you can open the Edit menu and click Delete.
Of course, if you used Method 2 as described above, you can simply click the image to select it and press the Delete key. Because Method 2 creates an image stamp overlay instead of actually inserting the image into the PDF structure, anyone who views the document can delete these images.
A Final Word
That covers everything there is to know about how to add an image to a PDF in Preview and also how to remove a page from your PDF in case something goes wrong.
If you find yourself needing to edit PDF files regularly, though, you should consider using a dedicated PDF editor such as Adobe Acrobat. Dedicated PDF apps offer a lot more editing options, and some of them even allow you to control the size and position of your inserted image.
Happy editing!