
To access iCloud photos on your Mac, sign into the same Apple ID you use for your iCloud, then sync your library in “System Settings”. Once you since your Mac, your iCloud photos will automatically update as you take and add more photos.
I’m Jon, a Mac expert and owner of a 2019 MacBook Pro and iPhone 11 Pro Max. I sync iCloud photos from my iPhone to my Mac and made this guide to show you how.
With iCloud, you can easily sync photos from all of your Apple devices to ensure you can easily access them anytime, anywhere. This guide outlines how to sync iCloud photos on your Mac, so continue reading to learn more.
Table of Contents
Set Up Your iCloud Photo Library
You’ll need to set up your account to easily sync your photos to your iCloud Photo Library. This will ensure your images are easily accessible on your Mac, iOS device, or via your account through an internet browser. Follow these steps:
Before starting, ensure your Mac is signed into the same iCloud account (Apple ID) where you store your photos.
For example, I use my iPhone as my primary camera and sync all the pictures I take to my iCloud. I am logged into the same iCloud account on my Mac.
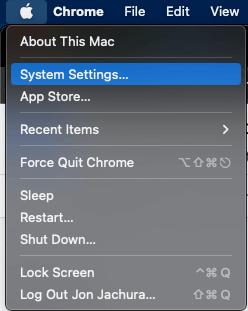
Step 1: Ensure your Mac is up to date and running the latest version of macOS. Verify it’s current by opening the Apple Menu and selecting “System Preferences” (or “System Settings” if you have macOS Ventura) from the drop-down menu.
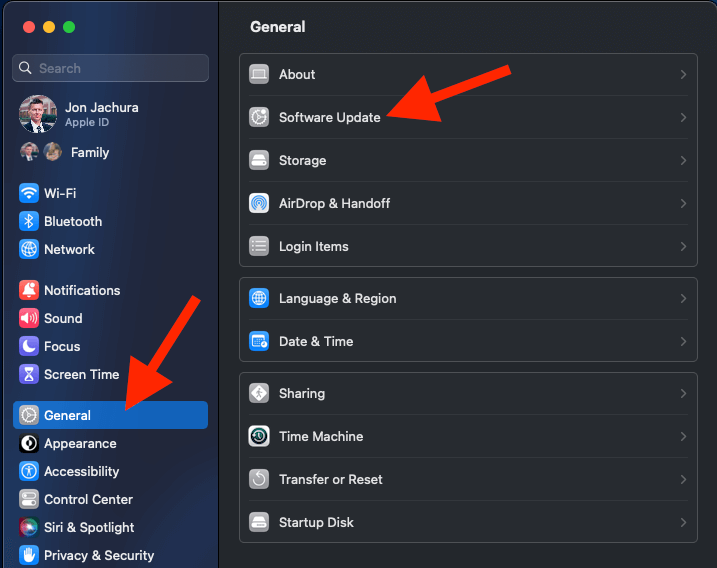
Click “General” on the left side of the window, then select “Software Update.” If an update is available, install it.
Step 2: Once your Mac is up to date, reopen “System Preferences” or “System Settings.”
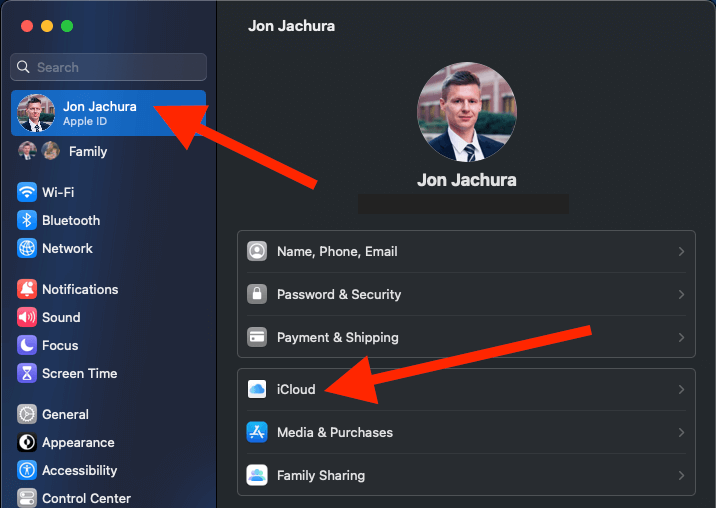
Step 3: Click your name with “Apple ID” below it from the available icons, then click on “iCloud.”
Step 4: Next, check the boxes next to which categories you want to sync to your iCloud account.
Step 5: Check the box next to “Photos” to sync your Photo library automatically.
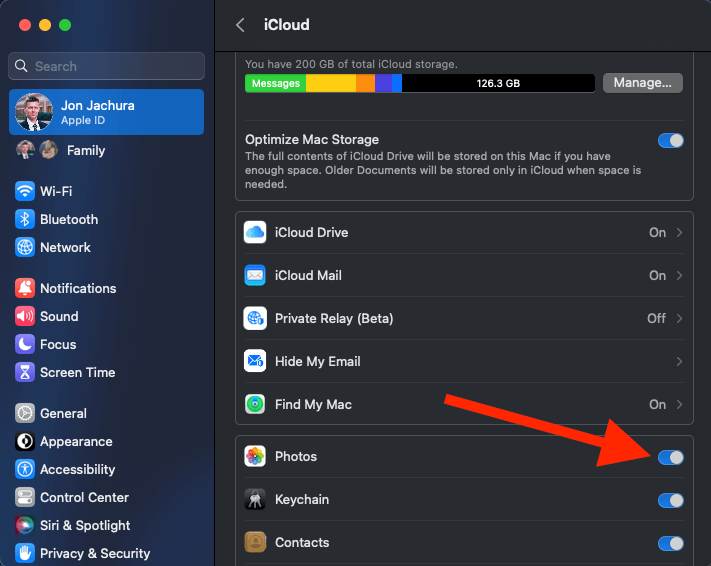
Step 6: If you’d like to save disk space on your Mac, check the box next to “Optimize Storage.”
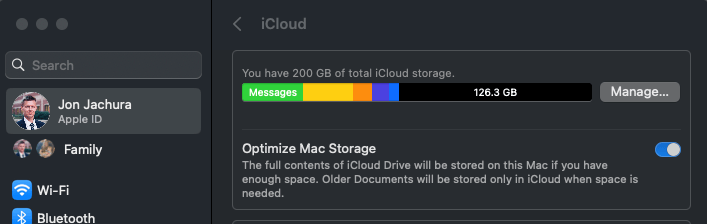
Step 7: When you select this option, your Mac will move part of your data to the cloud as long as you have space in your account.
Step 8: Once you check the box next to “Photos,” your Mac will begin uploading your Photo library to the iCloud Photo Library. This process can take a while if you have a large collection of photos or a slower internet speed.
To pause the upload process, simply open the Photos app, click “Photos,” then choose “Moments.” Scroll to the bottom of the page, then hit the “Pause” button.
Access iCloud Photos on Your Mac
Once you sync your device to your iCloud account, you can easily access them on your Mac. To view them regularly, simply open the Photos app on your Mac.
Your Mac will automatically update as you add new photos to your iCloud, so as long as you don’t pause uploads, have enough storage space, and have an Internet connection. Soon after you take new photos on your iPhone, they will sync to your iCloud account and your Mac.
If you need to upgrade your iCloud account to accommodate more storage, follow these steps:
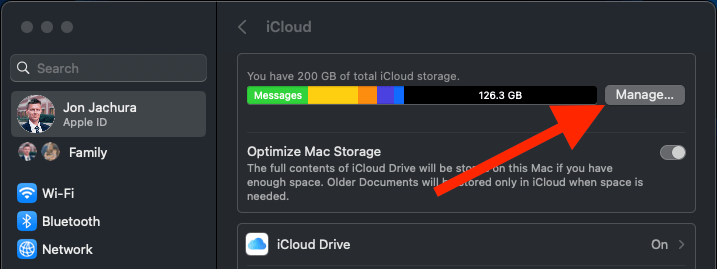
Step 1: Open the Apple Menu and select “System Preferences” from the drop-down menu. Click “iCloud,” then select “Manage.”
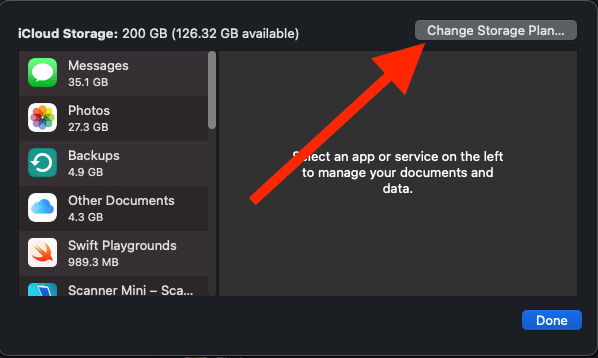
Step 2: Click on “Change Storage Plan” or “Buy More Storage” to view or upgrade your current storage plan.
Alternatively, you can always access your photos on your Mac by using a web browser. Log into your iCloud account on “icloud.com” to manage and access your photos.
Easily Manage Photos from Your Mac
Once you enable the iCloud Photo Library on your Mac, you might need to manage and organize your photos. You can delete, organize, and export photos from your Mac using the Photos app and your iCloud Photo Library.
If you’re working with iCloud’s free 5 GB of storage, be sure to pay attention to how rapidly it fills up. This way, you can ensure your precious memories are backed up, and you won’t lose them if something happens to the device you captured them on.
FAQs
Here are some other questions you might want to know about using iCloud.
Is iCloud Free?
Apple users can enjoy up to 5GB of free storage. After that, you need to pay for additional storage. There are various plans, and the minimum plans start at $0.99 per month for 50 GB and climb based on the size of the plan.
Can I Access iCloud Photos Without a Mac or iOS Device?
Yes, you can access your iCloud photos without a Mac or iOS device (iPhone, iPad, iPod, etc.). Simply use a browser to access your photos and download or sort images. Open the web browser, then type “icloud.com” into the search bar. Sign into your iCloud account, then click “Photos.”
Conclusion
Whether you want to create a seamless photo experience across all your Apple devices or simply want to easily access photos on your Mac, the process is simple. All it takes is signing into your iCloud account and syncing photos to your Mac (or skip this step and use a web browser instead), and you can conveniently access your photos on your Mac.
What’s your go-to way of accessing iCloud photos on your Mac?