To remove the background of an image in Photoshop, you can use Quick Action or go to Select > Select and Mask, then click on “Select Subject.” Photoshop will do its best to separate what it sees as the subject from the background.
Hello! I’m Jayde, and I’ve been using Adobe Photoshop for many years to edit family photos, create fantasy photo manipulations, and my own cartoon characters in the form of a digital puppet.
In this article, I’ll show you how to remove the background in Photoshop and/or make it transparent.
Key Takeaways
- You can remove the background in one click from the Properties panel Quick Actions > Remove Background.
- You need to unlock the background layer before editing it.
- There are many ways to separate your subject from the background, but the most efficient way is to go to Select and Mask and click on Select Subject.
Let’s dive into this simple screenshot tutorial.
Method 1: Quick Action
The most efficient way to remove the background of your image is to do so via Quick Actions.
When an image layer is selected, you’ll see the Remove Background option under the Properties panel > Quick Actions.
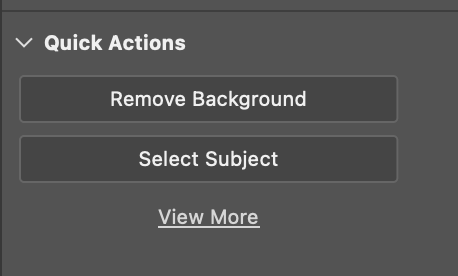
Simply select the image layer, and click Remove Background, Photoshop will automatically create a mask and remove the background of your image.
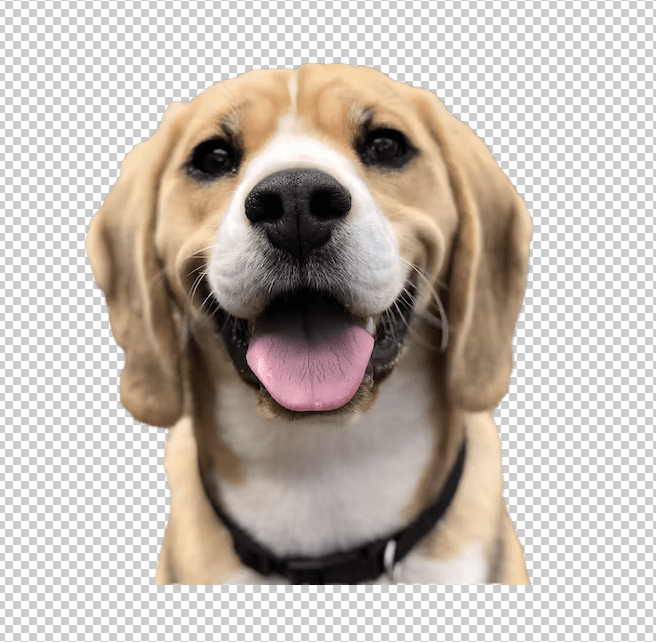
Ideally, this quick action feature in Photoshop just did exactly what you wanted to do. In case it didn’t, let’s take a look at alternative ways to remove the background.
Method 2: Select and Mask
Alright, so as you can see here I have a PNG of my daughter, Gracie. Photoshop automatically sets this as Layer 1 and it is unlocked.
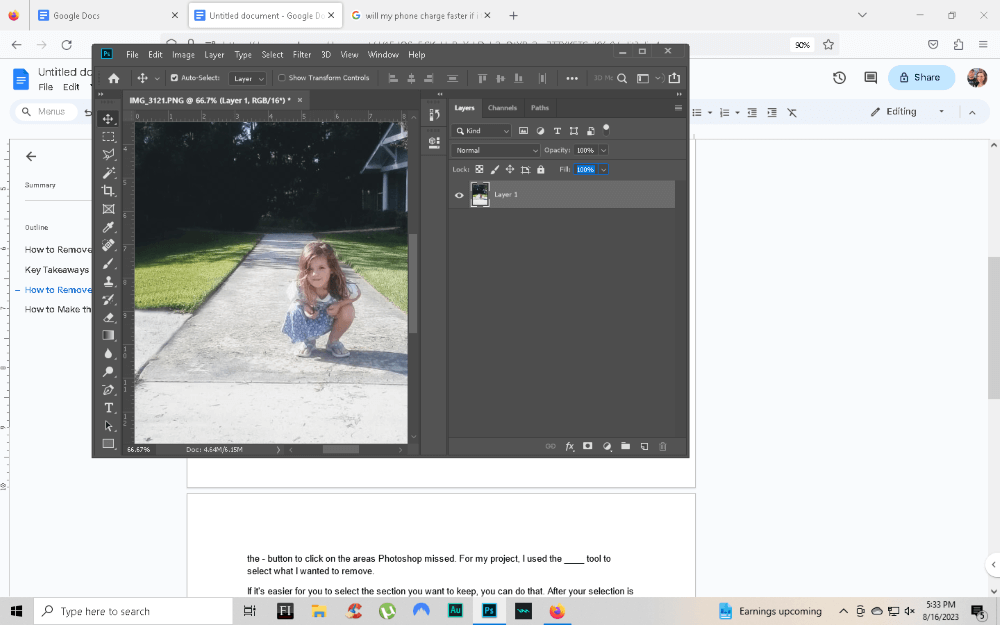
However, if it was a jpeg, Photoshop would’ve set my image as a locked “Background” layer.
To start editing a locked layer, simply click the small lock symbol on the layer to unlock it. Click and drag the layer into the trash can in the bottom corner to delete it.
I don’t want to do that here because I want to keep my layer, I just want to remove a certain part of it. Let’s try out Photoshop’s Select and Mask feature.
Step 1: Go to the overhead menu and choose Select > Select and Mask (keyboard shortcut Alt + Ctrl + R).
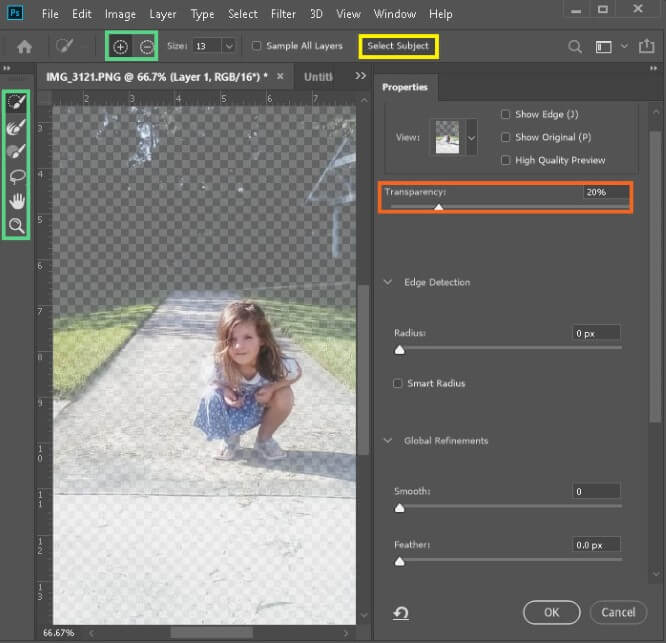
Step 2: On the top bar (in the yellow box), click Select Subject.
Note that the transparency is automatically set to 20% so we can see what we’re working with. It seems to have worked pretty well, however, I can see that it missed Gracie’s feet and sleeve.
Step 3: Use the Quick Selection tool (selected in the green box on the left) to add [+] to the subject selection. You can also use the [-] in the top green box to remove sections from your selected subject. Click OK.
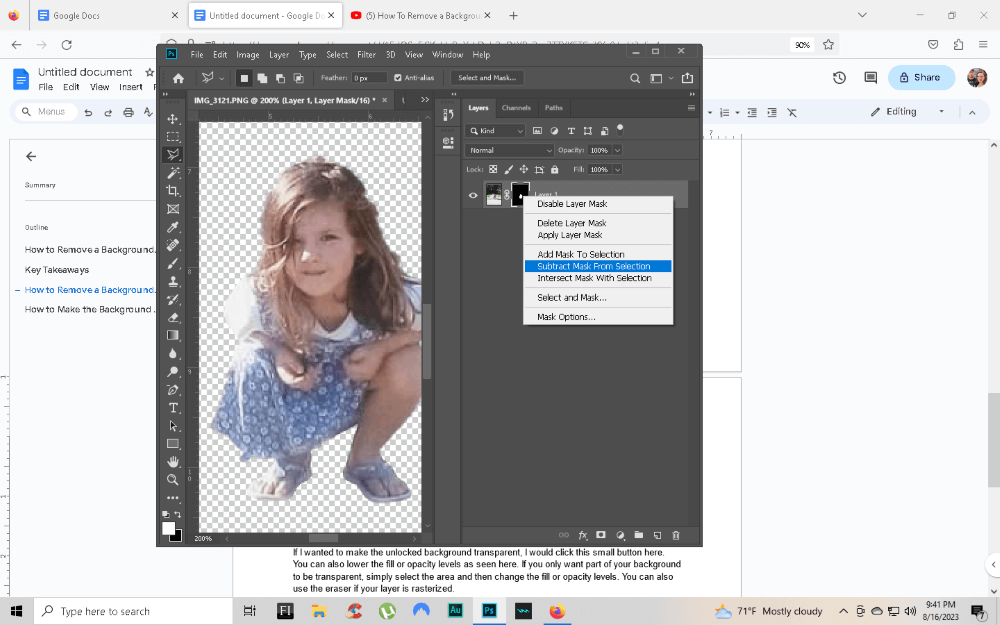
Quick Tip: To select the subject, right-click on the mask and select Subtract Mask From Selection.
You can also use the Polygonal Lasso tool (L) while pressing Shift to add to your selection, or Alt to subtract from your selection.
Now let’s say you want to delete the background so that you can have your subject alone on a layer.
Step 4: Right-click on the mask to bring up some options.
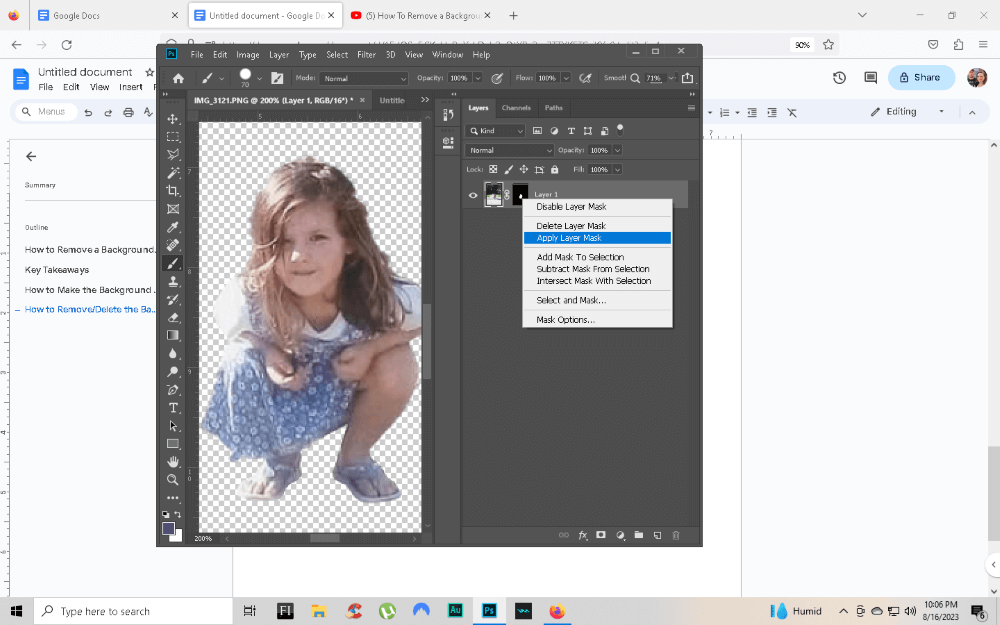
Step 5: Click Apply Layer Mask and the background is removed.
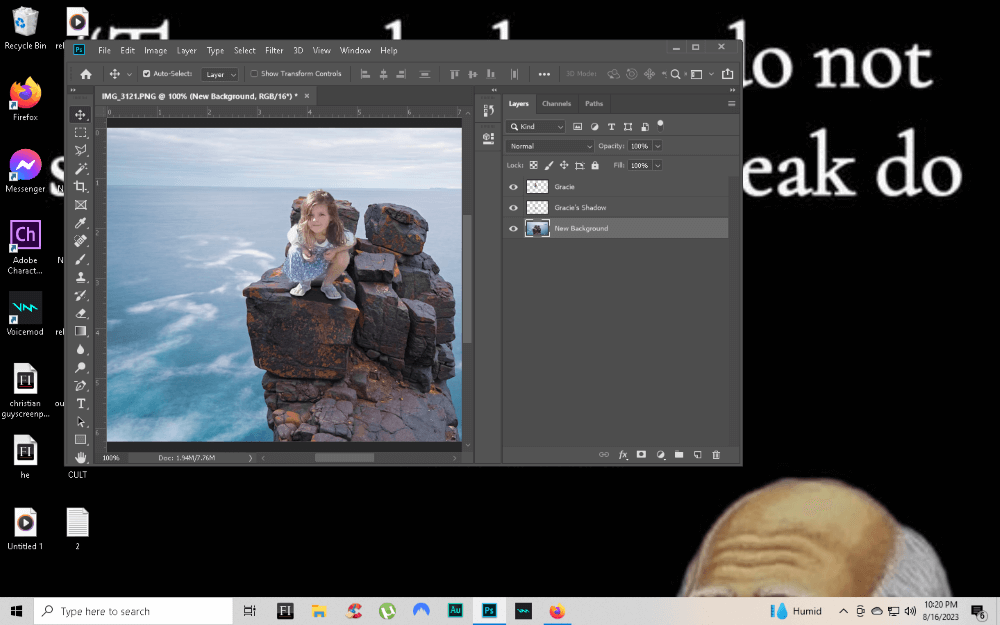
Now we have our subject alone on a layer and we can do something like this:
Final Thoughts
Learning the ins and outs of Photoshop is key to building your graphic design skills. By taking the time to learn how to remove the background in multiple ways, we’ve become familiar with helpful and universal tools that will make your future projects come to life.
Did you learn something new from this tutorial? Do you have any tips for other artists or graphic designers? Let me know in the comments below.
