
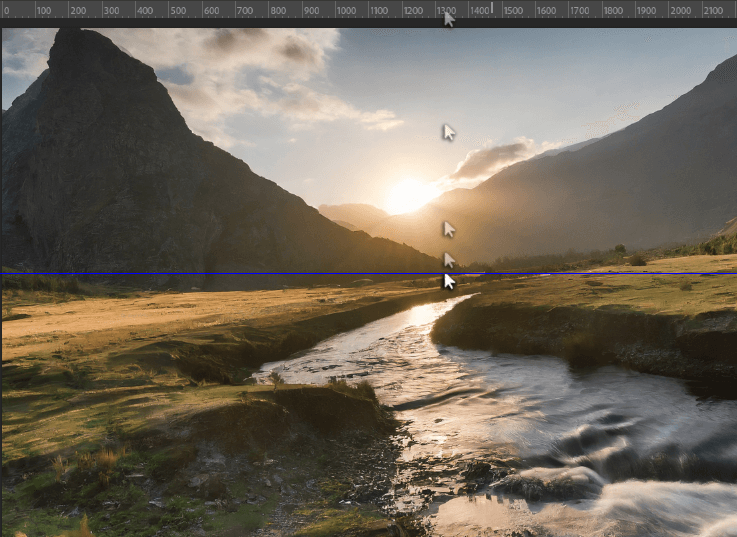
Straighten your image in Photoshop by selecting the Crop tool. Check off Content Aware Fill in the action bar, then click on the Straighten icon. Click and drag a line from one side of the horizon to the other.
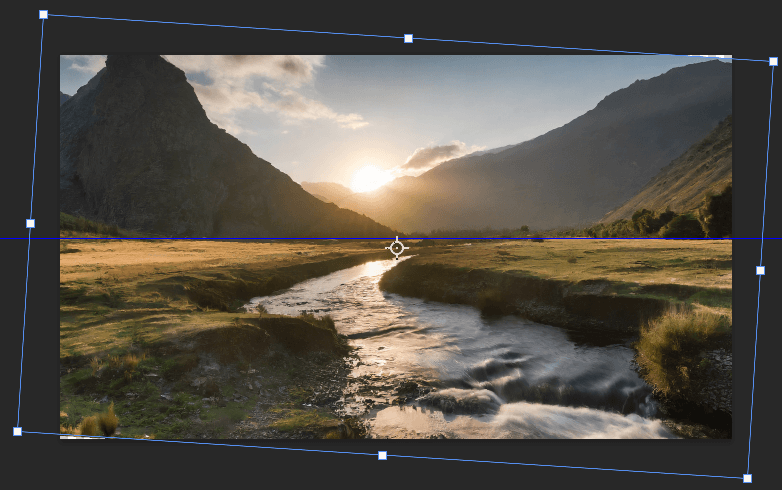
With your image straightened, you have an opportunity to increase the size of your photo, which will be generated. Click and drag the borders outwards if you like, then press Enter.
Hello, again! If you don’t already know, my name is Jayde, and I’m back to show you how to straighten an image in Photoshop. Per the norm, there is more than one way to do this, and by covering multiple ways, you’ll become more familiar with the many useful tools this program offers.
Without further ado, let’s dive in!
Table of Contents
Useful Shortcuts
- Free Transform: Ctrl/Command + T
- Deselect: Ctrl/Command + D
- Select All: Ctrl/Command + A
- Undo: Ctrl/Command + Z
- Invert selection: Ctrl/Command + Shift + I.
- Make a selection and use Edit > Content-Aware Fill to fill in any gaps or unwanted areas of your photo.
Note: The screenshots from this tutorial are taken from the Adobe Photoshop Windows version. Mac or other versions can look slightly different.
First, let’s look at how to use a guide and rotate our image.
Method 1: Guide & Rotate
You can manually straighten the image using the ruler as a guide.
Step 1: Pull down a guide from the ruler on the top of the workspace for reference. If you don’t see the ruler, use the shortcut Ctrl/Command + R.
Step 2: Use the shortcut Ctrl/Command + T to activate Free Transform so that you can rotate the corners of your image. Press Enter when you’re finished.
Method 2: Flatten the Tilted Image with Perspective Crop
Now let’s look at how to straighten or flatten an image with a perspective crop.
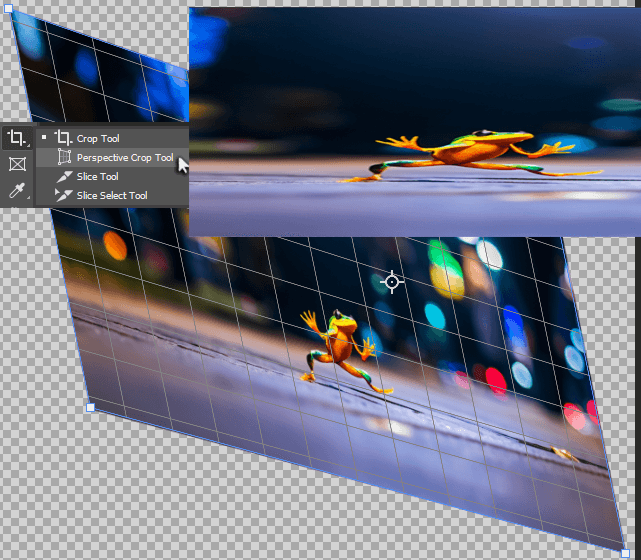
Step 1: Find the Perspective Crop tool in the sub-menu under Crop and click on the corners of the image to create the selection box, then press Enter.
Doing this will hold the photo to a specific ratio, but it’s easy to correct this.
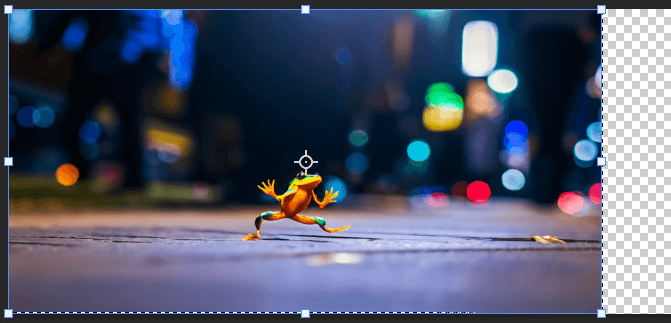
Step 2: Use the shortcut Ctrl/Command + A to select everything, then use the shortcut Ctrl/Command + T for Free Transform. Hold Shift and click and drag one side of your image until the correct ratio is reached, then press Enter.
Use the shortcut Ctrl/Command + D to Deselect as well.

Step 3: Trim away the access transparent canvas by going to Image > Trim and make sure Transparent Pixels and all sides are checked off.
Method 3: Ruler & Content-Aware Fill
Now let’s use the Ruler tool to tilt our image and fill in the blanks.
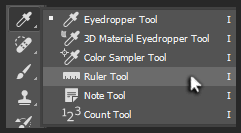
Step 1: Click and hold on to the Eyedropper tool to access the sub-menu and go to the Ruler tool.
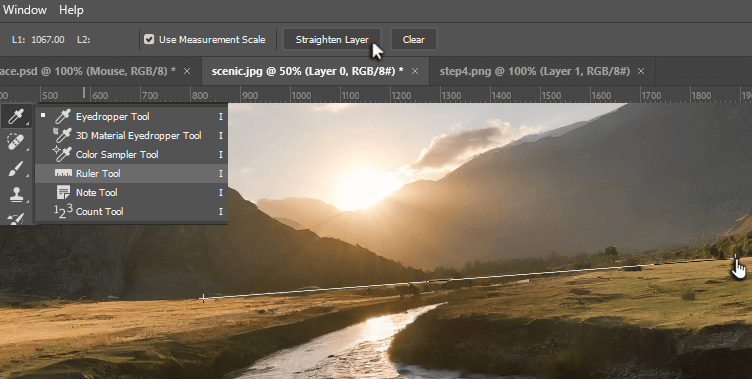
Step 2: Click and drag, starting on one side of your horizon. Let go and click Straighten Layer.

Step 3: Right-click on the image layer and go to Select Pixels.
Then use the shortcut Shift + Ctrl/Command + I to Select Inverse.
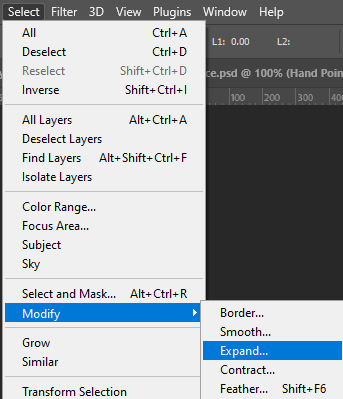
Step 4: Go to Select > Modify > Expand to expand your selection to include just the edges of your photo. I expanded mine by 5px.
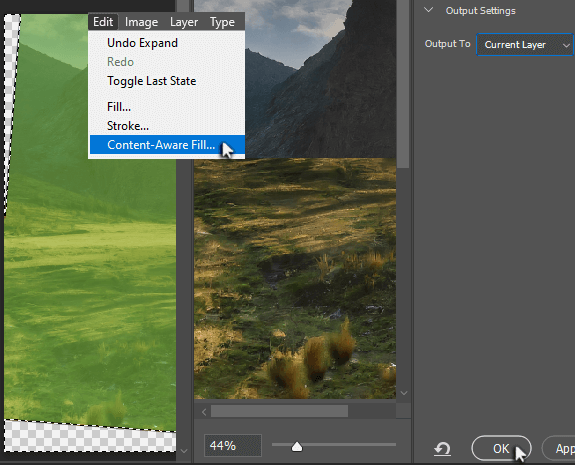
Step 5: Go to Edit > Content-Aware Fill. Take a look at the preview and change the Output To Current Layer if you wish. Click OK.
Use the shortcut Ctrl/Command + D to Deselect.
Here is our comparison.
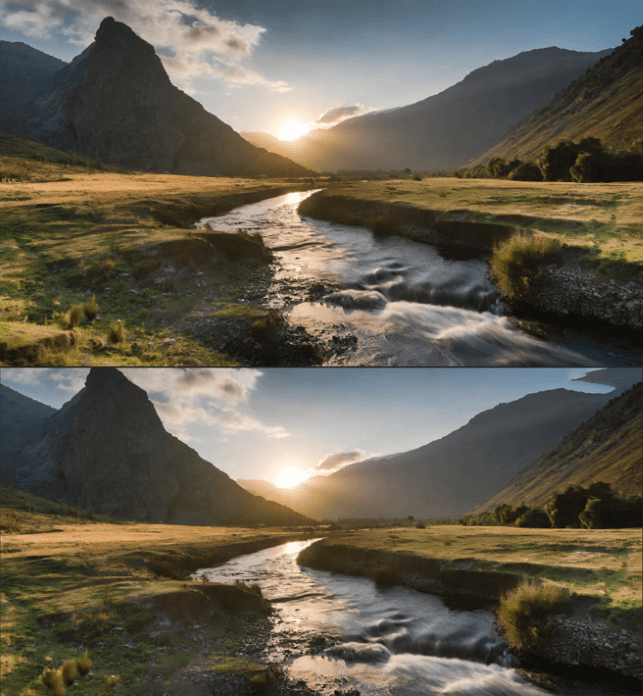
As you can see, the automatic fill oddly extended our mountains and repeated some distinct tufts of grass in the bottom left corner.
Method 4: Crop Straighten with Content-Aware Fill
Let’s use the Crop Tool with Content-Aware Fill at the same time.
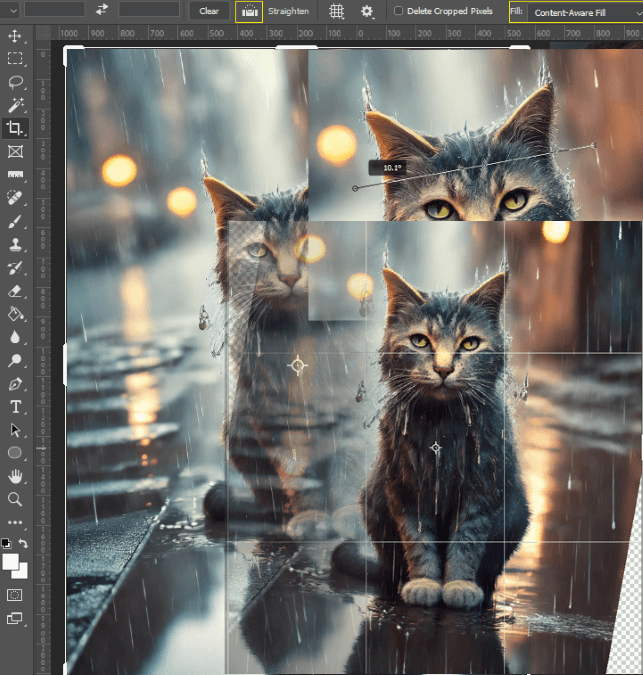
Step 1: Select the Crop Tool and make sure Fill (in the action bar) is on Content-Aware Fill. Click on the Straighten icon.
Zoom in and click and drag from one side of the horizon to the other.
Once you let go, this will straighten the photo. Now, if you wish, you can expand the size of the image to be generated by pulling out the borders.
Once you are satisfied, press Enter.
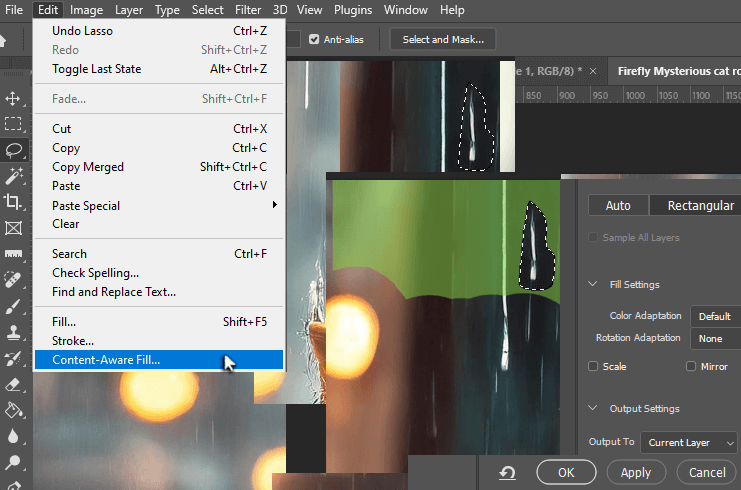
Step 2: If you notice any obvious repeating marks, use the Lasso Tool to select it and go to Edit > Content-Aware Fill.
Here you can use the left side to highlight in green wherever you want the content aware fill to source from. Click OK.
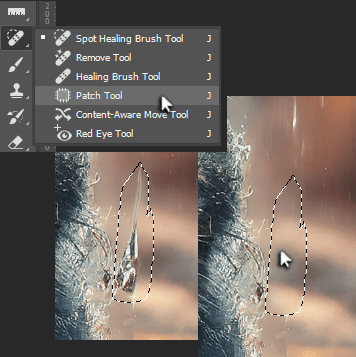
Tip: Alternatively, you can use the Patch Tool to select an unwanted area in the photo and click and drag the selection to the pixels you want to use to fill that spot.
Here’s the comparison:

Final Thoughts
There’s always more than one way to do something in Photoshop. Some ways work better than others, depending on the project at hand. Try any of the methods above to straighten your image in Photoshop!
What is your favorite tool to straighten images in Photoshop? Let us know in the comments below.