
Changing the color of your background can elevate your photos dramatically – and Adobe Photoshop has all of the tools you need to give your images that professional gleam! Understanding how to properly do this can be difficult, given all the different options Photoshop allows for but I’ve got your back.
I’m Skyler, and I’ve been using Photoshop on a personal and professional level for well over a decade. From motion graphics to finished illustrations or product photos for my small business ventures, I’ve found a background that pops is essential!
Today I’ll be using an old illustration turned animation to give you an understanding of how to change your background color in Photoshop easily. By exploring all the different options Photoshop has for changing your background, we can better apply those methods in our own projects and media depending on the circumstance.
Table of Contents
Quick Steps
- For new images navigate to File – New and select a color from the drop-down under the tab Background Contents. Click Create.
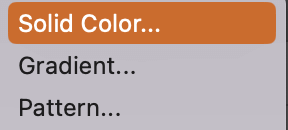
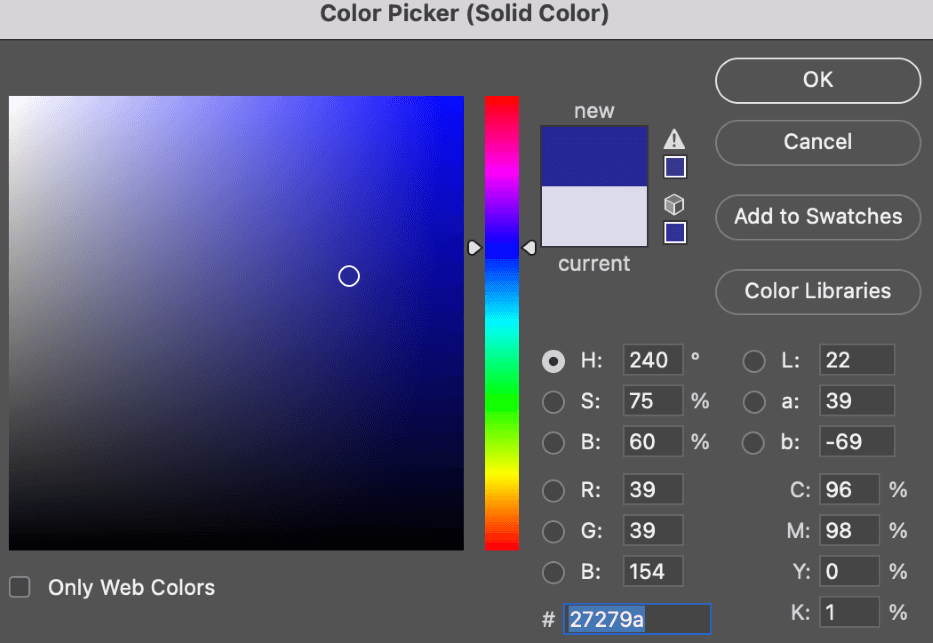
- For existing images navigate to your layers panel, select New Layer Filter, and right-click to choose Solid Color. Then select your desired color from the palette window.
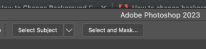
- Powered by AI, you can use the Quick Select Tool to automatically select the image in the foreground of your photo. Once you’ve clicked on the tool, a button will pop up in the top command window called Select Subject. Click this, and Photoshop gets to work on your image.
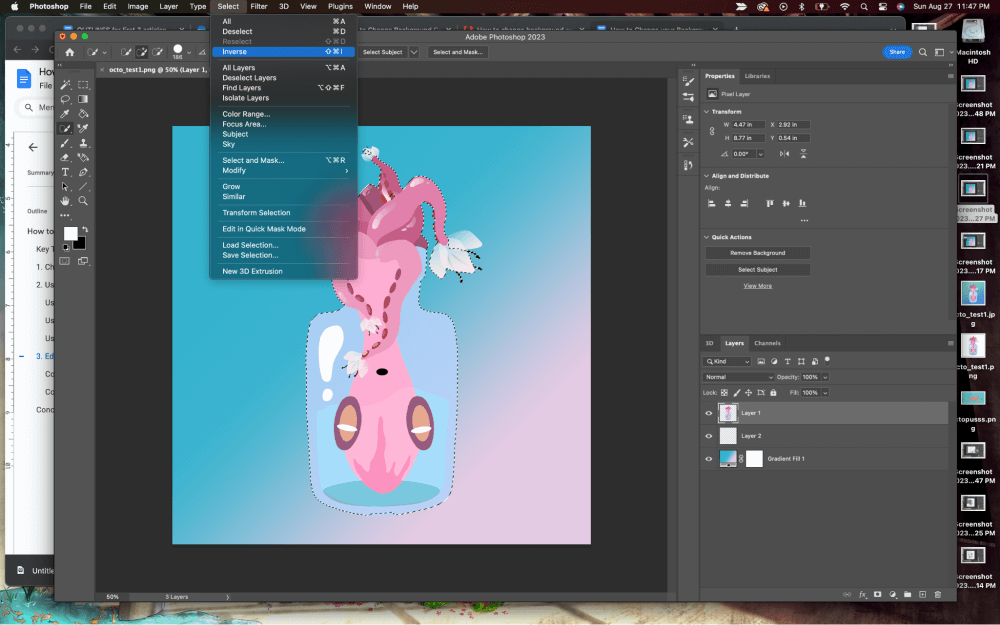
- After your image is selected you can navigate to the drop-down menu and Select – Inverse to swap the selection to only include the background.
Method 1: Add a Solid Color Layer
You can create a new fill or adjustment layer to change the background color in Photoshop. If your image has a background, you can remove the image background first and then navigate to your layers panel, select New Layer Filter, and right-click to choose Solid Color.
Now all you have to do is select your desired color from the palette window.
Method 2: Using the Selection Tools and Layer Masks
Now, it’s not always as simple if we’re working with more complex imagery. This is where the selection tools and layer masks come in handy. They’re powerful tools that can be used for a myriad of purposes, but in our case, we’ll be using them to separate the foreground and background so we can edit in a non-destructive way.
We’ll need to choose from three different types of selection tools – Quick Selection, Lasso, and the Magic Wand. After we’ve chosen appropriately we can apply a layer mask and get to work on the background.
Step 1: Choose a selection tool to select the image.
The quick selection tool is the most well-rounded option, as it uses AI to automatically detect and highlight your subject matter for you! Once you’ve selected the tool, a button will pop up in the top command window called Select Subject. Click this, and Photoshop gets to work on your image.
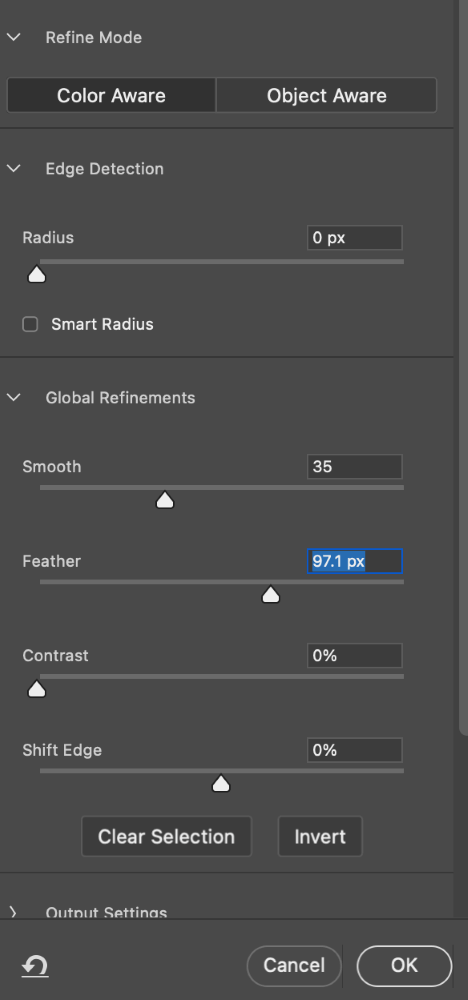
To clean up your selection and further edit, we can also click the Select and Mask button. This tool allows us to smooth out any rough edges or edit out color bleeds. The menu consists of sliders that allow us to refine, smooth, or feather your selection as you desire.
You can also use the Lasso tool to make a selection. There are two subcategories of the Lasso Tool – Polygonal and Magnetic Lasso. Polygonal makes straight-cut lines, better for more geometric objects. Magnetic Lasso identifies your images and highlights them with smooth curves matching your existing imagery.
If you want to use the Magic Wand, select the Magic Wand tool from the toolbar. Hold down the Shift key and use your cursor to select the pieces of the background you’d like to edit the color of.
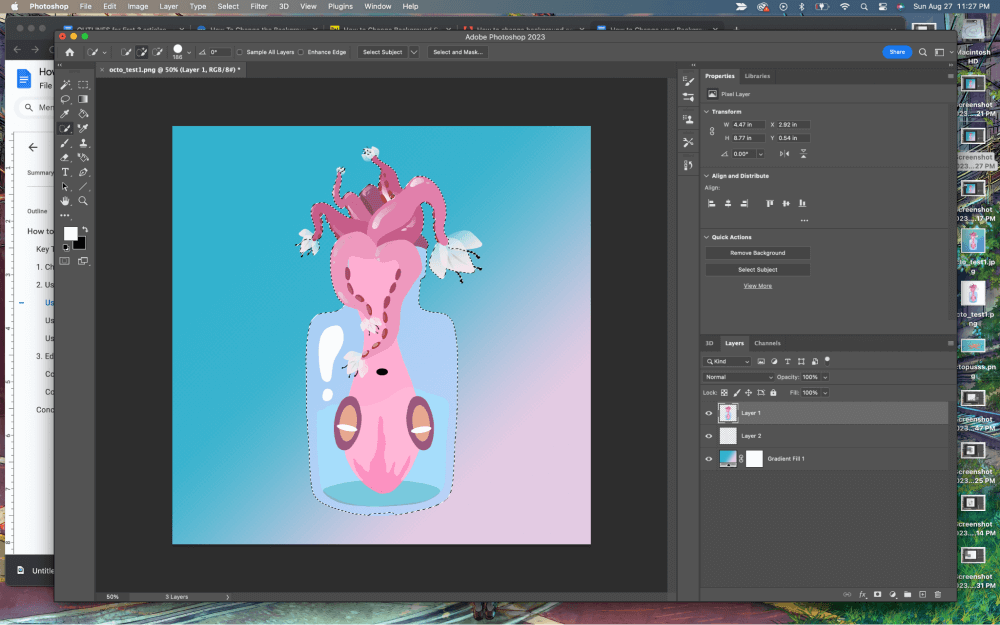
Once you’ve got your object selected like the above example, we can begin editing our background!
Step 2: Go to the overhead menu Select > Inverse to swap our selection to select the background.
Step 3: Now that your background is selected you can color as needed! This is the part where you can enjoy experimenting with colors, contrast, and hue… maybe even try out some new brushes for a patterned effect.
Pro Tip: If you want to further experiment with hue or saturation try pressing Ctrl/Command + Shift + U key to bring up a new window. There will be a slider that allows you to shift the hue while keeping the original lighting. This allows you to physically see the shifts in hue before you commit to changing it, giving you lots of control over your background in a non-destructive way!
Conclusion
It’s easy to change a background color in Photoshop, all you need to do is select the background using one of the selection tools and change the color using one of the methods above.