
You can easily crop an image in Inkscape by using one of the shape tools to create a rectangle around the area you want to crop and then selecting Object > Clip > Set Clip in the toolbar at the top of your workspace.
I’m Carolyn and I’ve been using design apps like Inkscape to help run my digital illustration business for over three years.
Inkscape is an open-sourced and free vector graphics program that allows users to make edits and change vector images, shapes, and text. The app is frequently used for creating clip art, editing photos, and creating graphic designs like typography and logos.
In this article, I’m going to show you how to import and crop an image in Inkscape.
Table of Contents
Key Takeaways
- You can use the clipping tool and the shape tool in Inkscape to crop an image.
- You need to first import the image you want to crop into your canvas.
- You can crop your image in many different shapes.
How to Import an Image in Inkscape
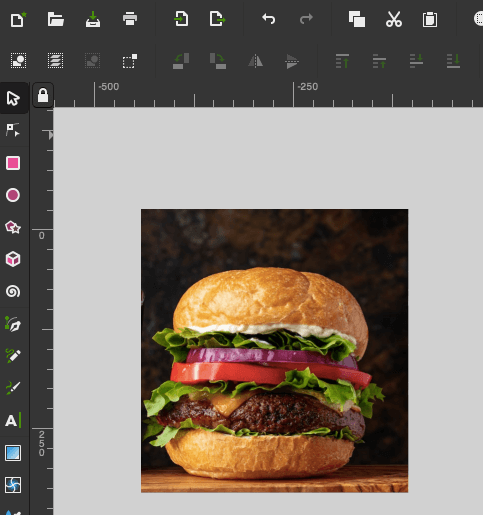
Before you can crop your image in Inkscape, you need to import it into your canvas first. Here’s how:
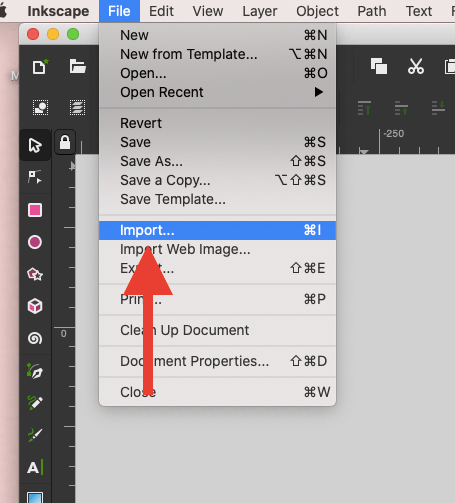
Step 1: Open your fresh canvas and select the File menu in the top left-hand corner of your screen. In the drop-down menu, tap on the Import option.
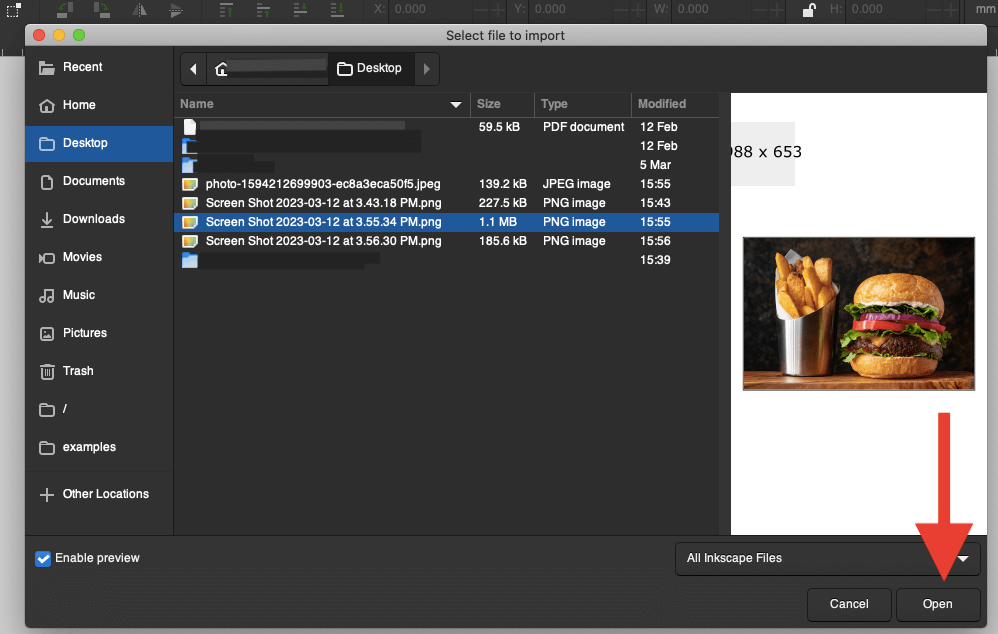
Step 2: In the pop-up window, open the location where your image is stored on your device. Tap on your image and then click on Open.
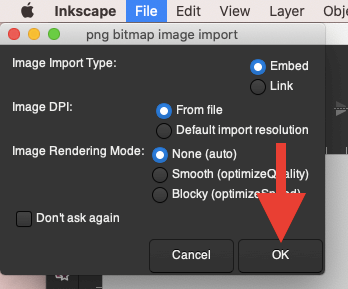
Step 3: A small window will appear to prompt you into choosing image settings. You can choose the default settings which should be Embed, From File, and None. Once you have selected these, click on the OK button. Your image will now be on your canvas.
How to Crop an Image in Inkscape
Now that your image has been imported into your canvas, you’re ready to crop it. Here’s how:
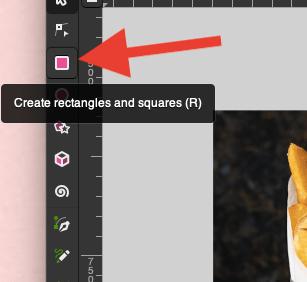
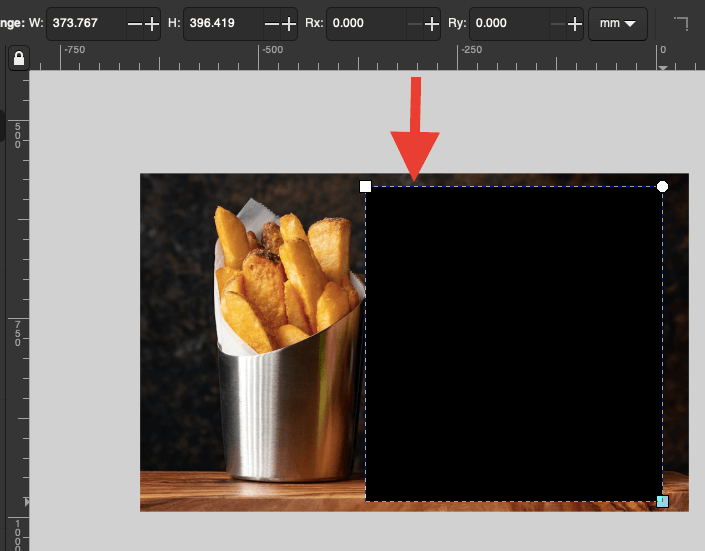
Step 1: In the left-hand tab of your canvas, select the pink rectangle icon. This is the tool that allows you to create rectangles and squares.
Step 2: Using the rectangle tool, draw a shape around the part of the image that you want to crop.
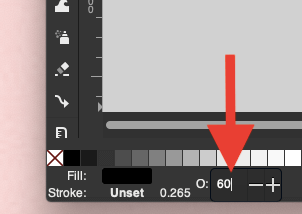
Step 3: Now we need to change the opacity of the shape so we can see the image underneath it. In the bottom left-hand corner of the canvas, double-click on the O icon. Change the Opacity to 60%.
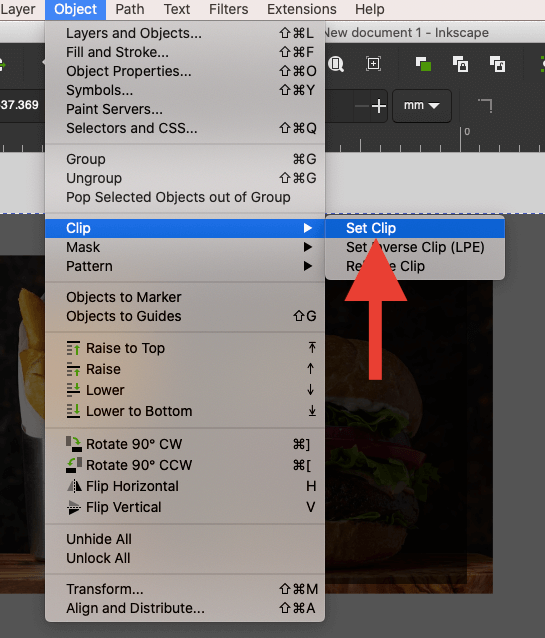
Step 4: Once you are happy with the shape you have created, tap on the Object tab in the top menu of the screen. In the drop-down menu, click on Clip and select the Set Clip option.
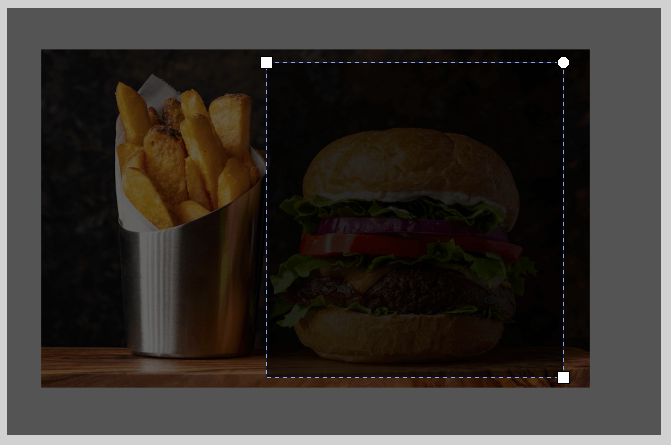
Step 5: All that remains will be the contents of your cropped shape and your blank canvas background. You can undo this and restart the action if you are not satisfied with the final result.
Pro Tip: You can crop any shape you like by choosing a different-shaped tool in the left-hand toolbar tab. Other shapes offered include text letters, circles, stars, and not symmetrical shapes.
FAQs
Below is a selection of your frequently asked questions about cropping an image in Inkscape. I have briefly answered them for you below:
Can I crop a PDF image in Inkscape?
Yes, you can crop a PDF image in Inkscape. You can follow the same method shown above in order to crop a PDF, JPG, or SVG image in the app.
How do I crop part of an image in Inkscape?
You need to make sure you have selected the right shape tool first. If you are cropping a small or oddly shaped part of the image, you should use the path or freehand selection tool to select the area and then follow the clipping steps shown above.
How to vectorize an image in Inkscape?
As this is a vector-based program, whatever you import/create will automatically be transferred to the vector graphics form.
Conclusion
Cropping an image is one of the most commonly used tools in Inkscape. I recommend spending some time today to practice importing and cropping images in the app so you can spend some time exploring the options and shapes that you have access to so when the time comes you will be fully familiar with all of your cropping options.
Have you cropped an image in Inkscape before? Leave your own hints and tips in the comments section below.