
If you’ve ever attempted manipulating or color-correcting images, you’ll know how difficult it can be to make aesthetically pleasing edits. If you don’t match the colors or lighting correctly, it’s extremely hard to recreate your images attractively! So what can we do?
My name is Skyler, and today I’ll be showing you how to color correct and enhance your images realistically and expertly in Photoshop.
So how exactly can we accomplish color correction on this level without hiring a professional? We’ll need to use one of Photoshop’s many color correction methods, such as – Threshold, RAW Filter, or Hue and Saturation Layer tools to adjust your images and edit their properties before applying them for quick and easy enhancement.
If this sounds like something you’re interested in learning, you’ll want to follow along below to learn how to utilize this tool for your edits and manipulations in the future!
Table of Contents
Method 1: Threshold Adjustment & Curves
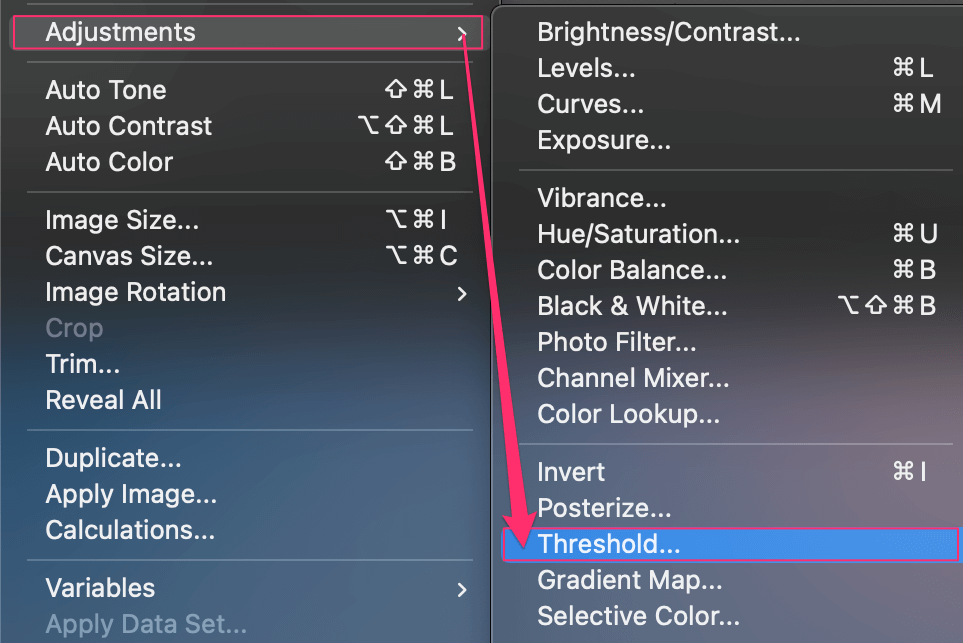
The first method is for black & white edits or corrections primarily. To open this dialogue, you’ll have to navigate to Adjustments > Threshold.
This will bring up the Threshold Panel, where we can adjust the application of the curve dialogue.
Once you’ve summoned this panel, you’ll see a numerical input option called Threshold Level, followed by your Threshold Slider. You can use either one to adjust the intensity of your threshold levels.
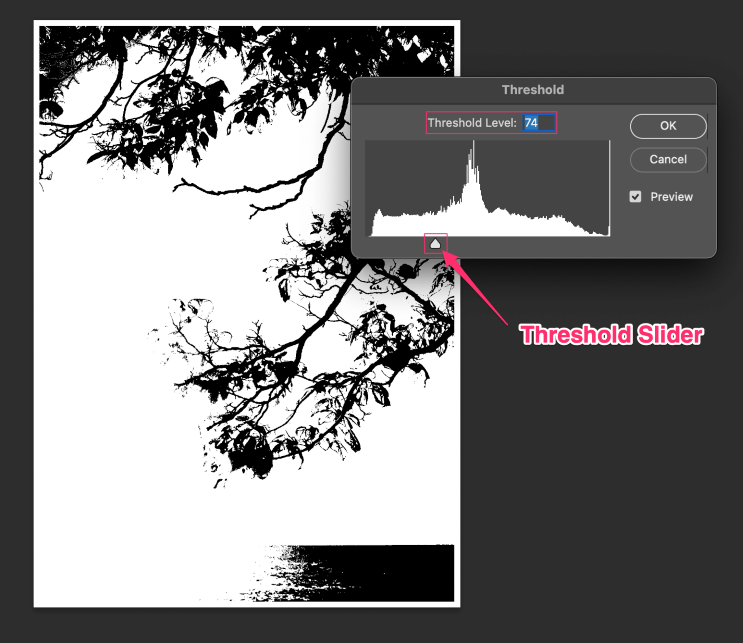
The further you drag your slider to the left, the lighter the image will appear. Opposite this, the further you drag your slider right, the darker the appearance. When you’re satisfied with your edits, simply press OK and you’re all set!
Method 2: Camera RAW Filter
Job well done! You’ve learned the first method easily, but there’s more to come still. The following tools are more applicable to a wider range of images, so they’re sure to be useful.
The Camera RAW Filter is a personal favorite for editing photography in post. I turn to this method about seventy-five percent of the time and I’m never disappointed in the results.
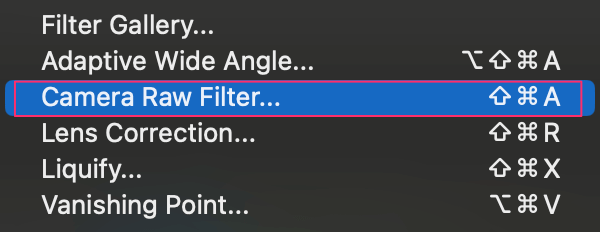
To summon the Camera RAW Filter dialogue, you’ll either need to navigate to Filter > Camera RAW Filter or use the shortcut Shift + Ctrl/Command + A on your keyboard.
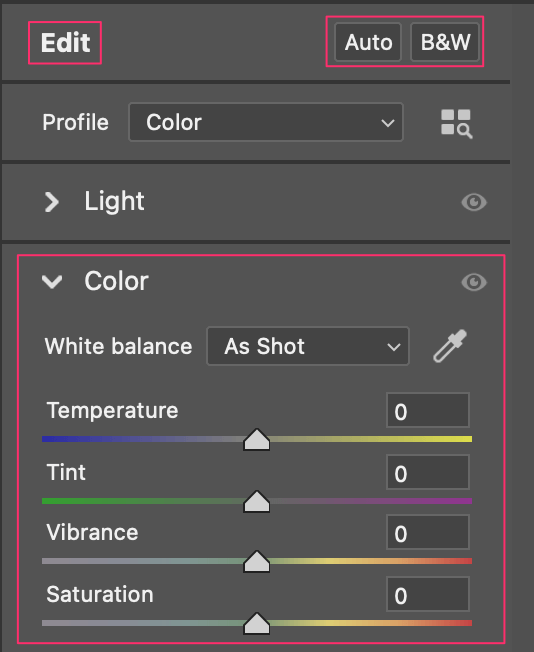
Once you’ve done this, a new set of commands will become available – lots of them in fact! For standard color corrections, we’ll want to focus on the Color dropdown menu. This allows us to adjust the temperature, saturation, and more.
- Temperature: This slider controls the temperature of your image, giving it a cooler blue or warmer red depending on your selection.
- Tint: This is similar to color temperature, but it adjusts the balance of green and magenta tones in your image.
- Vibrance: Like saturation, this manipulates the intensity of the colors in your image. The difference is that it usually affects the mid-tones of your image.
- Saturation: Opposingly, This slider will either add to or deplete the overall level of color intensity in your image.
Simply use the sliders to manipulate your image and you’ll immediately see the results in the preview window. In addition to these features, the color dropdown allows us to correct the White Balance of our images by choosing As Shot from the menu.
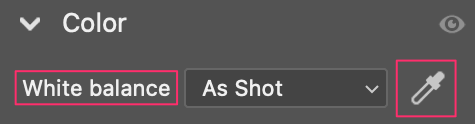
If you’re not satisfied with the default setting, you can change this by clicking the eyedropper tool and selecting the part of your image you’d like fixed!
Mastering the Camera RAW Filter
We’ve only just scratched the surface of this extremely powerful tool! If you’d like to learn more and accomplish polished, professional edits seamlessly look no further than the attached tutorial.
Method 3: Hue & Saturation Layer
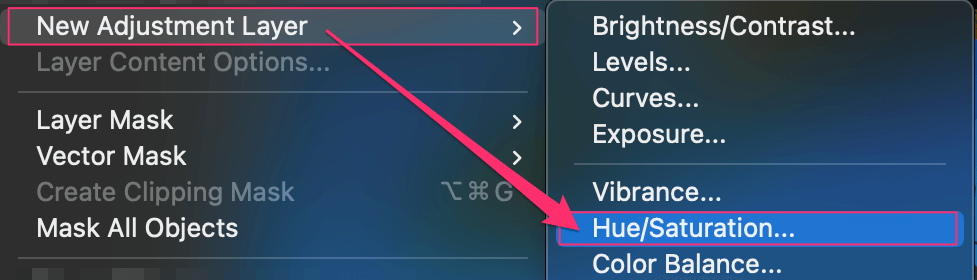
Last, but certainly not least – the Hue & Saturation Layer method, which allows us to mimic their curves and functions. We can find this layer by navigating to Layer > New Adjustment Layer > Hue/Saturation.
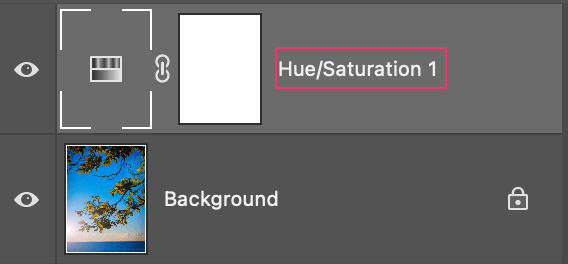
Once you’ve selected this, a new layer will appear in our Layers Panel. This will also allow us to summon the properties menu for our new hue and saturation layer. If you can’t find it among your panels, you can bring it up by clicking on the Gradient Box within your new hue/saturation layer.
Great! Once you’ve got the Properties Panel within reach, you can see the Hue, Saturation, and Lightness Sliders.
- Hue: This slider will adjust the color of all the objects in your image to your selection.
- Saturation: On the other hand, this slider will either add to or deplete the level of color intensity in your image.
- Lightness: This will then manipulate the Contrast Levels in your image.

Once you’re satisfied with the slider levels and image manipulations, you’re all set!
Conclusion
Congrats! You’re officially on your way to mastering color correction on a professional level, all without utilizing shortcuts or breaking the bank. Be sure to continue to utilize this tutorial and the attached video for the Camera RAW filter if you’re looking to up your game.