
Pressure sensitivity is the key to creating dynamic digital art. With pressure sensitivity, you can vary the width of your strokes and control how dark you would like your lines.
In PaintTool SAI, you can easily turn on and adjust your pressure sensitivity through the brush settings and minimum pressure.
My name is Elianna. I have a Bachelor of Fine Arts in Illustration. I have used PaintTool SAI for over seven years and know everything there is to know about the program. Soon, so will you.
In this post, I am going to show you a couple of ways to turn on and adjust pressure sensitivity in PaintTool SAI.
Let’s get into it!
Table of Contents
Key Takeaways
- Check the Min Size of your brush settings and make sure it is less than 100%.
- Change the minimum pressure settings in your PaintTool SAI options. You can access this menu through Help > Options in PaintTool SAI ver. 2 and Others > Options in ver.1.
Method 1: Use the Brush Settings
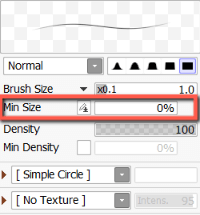
In PaintTool SAI the Min Size slider in the brush settings menu “changes the brush size when pressure is 0.” This affects the size of your brush depending on how much pressure you apply while drawing. Default PaintTool SAI brushes have Min Size values ranging from 0-50%.
Here are some examples of the default minimum size values of default PaintTool SAI brushes.
| Brush Type | Min Size Value |
| Pencil, Eraser, Smudge, Binary Pen, Select Pen, Select Eraser | 0% |
| Airbrush, Brush, Watercolor, Marker, Effect Pen, Scatter, Smudge, | 50% |
As a general rule, the higher value % your minimum size is, the less pressure sensitivity your brush will have. Therefore, if you want to have a more reactive brush, it is better to choose values 50% and below.
The benefit of using this method to turn on and adjust your pressure sensitivity is the ability to customize the brush to your comfort and preferences.
Follow the steps below to turn on and adjust pressure sensitivity using Min Size.
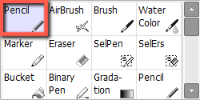
Step 1: Click on any brush in the PaintTool SAI tool menu. For this example, I will be using Pencil.
Step 2: Find Min Size under Brush Size in the brush settings menu.
Step 3: Adjust the slider to your preferences. For a more reactive brush, choose a lower value %. For a less reactive brush, set your values to 50% and above.
Draw! Enjoy.
Method 2: Change Minimum Pressure Settings
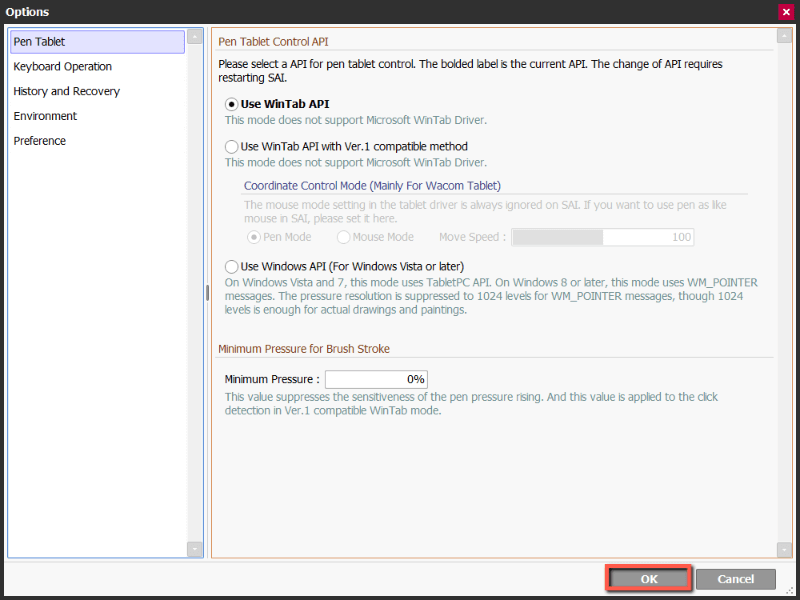
Another way to turn on and adjust the pressure sensitivity in PaintTool SAI is by changing the minimum pressure settings in the Pen Tablet section of PaintTool SAI’s options. Here’s how:
If you’re using SAI Version 2, follow the steps below. If you’re using SAI version 1, scroll down just a bit more.
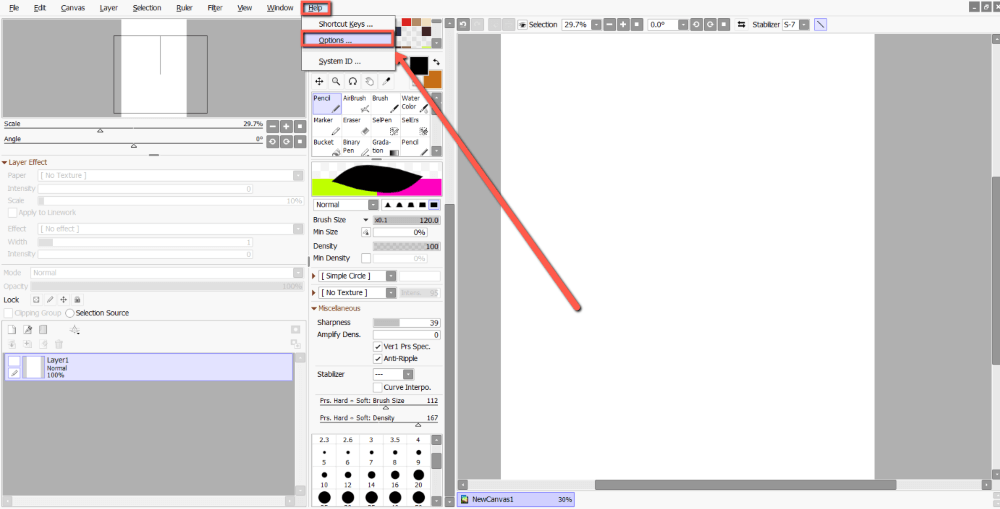
Step 1: In the top menu bar, click Help > Options.
Step 2: In Pen Tablet find the Minimum Pressure for Brush Stroke.
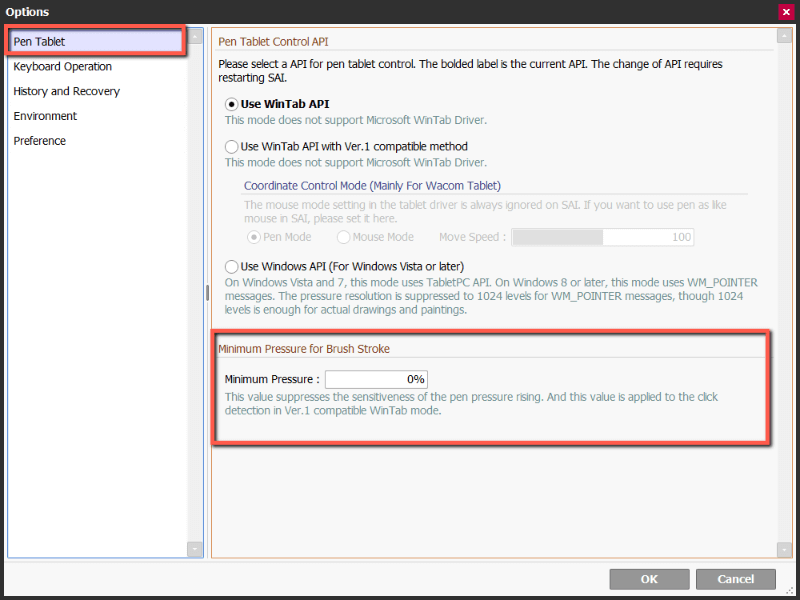
Step 3: Use the slider to adjust the minimum pressure you desire. Similar to the method above, keep your values low if you prefer a more reactive brush. The default settings for minimum pressure are usually 0.
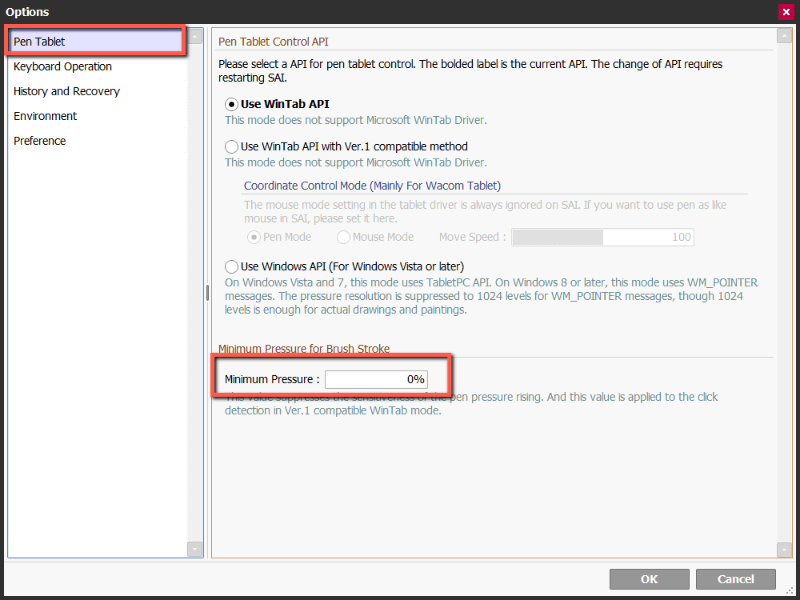
Step 4: Hit Enter on your keyboard or press OK.
Enjoy!
If you’re using SAI Version 1, follow these steps:
Step 1: In the top menu bar, click Others > Options.
Step 2: Click on Digitizer Support.
Step 3: Set Click Detection Pressure to your desired value.
Final Thoughts
Knowing how to turn on and adjust your pen pressure sensitivity key to create a custom digital drawing experience suited to your preferences and needs.
In PaintTool SAI, you can turn on and adjust your pressure sensitivity using the Min Size value in the brush settings and change the minimum pressure value in your PaintTool SAI options. Experiment to find what feels the most comfortable for you.
Just remember that most PaintTool SAI default brushes have a min. Size value of 0-50% and the default minimum pressure setting is 0%. You can always change your settings back to these defaults in the future if needed.
What pressure sensitivity setting do you use for your brushes? Tell me in the comments below!