
To create a new brush, tap on the + icon in your brush library. Then select the Shape Editor in your Brush menu. Tap on the Import option and select the Star shape from your Source Library. Adjust your brush settings accordingly and select Done.
I’m Carolyn and I’ve been using Procreate for over three years to run my digital illustration business. This means I’m always looking for new ways to save time, like creating my own brushes that produce effects that would normally take a significant amount of time.
Creating a Star Brush in Procreate is basically the same as creating a stamp in Procreate except you can use a shape from the Source Gallery or import a star shape of your own. This is a great way to create a background effect quickly and today I’m going to show you how.
Note: Screenshots are taken from Procreate on iPadOS 15.5.
Table of Contents
Key Takeaways
- This is a quick and efficient way to add detail to the background of the artwork.
- You can adjust the brush settings to create different types of star brushes.
- You can use this method to create any other shape brushes in Procreate too.
8 Easy Steps to Make a Star Brush in Procreate
This method is a quick and easy way to create your very own star brush in Procreate. This will allow you to produce a cool starry pattern without having to even lift your stylus off your screen. Here’s how:
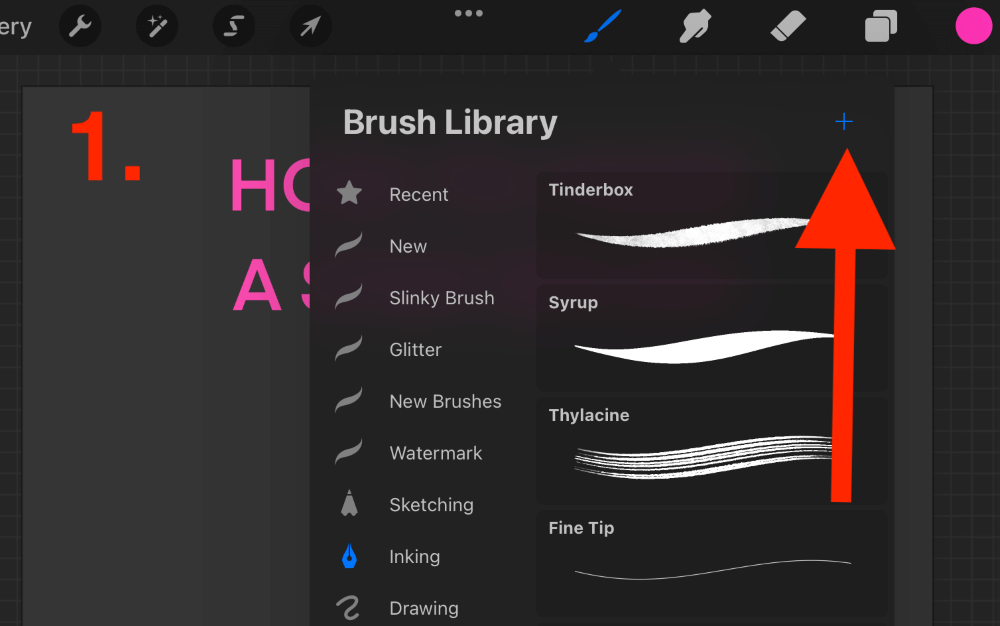
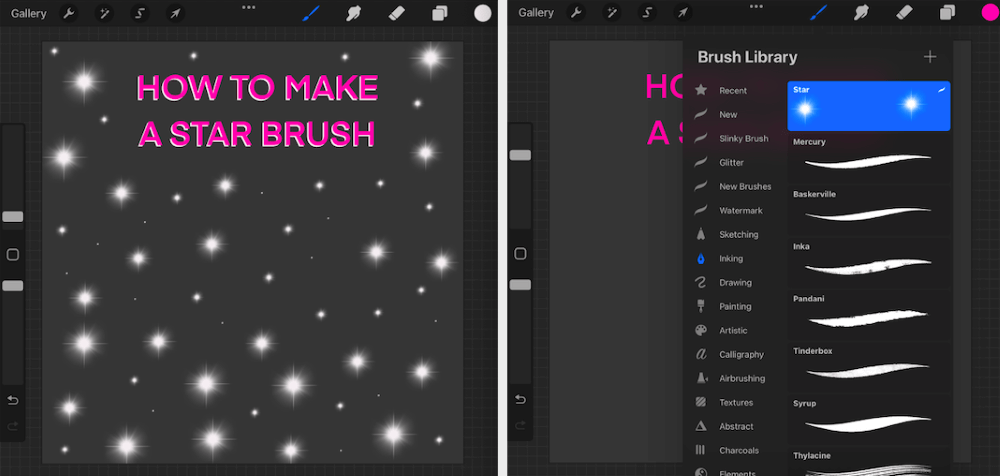
Step 1: Open your Brush Library by tapping on the paintbrush icon. In the top right-hand corner, you will see a + symbol. Tap on this to open your new Brush Studio.
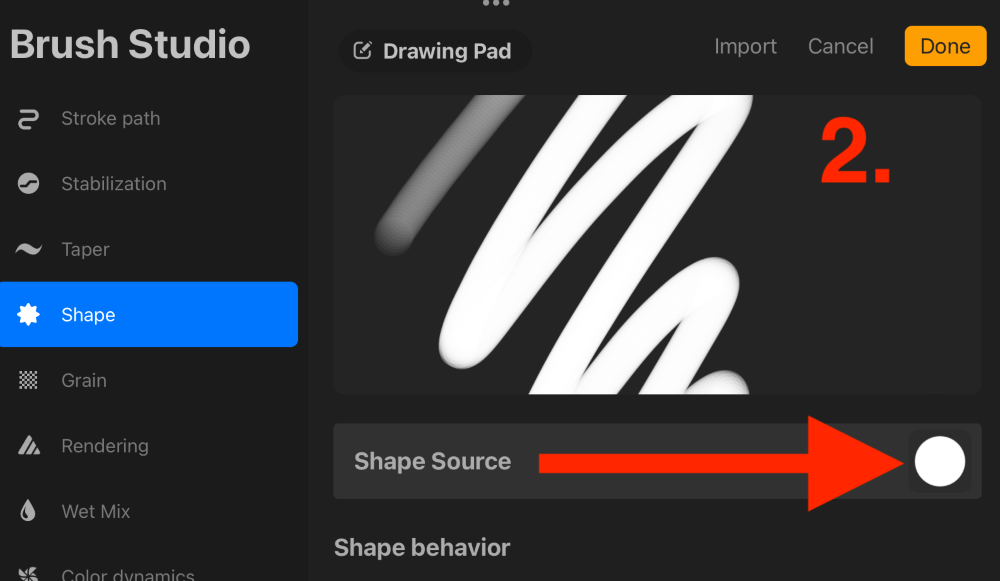
Step 2: In the drop-down menu on the left, select the Shape menu. In the Shape Source tab, tap on the white circle to the right. This will open your Shape Editor.
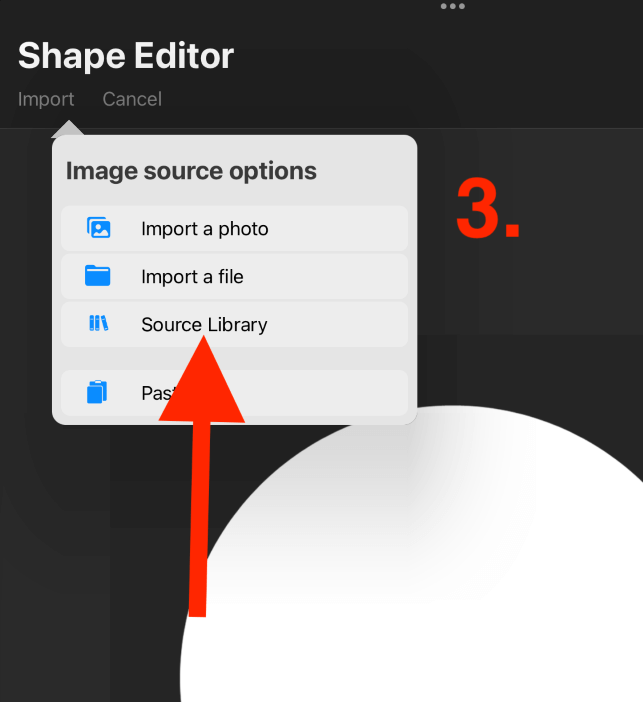
Step 3: In your Shape Editor, tap on the Import option and select Source Library.
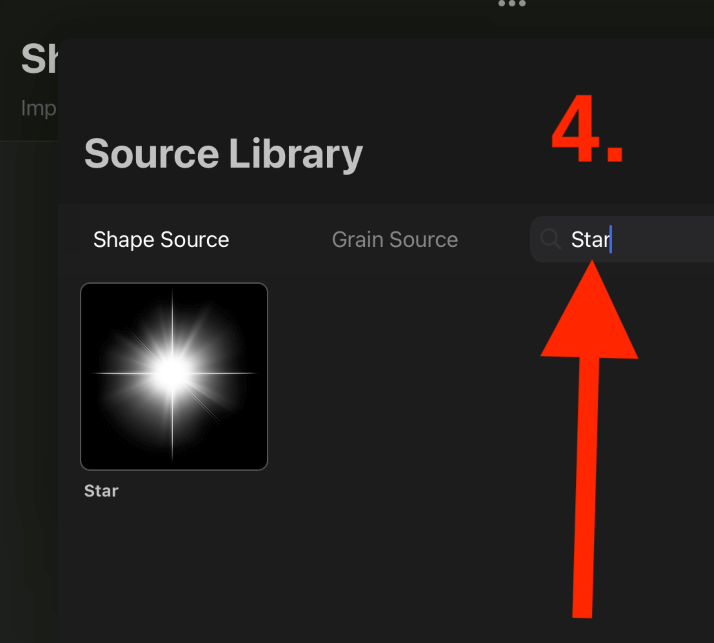
Step 4: In the search box, type in “Star” next to Grain Source. Select it and tap on Done.
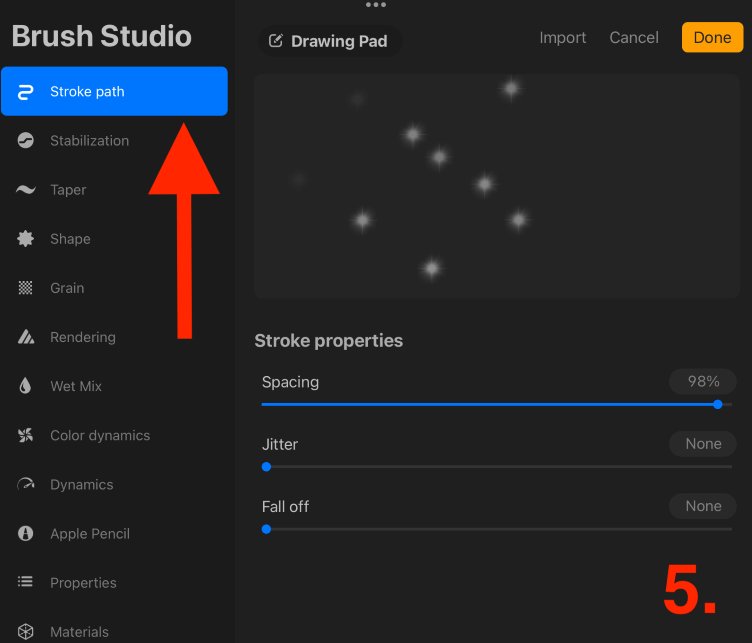
Step 5: In your Brush Studio, open the Stroke Path menu and adjust your spacing to 100%.
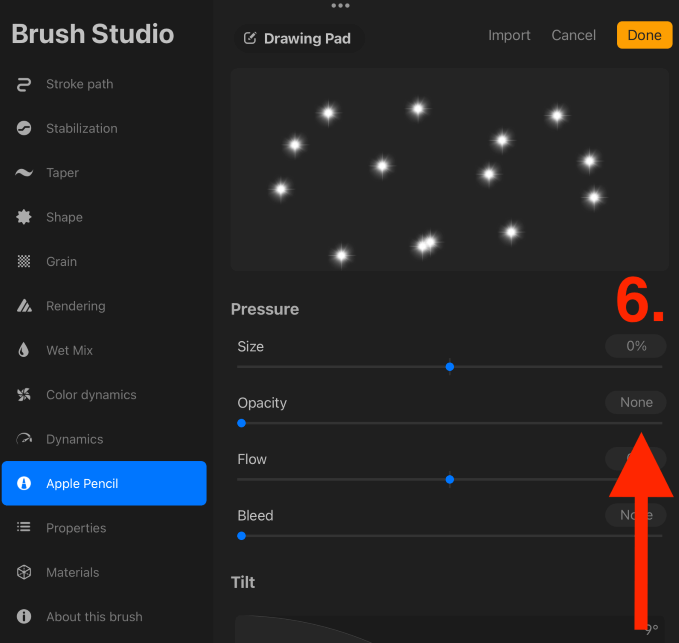
Step 6: In your Brush Studio, open the Apple Pencil menu and adjust your Opacity to 0%.
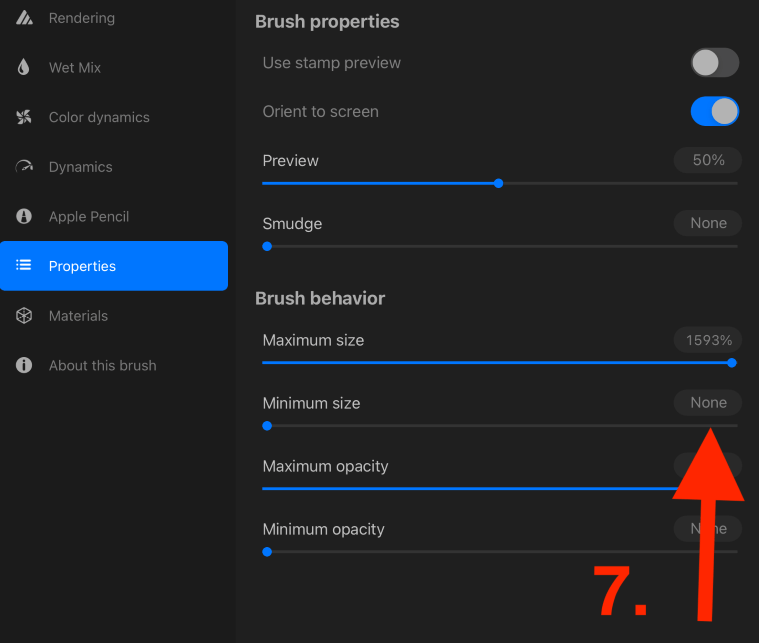
Step 7: In your Brush Studio, open the Properties menu. Adjust the Preview to 50%, the Smudge to 0%, the Maximum Size to 100%, and the Minimum Size to 0%.
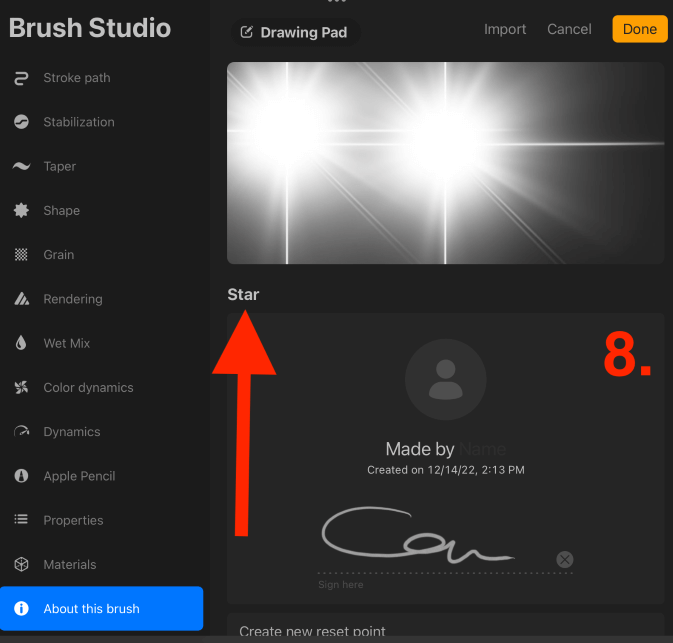
Step 8: I recommend renaming your new brush so that you can distinguish which one it is in your Brush Library. You can do this by opening the About this brush menu and tapping on the Untitled section. When you are finished, tap on Done.
Your brush is now active and you can draw with it on your canvas.
Procreate Brush Studio Adjustments
Below is a brief explanation of the individual adjustments you need to make when creating a star brush and how they will affect your finished product.
Shape Source
This determines the base shape of your brush’s stamp and is a starting point for your new brush.
Stroke Path
Increasing the Spacing to 100% will create a consistent and continuous pattern using the shape you have chosen as the source.
Opacity
Reducing your opacity to 0% means the pressure you put on your Apple Pencil will not affect the clarity of your stamp and it will produce solid color stamps consistently.
Smudge
Reducing this setting will prevent your brush from smudging and it will come out with a solid shape.
Preview
This setting determines the size of your stamp that you will be able to sample and view in the Drawing Pad window of your brush library.
Maximum and Minimum Size
This determines the extent of how big or small you can make your stamp.
About This Brush
This is where you can save your new brush as your own by adding your own signature to it and also renaming the brush title. This is particularly useful if you plan to sell or share your personalized brushes.
FAQs
Below is a selection of some of your frequently asked questions about making a star brush in Procreate. I have briefly answered them for you:
How to make a star shape in Procreate?
You can use the shape tool to create your own star shape or you can use the Flare paintbrush which is accessible in the Luminance menu of your Brush Library.
How to create my own brush in Procreate?
To create your own brush in Procreate, open your Brush Library by tapping on the paintbrush icon. In the top right-hand corner, tap on the + symbol and edit your brush to your liking. When you are finished, tap on Done.
How to make a star in Procreate?
You can manually draw a star shape using your Apple Pencil and hold down the stylus on the canvas until your QuickShape tool is activated. This will create a symmetrical star shape using the original as a reference.
Are there free Procreate star brushes?
You can find star brush sets online available for purchase or you can create your own using the method shown above.
Is there a sparkle brush in Procreate?
There is a pre-loaded sparkle brush in Procreate. It’s called the Glitter paintbrush and it can be found in the Luminance brush palette in your Brush Library.
How to make a star brush in Procreate Pocket?
You can follow the same method as shown above to create your own brush in the Procreate Pocket app on your iPhone.
Conclusion
Creating your own star brush in Procreate is very simple and quick to do. And in the long run, creating brushes like this with patterns that you use frequently can help reduce your time spent adding the finer details to your drawing if you have them already prepared as a brush.
Learning how to create your own brush of any kind in Procreate is a very useful skill to have and it doesn’t take too long to do. I highly recommend all Procreate artists learn this method early on so that you have full access to your own personalized brush library.
Have you created your own star brush in Procreate? Share your versions in the comments section below.