
Import the image you want to make a stamp with. Fill the layer below with a solid color, merge the two together and copy. In Brush Studio, tap the + icon. Under Shape, import your image and adjust the spacing to the max in the Stroke Path, and tap Done.
I’m Carolyn and I’ve been using Procreate for over three years to run my digital illustration business. I spend most of my days on the app either drawing or learning new techniques and features that I never even knew existed. The options are really endless in Procreate.
Creating your own stamp in Procreate can be used in a variety of different ways. You can use your stamp to easily add your signature or business name to an artwork, create fun patterns or even design a unique shape that you use frequently like a raindrop or clouds.
Table of Contents
Key Takeaways
- Creating a stamp in Procreate involves a lot of steps but is a quick process.
- You must have your desired shape saved to the images or files on your device before you begin.
- You can adjust the size and opacity of each stamp you create.
- Your stamp will be accessible in your Brush Library which means you can use it the same way you would as a paintbrush with different colors and sizes.
- The three settings to use when creating your stamp are the Shape Source, the Spacing, and the Opacity.
- You can also use your new stamp as an eraser tool to create negative shapes in your artwork.
How to Make a Stamp in Procreate (Detailed Steps)
This method consists of many steps, but it should only take a couple of minutes to complete. Ensure you have the shape or image you want to use saved in your images or files on your device before you jump into the steps below.
Note: Screenshots are taken from Procreate on iPadOS 15.5.
Step 1: On your canvas, import the image you want to use from your device onto a new layer. Add a layer beneath it with a solid color.
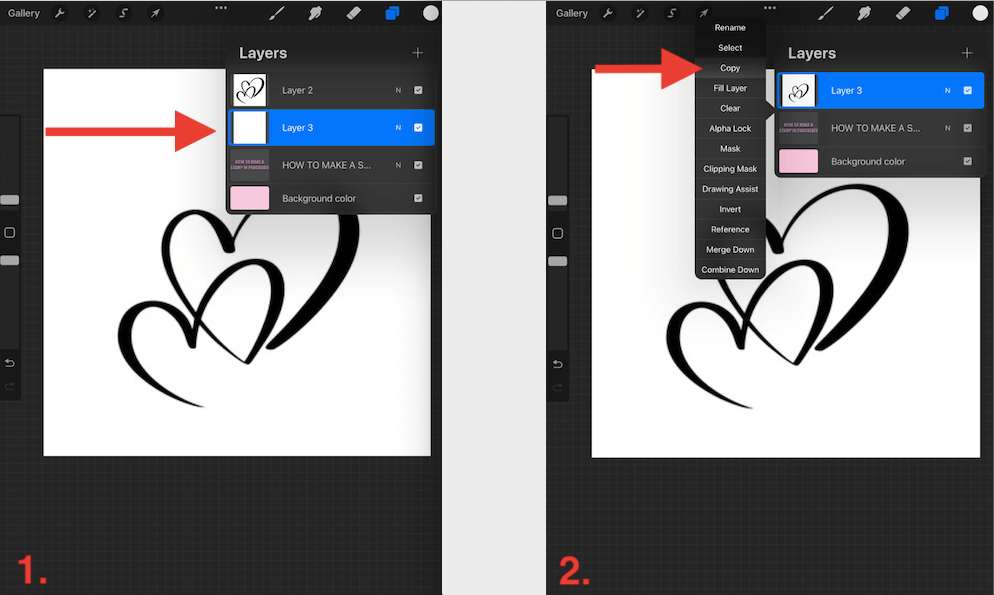
Step 2: Combine the two layers together. This will ensure your background will be removed when creating your stamp. Tap on the layer’s thumbnail and select Copy.
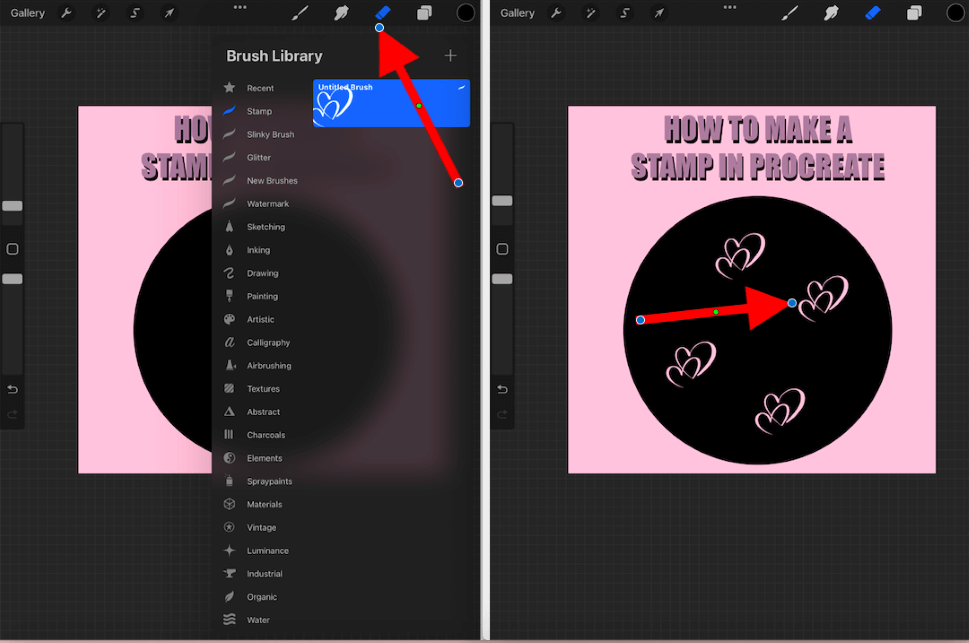
Step 3: Open your Brush Library by tapping on the paintbrush icon at the top of your canvas. Tap on the + symbol to start a new brush.
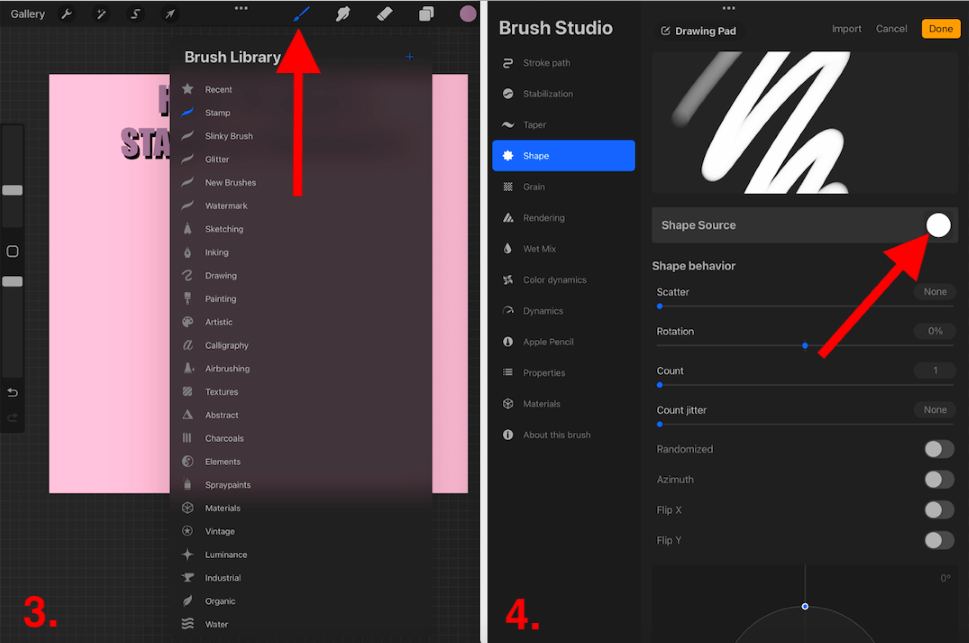
Step 4: In your Brush Studio, tap on the Shape menu. Select the option that says Shape Source. This will open the Shape Editor.
Step 5: In the top left-hand corner, tap Import. Select the Paste option and this will add your copied image to your shape canvas.
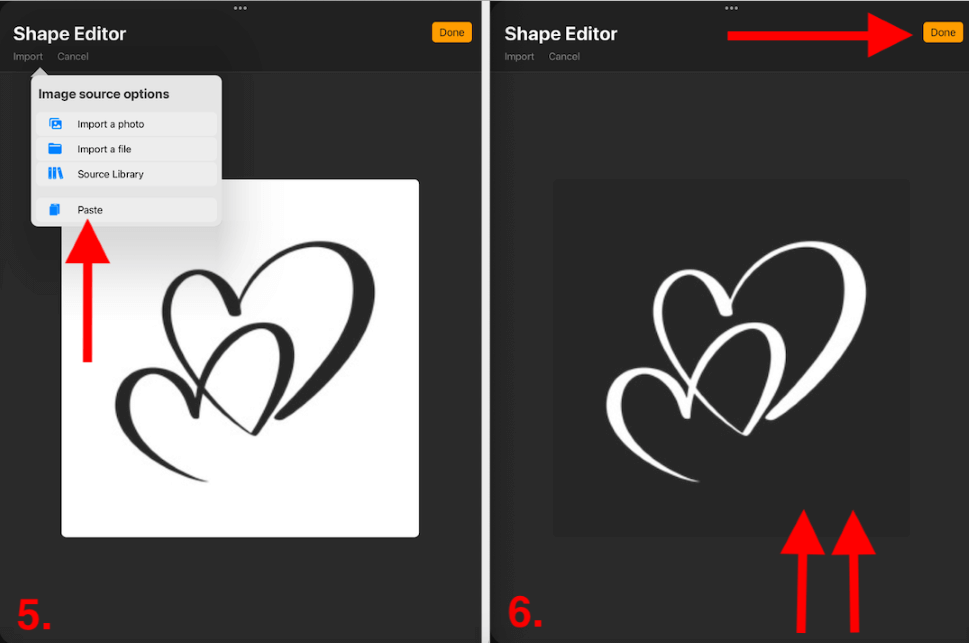
Step 6: Using two fingers, tap on your shape to invert it. This will remove the background so that only the shape will appear in your stamp. When you have completed this step, tap Done to confirm your changes.
Step 7: Now you need to set the Spacing to Max in your Stroke Path menu.
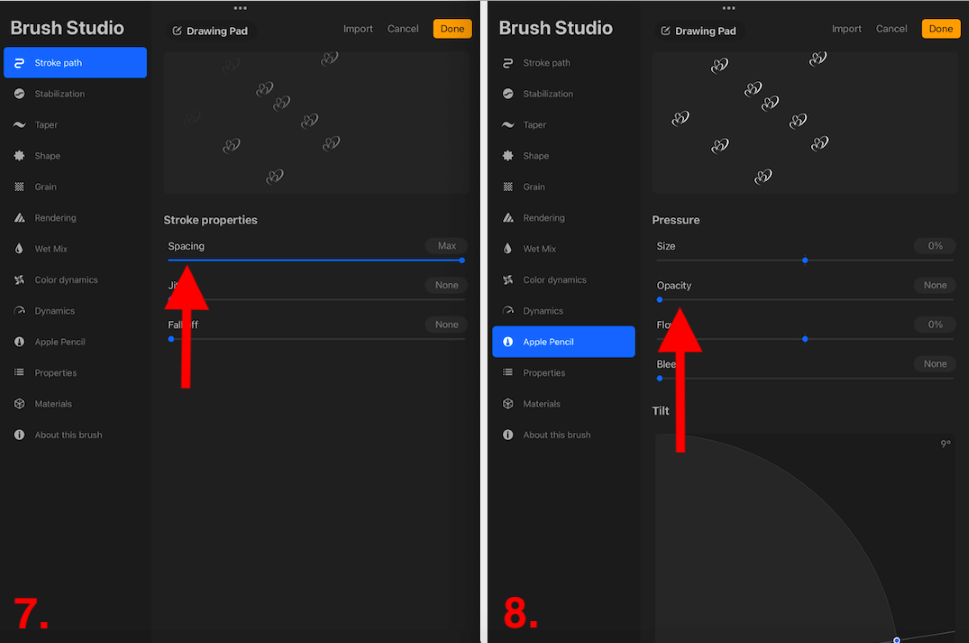
Step 8: In the Apple Pencil menu, reduce the Opacity to None. This will ensure your stamp will be solid and clear.
Step 9: In the Properties menu, you can adjust the size of your stamp by sliding the Maximum Size toggle to your liking. When you are happy with your stamp settings, tap Done in the top right-hand corner to close your Brush Studio.
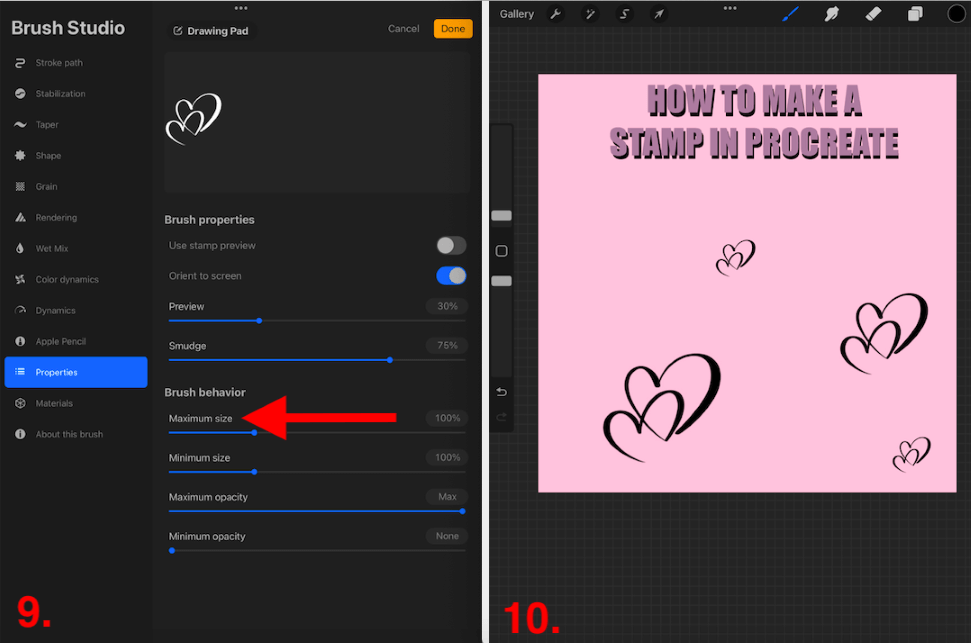
Step 10: Your new stamp brush is now active and you can apply it to your artwork. It acts the same as a paintbrush so you can adjust the size, opacity, and color of your stamp.
Pro Tip: Ensure the image you use for your stamp is a solid shape and color with no background. The simpler your shape the better. This will provide the best and clearest results when creating your stamp.
Fun Fact
You can also use your new stamp brush as an eraser tool. This is a great way to create a negative effect in your artwork if you don’t want to add it as a new color. Simply tap on your Eraser tool to select the new stamp brush and work away.
FAQs
Below is a selection of frequently asked questions about creating a stamp on Procreate. I have briefly answered them for you:
How to make a brush in Procreate from an image?
Following the steps shown above will show you how to create a brush from an image. Make sure the image is saved to your device before you start and import it into your Shape Source in the Brush Studio.
How to make a colored stamp in Procreate?
All brushes in Procreate will default to black until you change the color on the Color Wheel in the top right-hand corner of your canvas. This means you can follow the steps above to create your brush and then edit the color before you apply paint to your canvas.
How to make a circle stamp in Procreate?
Save an image of a circle to your device. You can use Google Images or draw a circle yourself in Procreate and save it to your device. Then follow the steps above to import the image into the Shape Source setting in the Brush Studio.
How to make a signature stamp in Procreate?
Draw your signature in Procreate and save it to your device with a transparent background. Then use this image when following the steps above to import the image into your Shape Source in the Brush Studio.
How to make a stamp in Procreate Pocket?
Great news Pocketeers. You can follow the exact same steps to create a stamp in Procreate Pocket and you have full accessibility to all of its unique features too.
Conclusion
The stamp feature on Procreate has unlimited potential and I have seen it used for a variety of different techniques but mostly it’s a quick way for artists to apply their brand or signature to an artwork. This provides a professional level of consistency across all of your projects.
This looks like a long process as there are so many steps to take, but I assure you it is simpler than it looks when you actually get down to it. The hardest part is finding the right image or shape to use that will give you the best results. Try the method above if you don’t believe me.
Have you created your own stamp in Procreate? Leave your hints or tips in the comments section below to share your wisdom.