
Start by sketching the dimensions of your characters’ facial features to use as a guide. Then add in the details of the face like the eyes, nose, and mouth. Add a new layer and begin to add color and details to your character. Finally, add shadows and save.
I’m Carolyn and three years ago, I established my digital illustration business using Procreate. This means for the last three years, I have spent hours every day trying to learn every feature this app has to offer. This means I know how to do almost anything on Procreate.
Many digital artists get started with Procreate due to their interest in anime or character drawing and want to animate using the app. Creating characters is very unique as it will vary from person to person as it’s the result of your imagination combined with your drawing style.
In this tutorial, I’m going to show you the detailed steps on how I draw characters in Procreate along with some drawing tips.
Table of Contents
Key Takeaways
- Always start by sketching an outline of the facial dimensions you want to use for your character to use as a guide.
- If you plan on using your character for animations or a storyline in a book, you should draw each one of your characters from multiple angles.
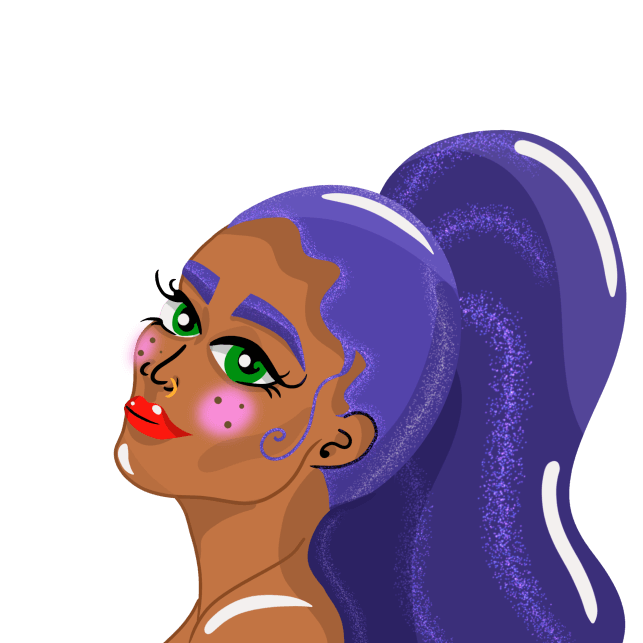
- Always save your character design with a transparent background by removing your Background Layer and saving the file as a PNG.
How to Draw Characters in Procreate – Step By Step
Before you start this method, you should have a very good idea of the character you want to create which should include the facial expression, the color of eyes, hair, skin color, and any other details you want to include.
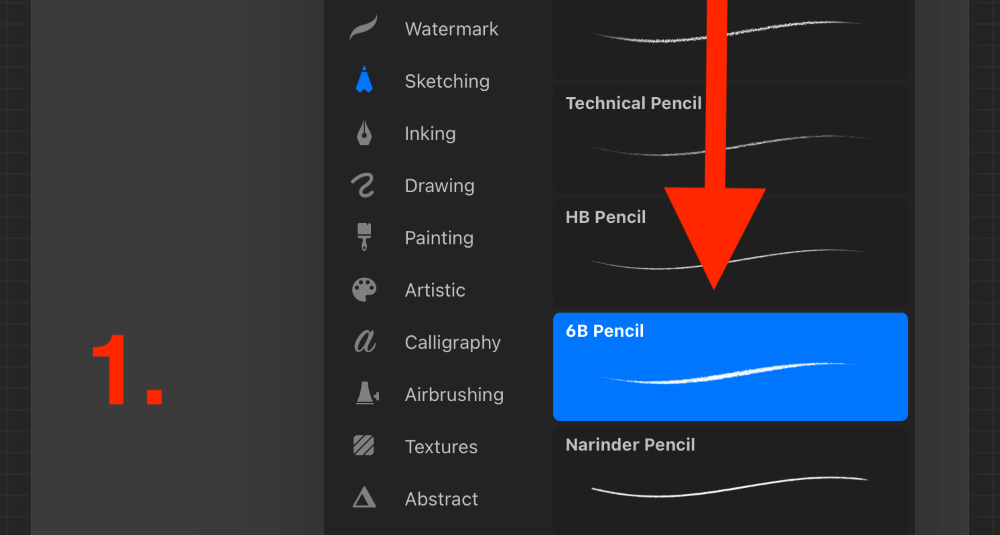
Step 1: Start your sketch by choosing the right brush. I like to use the 6B Pencil brush from the Sketching palette as it most resembles a normal pencil when drawing on your canvas.
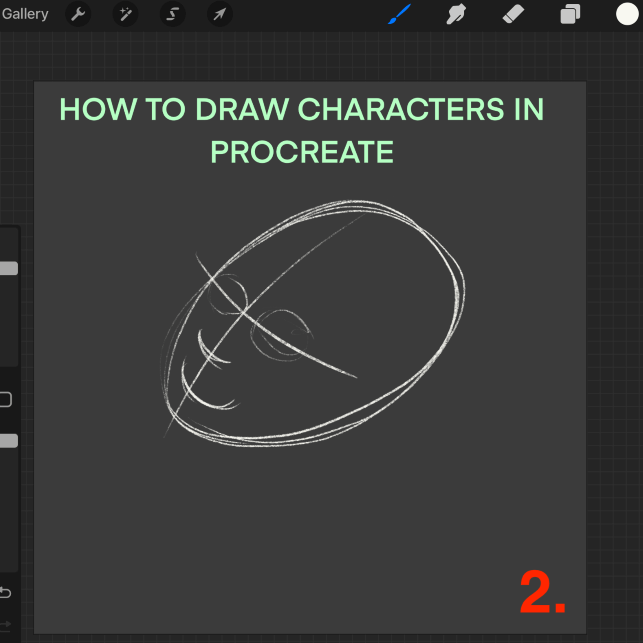
Step 2: Start by sketching the rough shape of your character’s head and add an X on the part of the face that you want to have your facial features and mark out where they will go. This will also determine the angle of your character’s face.
Step 3: Mark out the other details like the eyebrows, the hairline, and the neck to give you a better idea of where to draw the details.
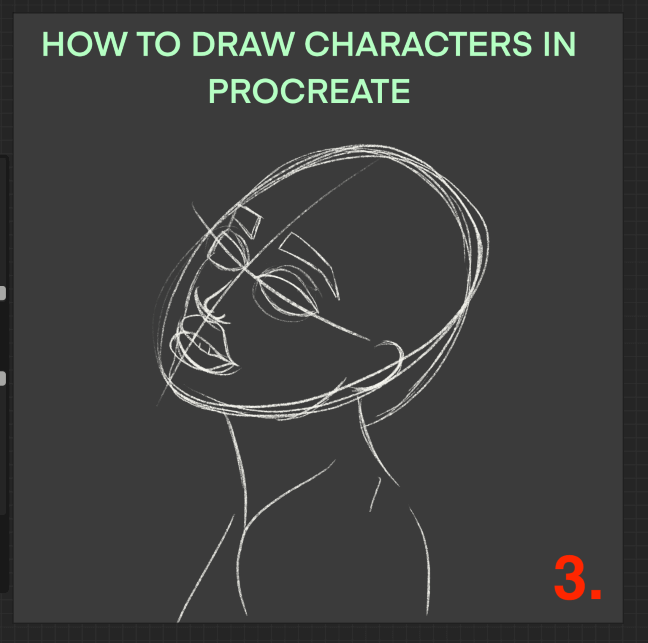
Step 4: For this step, you can add a new layer on top of your original guide or you can keep adding it. It’s time to add clearer details about the character. Here you can define the lines that depict the shape of the nose, eyes, lips, and so on.
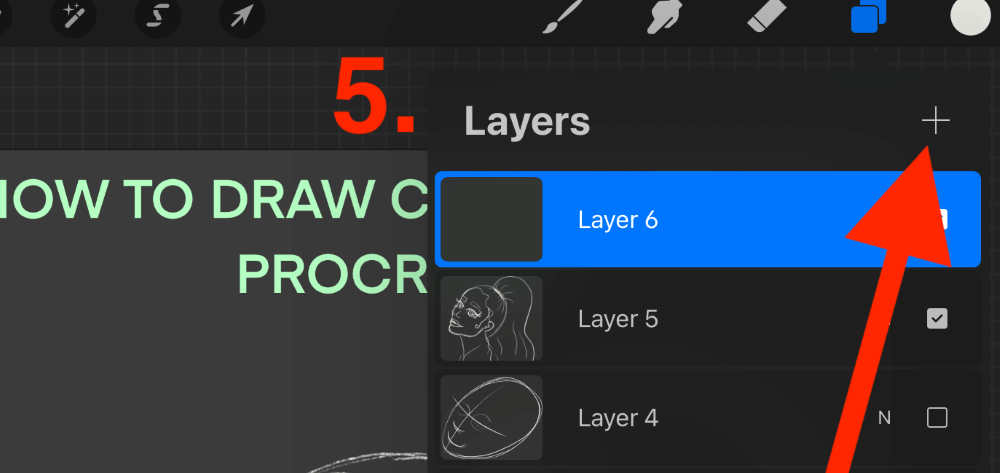
Step 5: Add a new layer to your Layers menu by tapping on the + symbol in the top right-hand corner.
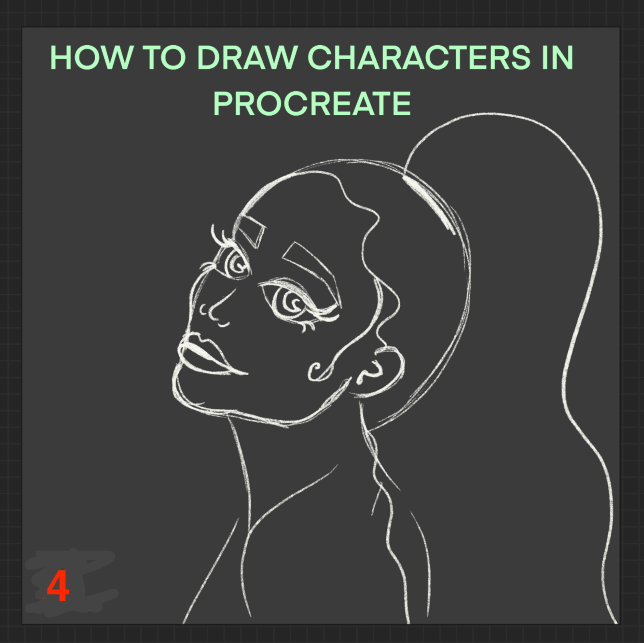
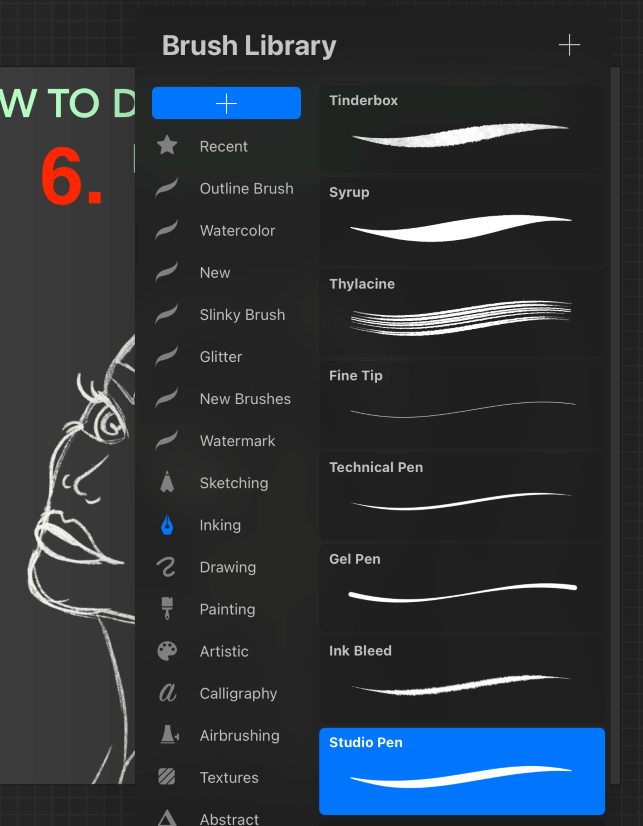
Step 6: You need to change your brush to one that is more solid and less opaque. I chose the Studio Pen brush as it’s the best for adding clean lines and solid colors. You can do this by tapping on the + symbol in the top right-hand corner of your Brush Library.
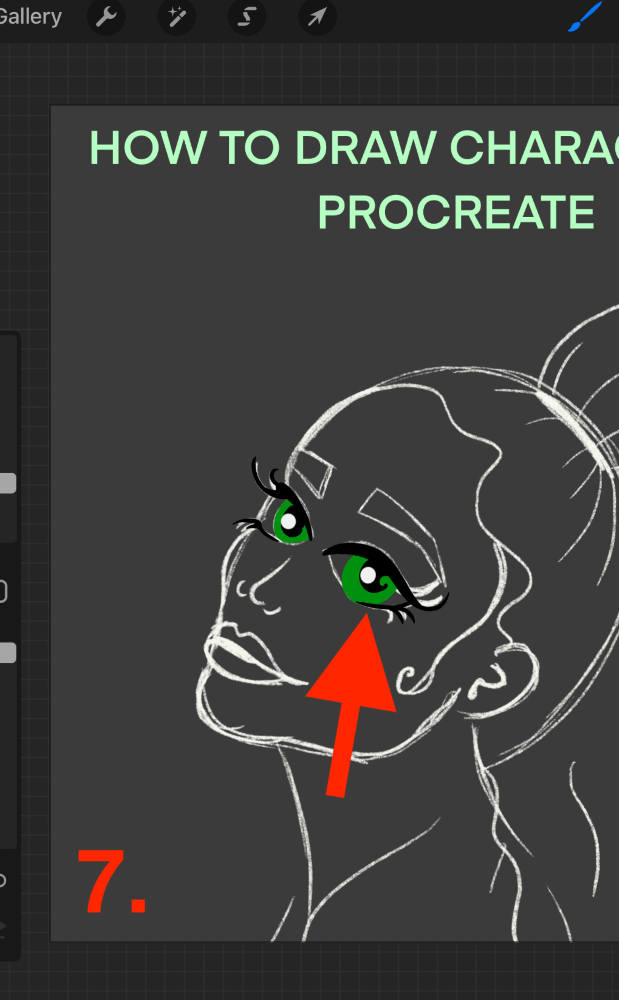
Step 7: Drawing over your guide on a fresh layer, start to fill the solid color shapes of your features. These details should be relatively basic as we will be adding the finer details later on.
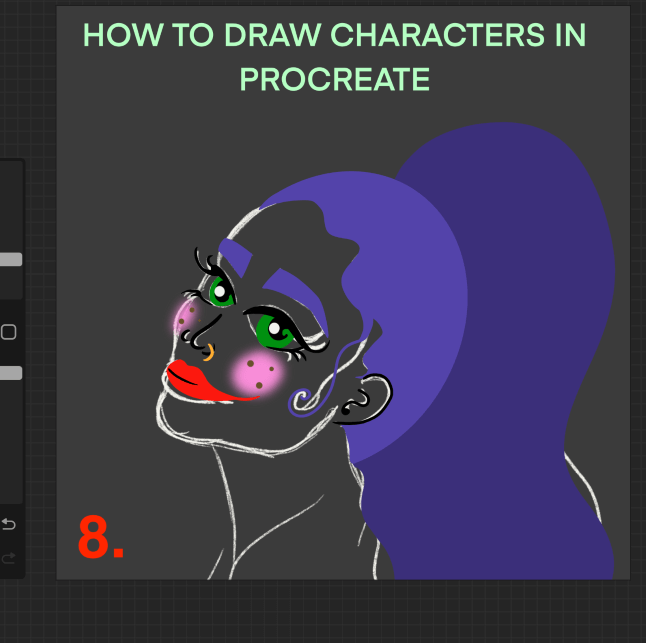
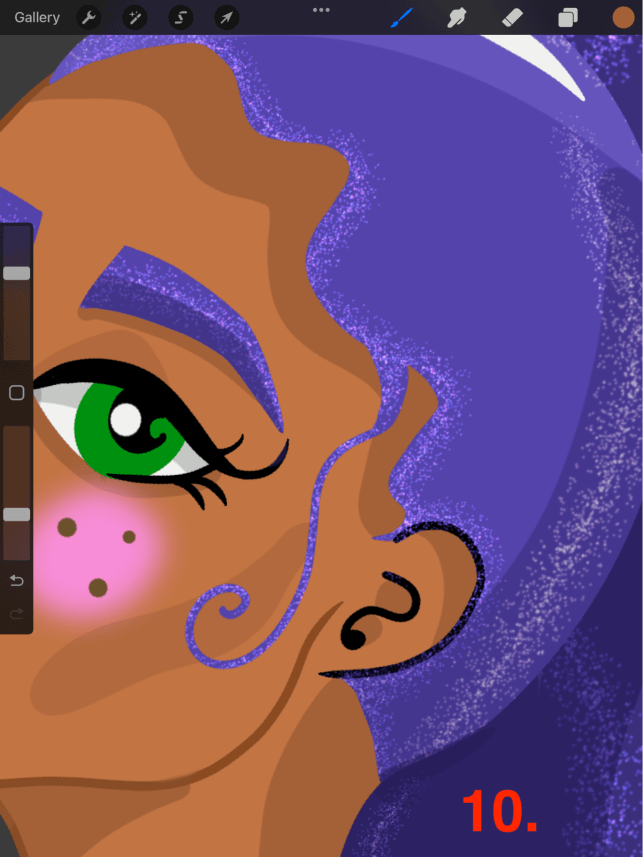
Step 8: For each new color or feature, you should be using a new layer for each if you want to make any further edits down the road. Work backward, so start by adding the top details and then move back to your hair and skin color.
Step 9: Once you have added your basic colors, add a new layer on top by tapping the + symbol in the top right-hand corner of your Layers menu. Then reduce the Opacity of your Studio Pen to 50% on the left Sidebar.
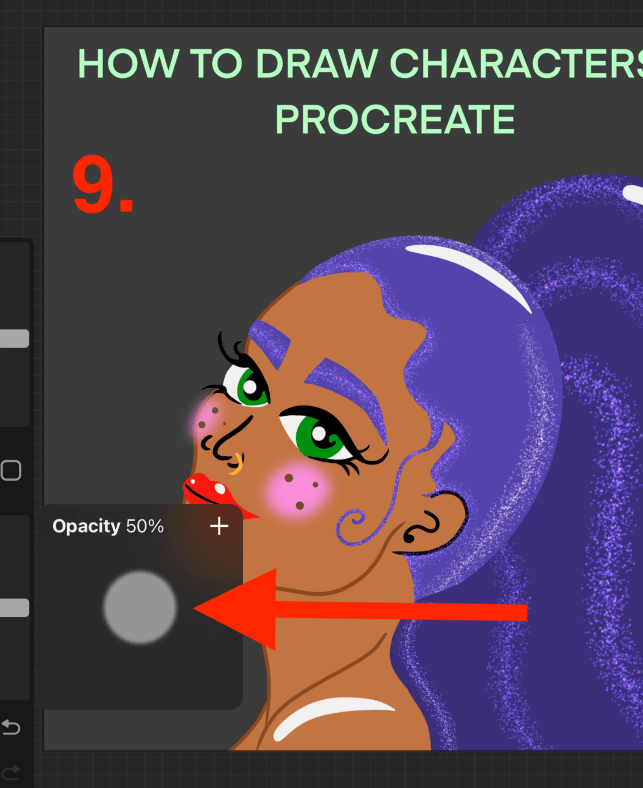
Step 10: Using your Studio Pen, add shadows on each color layer to show a light source and give your character some depth.
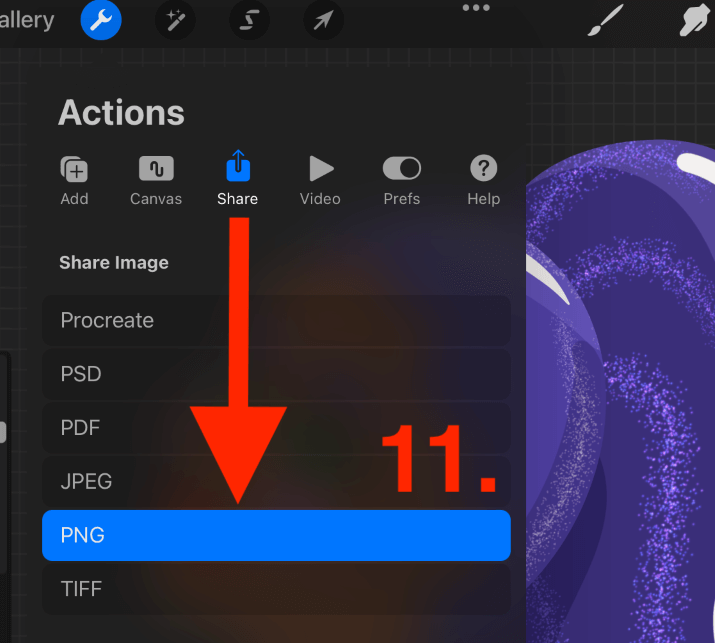
Step 11: Now it’s time to save your character design. Remove the Background Layer in your Layers Menu by unticking it. Then open the Actions tool by tapping on the wrench icon and scrolling to the Share menu. Share your drawing as a PNG file.
Pro Tip: If you are planning on using your character design in the future for projects such as animation or book illustration, you need to create multiple drawings of your character from all applicable angles to ensure consistency throughout your project.
Other Resources
There are many different tutorials to access online for drawing characters as it is such a broad subject. Below I have added two of my favorite video tutorials for drawing characters in Procreate.
Here is a video tutorial on YouTube by Genevieve’s Design Studio showing a breakdown of adding child-size dimensions for characters in Procreate.
If you want to create cartoon characters in Procreate this video tutorial by Rishi Draws gives you a full breakdown of their process from start to finish.
FAQs
Below I have answered a selection of your frequently asked questions about drawing characters in Procreate.
How to draw a cartoon character of yourself?
I would recommend following the same method as shown above except using a photo of yourself as a reference. You can insert a photo of yourself into your canvas and add a new layer on top of it. Then you can trace it or use it as a reference when drawing your cartoon.
What’s the best Procreate cartoon brush?
All of the brushes I used in this tutorial are pre-loaded Procreate brushes. However, if the brushes you’re looking for aren’t available, you can find brush sets made by other artists online that are available for purchase and download.
How to draw anime characters in Procreate?
Anime is a very distinct style of drawing so I would recommend watching a tutorial and doing your research before starting. You should have an idea of your character in your mind and then use anime-style drawing techniques to translate your ideas onto your canvas.
How do you create a cute character in Procreate
“Cute” characters are usually based on children’s facial and body proportions rather than adult ones. I recommend using the measurements and dimensions of a child when creating your character and also putting some focus on them having bigger eyes and softer expressions.
Conclusion
Learning how to draw characters in Procreate can be a long process depending on your drawing skills and what exactly you are creating your characters for. But it’s also quite an enjoyable process that gives you full control of the outcome, design, and angles.
This is a skill that is really cool once you’ve mastered it and can open up your skills to the world of animation and book illustration. Anything you need that you can’t find in this article can definitely be found online whether it’s in the Procreate Handbook or a video tutorial.
Do you create characters in Procreate? Share some of your work in the comments section below.