
The easiest way to copy and paste in Procreate is by clicking on the Actions tool (wrench icon). Then select Add (plus icon) and scroll down to the Copy selection. Open up the layer you wish to paste and repeat the first step but select Paste instead of Copy.
I’m Carolyn and I’ve been using Procreate to run my digital illustration business for over three years. As I work frequently on logo design, photo stitching, and book covers, I am constantly using the copy and paste function to add elements to my work and to duplicate layers too.
I first discovered the copy and paste tool when I was first learning how to use Procreate and my first thought was that there is no way that it’s as simple as copying and pasting on Microsoft Word. But I was wrong and it really was that simple.
In this article, I’m going to show you how to use this quick and easy tool.
Note: Screenshots from this tutorial are taken of Procreate on my iPadOS 15.5.
Table of Contents
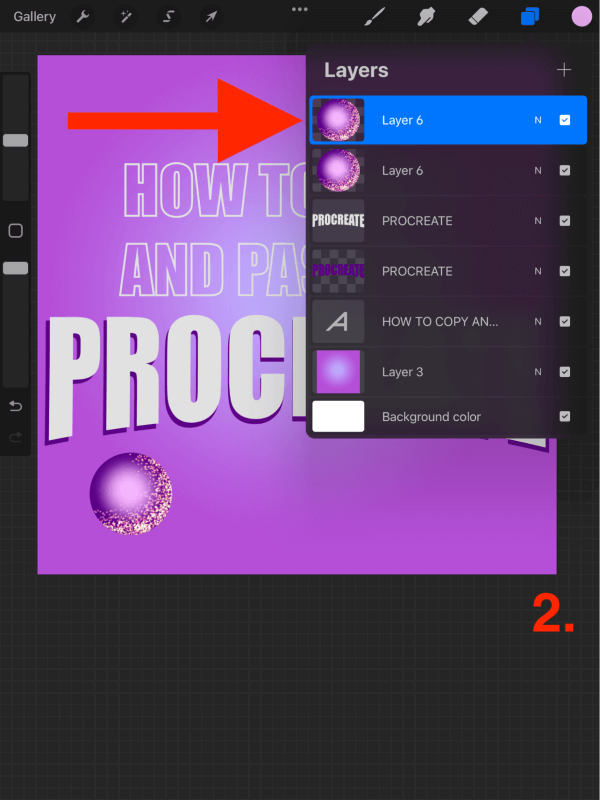
3 Ways to Copy and Paste in Procreate
You can copy and paste from the main canvas, within the layer, or duplicate the layer. Here are the step-by-step guides of each method to copy and paste in Procreate.
Method 1: From the main canvas screen
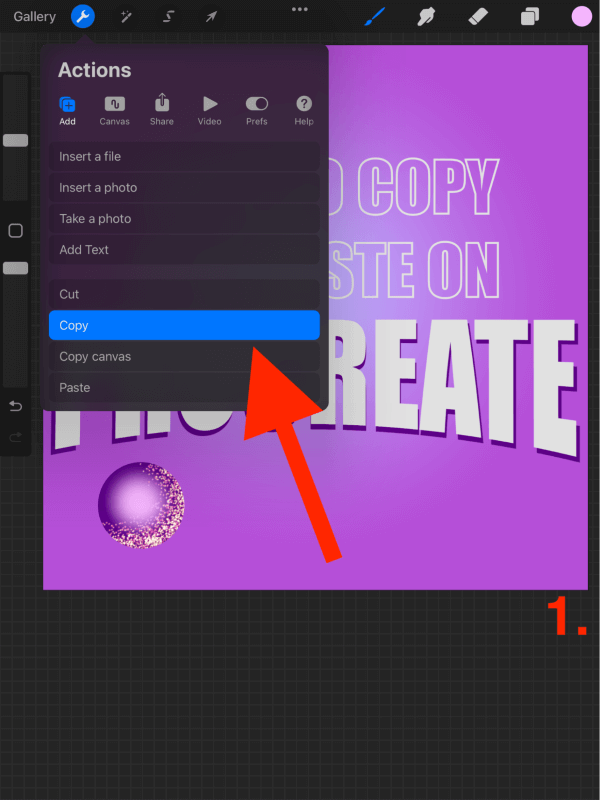
Step 1: Ensure the layer you want to copy is selected. Click on the Actions tool (wrench icon) and a drop-down menu will appear. Select Copy.
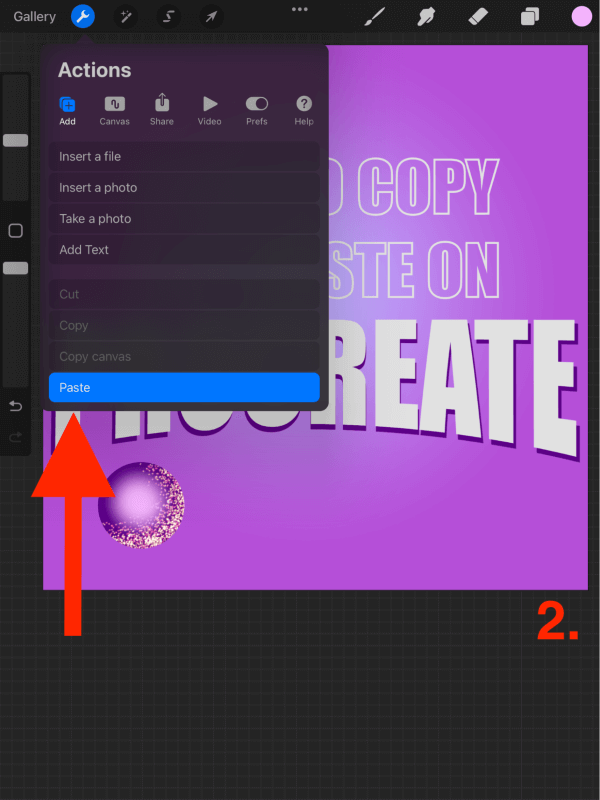
Step 2: Open up the layer in which you want to paste. Click on the Actions tool (wrench icon) and a drop-down menu will appear. Select Paste.

Method 2: Within the layer
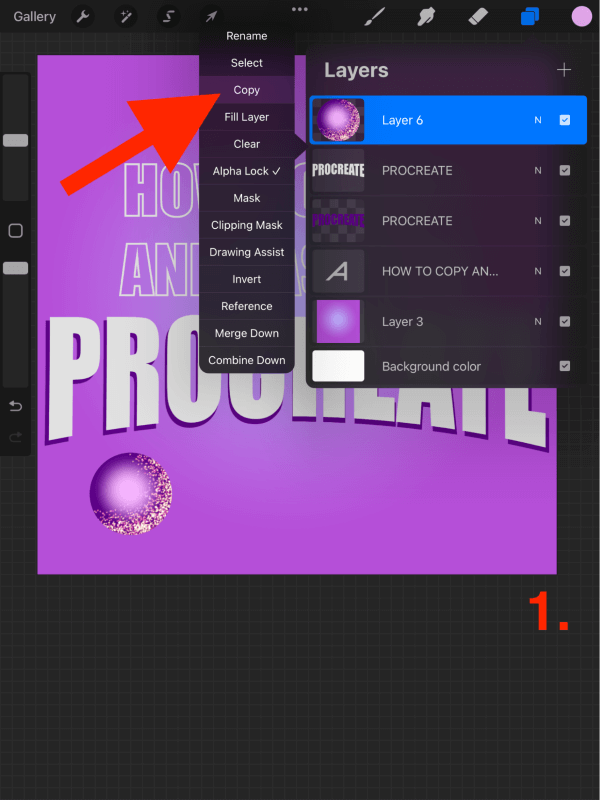
Step 1: Open up the layer you wish to copy. Click on the layer’s thumbnail and a dropdown menu will appear. Select Copy.
Step 2: Open up the layer in which you want to paste. Click on the Actions tool (wrench icon) and a drop-down menu will appear. Select Paste.
Method 3: Duplicate the layer
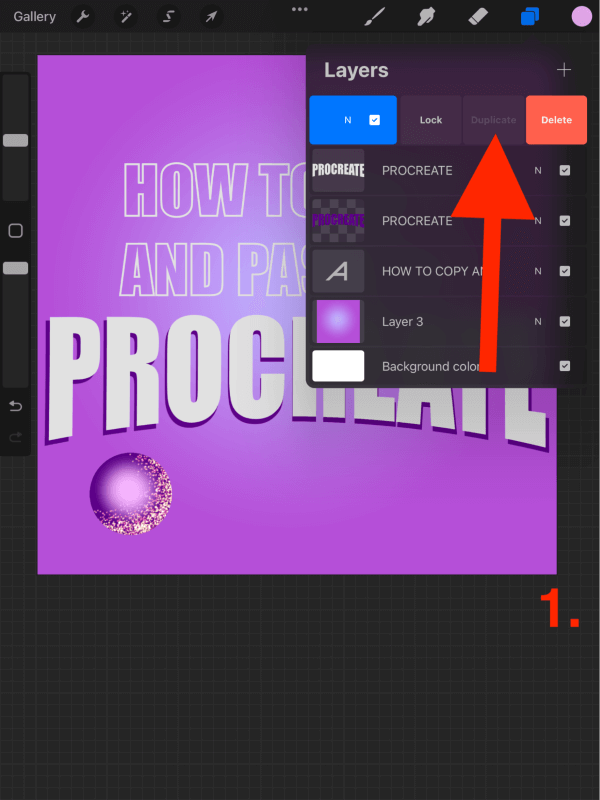
Step 1: Open up the layer you wish to copy. Swipe the layer to the left and select Duplicate.
Step 2: A copy of the duplicated layer will appear above the original layer.
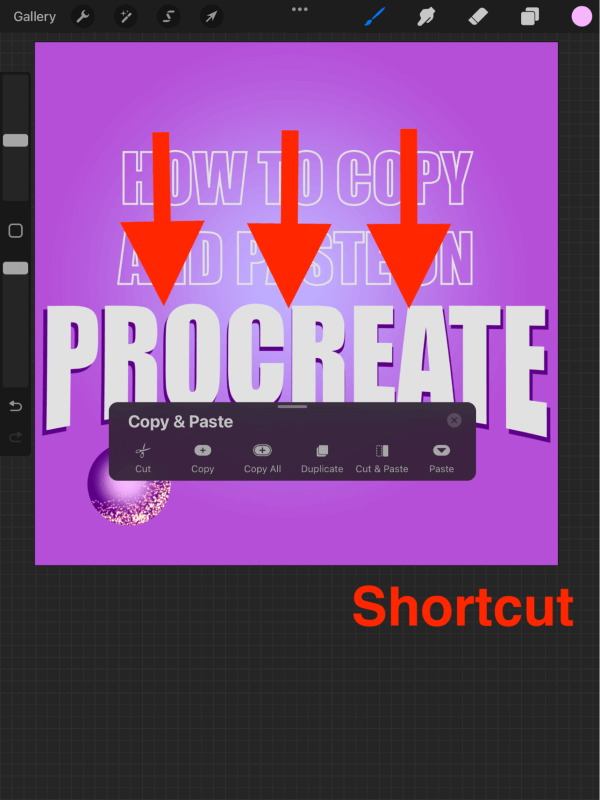
The Procreate Copy and Paste Shortcut
I get a lot of questions like “What’s the quickest way to copy and paste on Procreate?” or “What’s the easy way to copy and paste?” and today I have the answer for you. Like most other creation programs like Microsoft Word or Google Docs, there IS a shortcut and you WILL use it.
Using three fingers, drag your fingertips downwards on your screen. A toolbox will appear at the bottom of your screen. Here you will have the choice to cut, copy, duplicate and paste.
The Procreate Handbook has a more in-depth review of all of the copy and paste options. This is a very useful resource when you’re learning how to make the most out of this awesome shortcut.
FAQs
Got more questions related to copying and pasting in Procreate? Here are more questions that are related to this topic.
How to copy and paste on the same layer in Procreate?
The only way to do this is once you have copied and pasted and you now have two separate layers, combine them. You can do this by either selecting the Merge Down option or simply using your two fingers to pinch the two layers together to form one.
How to copy and paste in Procreate without creating a new layer?
This is a similar answer to the one above. It is not possible to copy and paste without creating a new layer. So your best option is to copy, paste and combine the two layers to form one.
How to paste an image in Procreate?
The only step that changes here is that you need to copy your chosen image from outside of the app through either an internet search or your Photos app.
Once you have copied your chosen image, you can open your Procreate canvas and follow Step 2 (from Methods 1 & 2), and select Paste. This will paste your image as a new layer in your project.
Final Thoughts
Copy and paste yet again another very simple yet very crucial tool on the Procreate app. If you haven’t already, I strongly suggest spending a few minutes getting familiar with this function as it’s something most users will need to use for almost every project.
The shortcut will save you time in the long run and who doesn’t need more of that?
Did I miss anything? Feel free to leave your comments below and share any hints or tips of your own that you may have up your sleeve so we can all learn from each other.