
Today, I just wanted to share a few quick tutorials on how to adjust the color of visited links in different web browsers, so you can avoid clicking on web pages that have been browsed already.
This is helpful especially when you (or your friends and family) are color-blind. For those who are color-blind, it’s hard to tell the difference between the colors of visited and unvisited web links if they are not set properly. This can make simple web browsing a frustrating experience.
The Fun Story Behind It
The other day my cousin dropped by my apartment and he was using my laptop to search for something on Google. Several times, I heard him say, “Stupid me! Why am I visiting this page again?” So I told him:
- Me: Hey Daniel, are you clicking page results you’ve already visited?
- Daniel: Yep. I don’t know why.
- Me: The visited pages in Google results are marked as red, and those you haven’t visited are in blue, in case you don’t know… (I just wanted to help)
- Daniel: I think they look all the same to me.
- Me: Really? (I thought he was joking)…Hey, those are different colors. One is light purple, the other is blue. Can you tell?
- Daniel: Nope!
Our conversation started to get a bit serious, as you may have guessed. Yep, my cousin is somewhat color-blind — more specifically, red color blind. I use Chrome, and after I changed the color of a visited link from red to green, he could immediately tell the difference.
Table of Contents
Do You Have Color Blindness?
First off, you don’t have to worry about it at all if you have it. Most of the time, color blindness is genetic and there is no treatment, according to MedlinePlus. Also, to make yourself feel better, “There is general agreement that worldwide 8% of men and 0.5% of women have a color vision deficiency.” (Source)
To test whether you are color blind, the quickest way is to check out this Huffington Post article. It includes five images sourced from the Ishihara Color Test.
For more tests, you can visit this website. You’ll be given 20 trial questions before you see your test result. Click the blue “START TEST” to start:
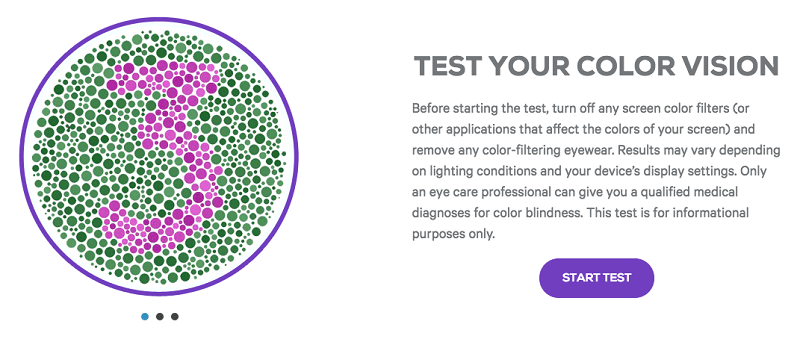
Most people will be told they have “Normal Color Vision”:

The Color Scheme in Search Engine Page Results
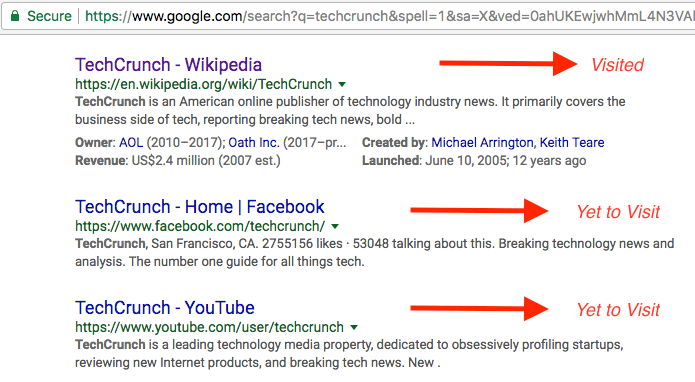
Note: By default, most search engines such as Google and Bing mark results you clicked through as purple and results unvisited as blue.
Here are two examples:
This is what came up after I searched for “TechCrunch” on Google. Since I’ve visited the TechCrunch Wikipedia page before, it’s now marked as light purple, while Facebook and YouTube are still blue.
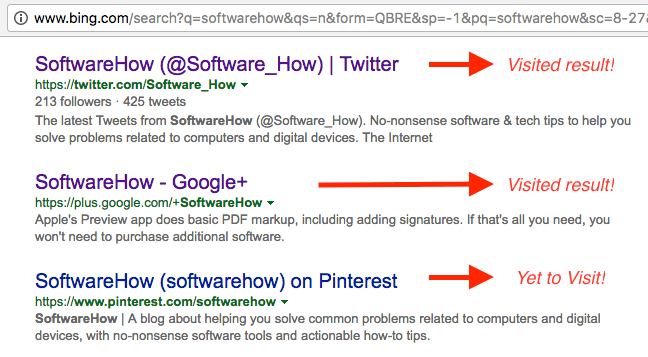
In Bing, I searched “SoftwareHow” and here’s what I saw. Twitter and Google+ pages are already visited, thus they are marked as purple as well, while the Pinterest link is still blue.
Now let’s get back to the topic. Here’s how to change the color of visited links in different web browsers.
How to Change Visited Link Color in Google Chrome
Unfortunately for the Chrome browser, you’ll have to add an extension to make it work. Here’s a step-by-step tutorial:
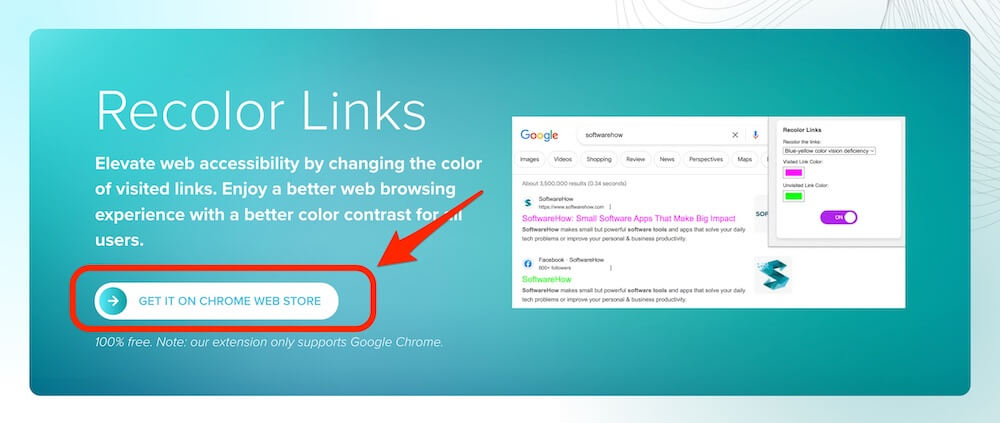
Step 1: Add this extension called Recolor Links to your Google Chrome browser. Click this button and on the Chrome Web Store page, hit the blue “Add to Chrome” button to install it.
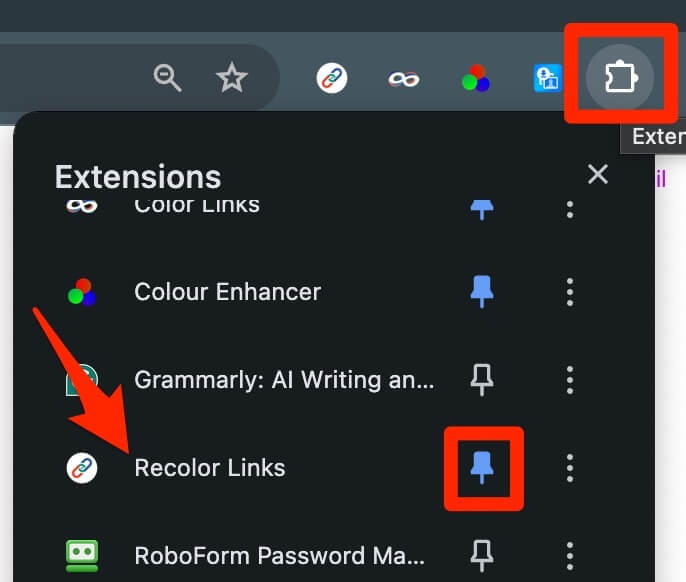
Step 2: Once you see a notification indicating the plugin has been added to Chrome, click on the Extension icon on the top right corner, and select Recolor Links (or pin it to your browser menu).
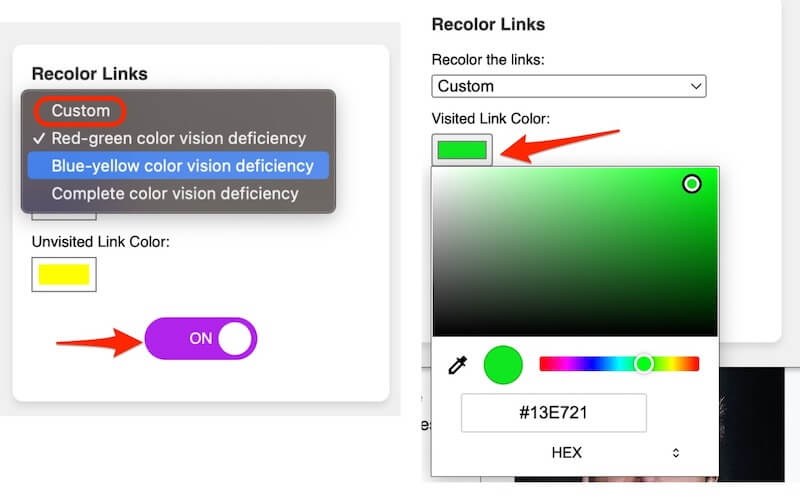
Step 3: Click on the Recolor Links icon, and you’ll see a dropdown menu like this. You can either choose the mode that fits your vision deficiency or select the “Custom” mode so you can customize your color preferences.
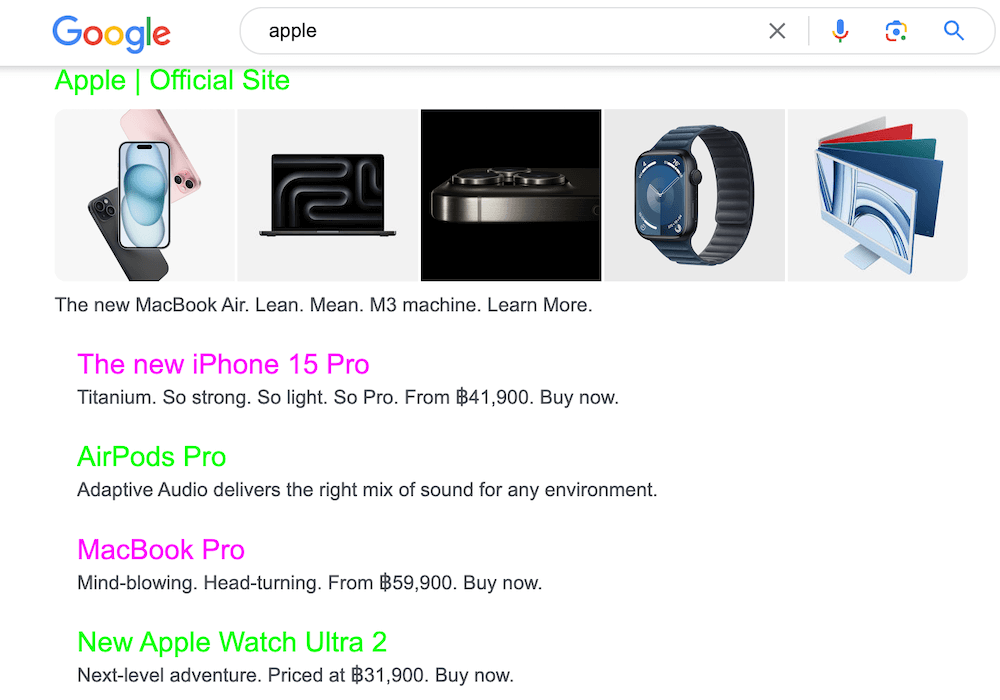
Step 4: Now search on Google or any search engine that you use, and you’ll see the color contrast of these visited and unvisited links.
By the way, this extension also works for changing the color of links on any web page. You can get it for free on the Chrome Web Store.
How to Change Visited Link Color in Mozilla Firefox
Making the change in Firefox browser is even easier because unlike Chrome, you don’t need to install any third-party extension. Follow the step-by-step guide below:
Note: In this tutorial, I use Firefox 54.0.1 for macOS. If you are using another version or are on a Windows PC, the paths and screenshots as shown below may not apply.
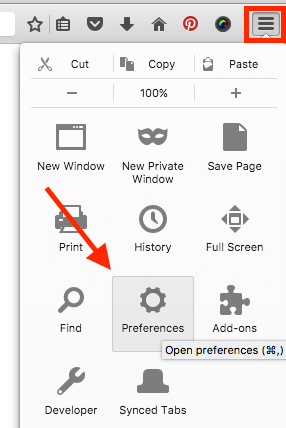
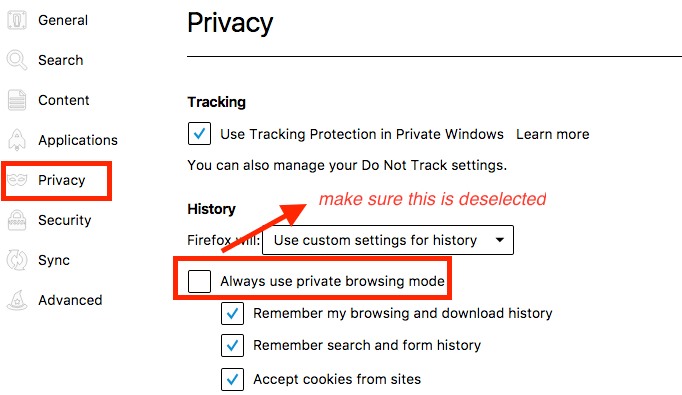
Step 1: Make sure the “Always use Private Browsing mode” option is deselected. Open Firefox Menu > Preferences > Privacy.
Under History > Firefox will:, select “Use custom settings for history”. If you’ve checked “Always use private browsing mode”, uncheck it. If it’s deselected (by default), you are good. Go to Step 2.
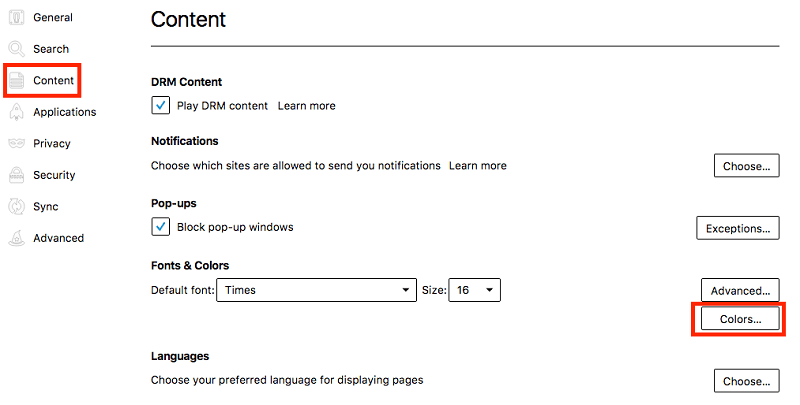
Step 2: Now go to Content > Fonts & Colors > Colors.
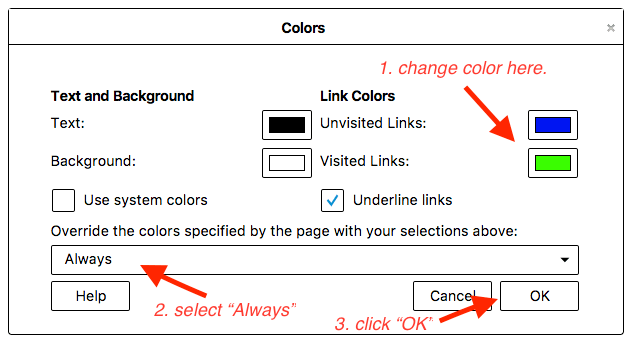
In the “Colors” windows, change the color of “Visited Links:” to your desired one, select Always in the drop-down menu, and click the “OK” button to save your changes.
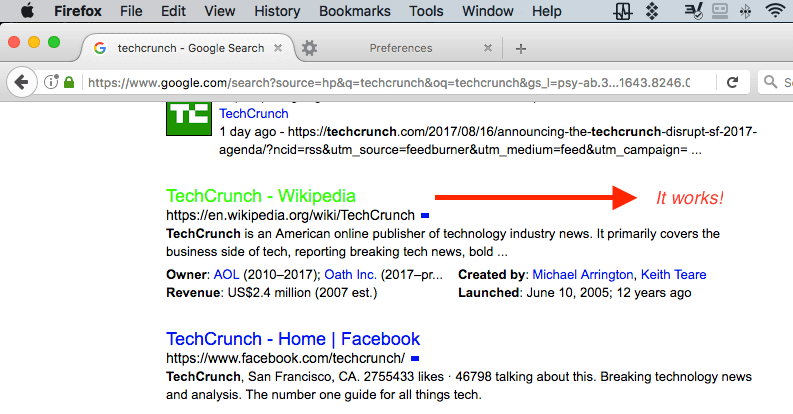
Step 3: That’s it. To test if the setting change is effective, simply do a quick search on Google and see if the color of those visited results has changed. In my case, I set them as green, and it works.
How to Change Visited Link Color in Safari
The process is quite similar to Chrome’s. You’ll need to install an extension called Stylish. Follow the tutorial below, where I also point out a trick that you need to take care to perform. Otherwise, it won’t work as expected.
Note: I’m using Safari for macOS (Version 10.0). The screenshots shown below may be slightly different from what you see on your computer.
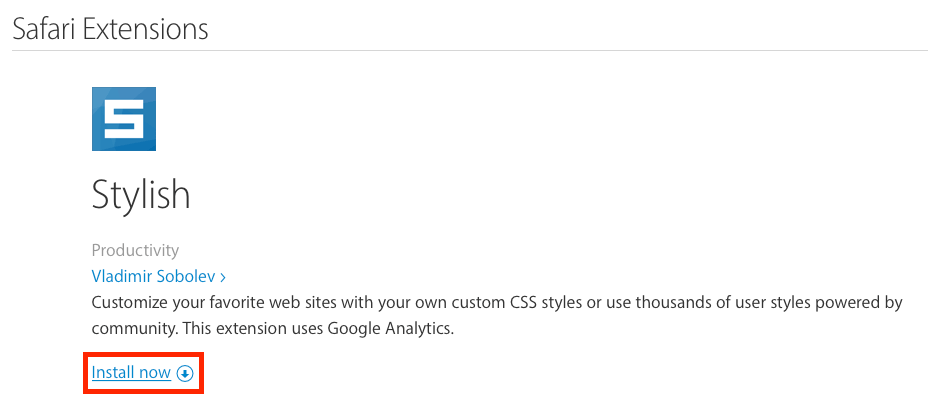
Step 1: Get the Stylish extension (visit the link) and install it to your Safari browser.
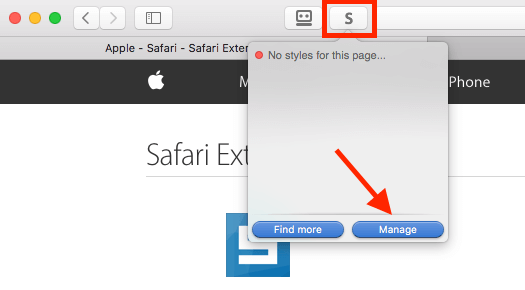
Step 2: Click the Stylish extension icon (located on the top of the toolbar), then select “Manage”.
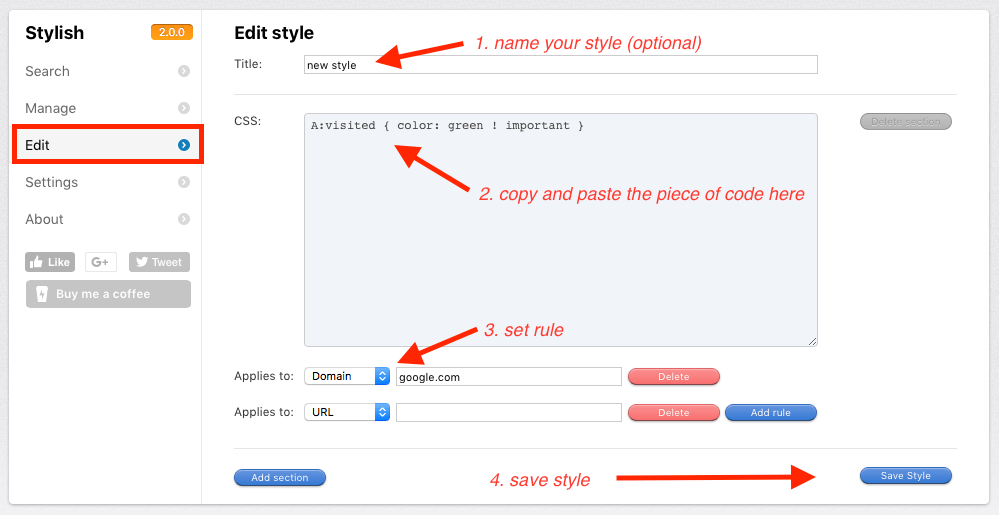
Step 3: In the new Stylish dashboard, go to Edit. Complete the four tasks as shown in this screenshot. The piece of CSS code is shown below.
A:visited { color: green ! important }
Again, the color in my example is green. You can change it whatever you like. Find more colors and their codes here or here.
Pay close attention when you set the rules. For example, I wanted to only change the color of visited links in Google.com. I choose “Domain” and type “google.com” under the CSS box. Note: DO NOT type “www.google.com” as it won’t work. It took me some trials and error to figure this out.
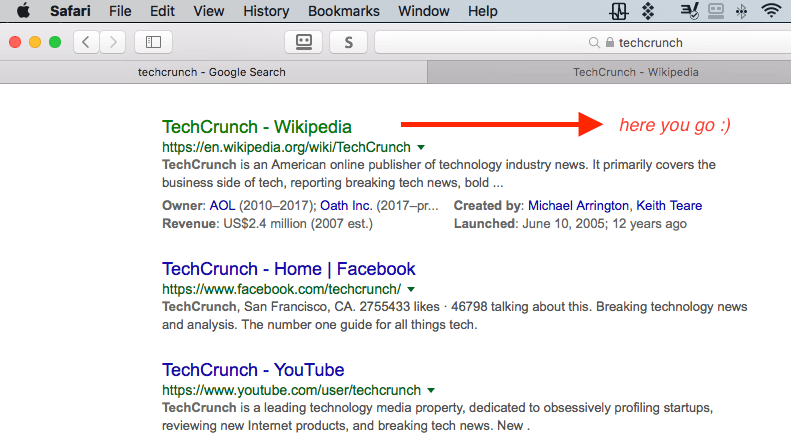
Step 4: Test to see if the change has taken effect. In my case, it works.
How to Change Visited Link Color in Microsoft Edge
Unfortunately, for Windows users, I have yet to find a feasible solution to change the color of visited or unvisited links. I thought the Stylish extension would work with Edge, but I was wrong. However, it seems I am not alone, as you can see from this discussion that many people are demanding the feature.
I’ll update this post if Edge adds this function or if there is a third-party extension that does the job.
I hope you found this article useful. Please let me know if you’re unclear about any steps in the tutorials above. If you discover an easier method, leave a comment below and let me know.
Totally stupid! I HATE the purple color, which it is not even that! It looks like washed-out purple. 🙁 I cannot discern visited links! Even Brave has a way of changing it. Who the hell decided to unilaterally ram the “color purple” down our throat! They must have watched the movie just before going ahead with this idiotic design! Removing Edge and sticking with Brave!
re: Firefox, sure it works but it messes up all sorts of things, LIKE FILLING IN THIS FORM 9i had to go back and select “Never” rather than “always”. I can’t imagine why Mozilla allows over-riding of the world-wide blue-and-purple.
For Chrome, that link seems to link to a different extension, unless they changed the name. Also, if possible you should turn on dates for comments!
Thanks for the article on changing the colour of visited links. Unfortunately I use Opera, which you did not cover. Any tips on how to do it in Opera?
Kind regards
Bob Sather
London, England
outdated pictures for chrome , I got it working,
but a novice will overload
Thanks for the tutorial. Very helpful indeed.
Thanks! Looks like it just got updated. Anyway, good to know
thanks for making this, I needed to change the colour of visited links because blue and purple were too close, and I needed to keep track of which links I’d visited and which I hadn’t.
Hello, what about Opera please?
Thanks, JP! Worked like a charm!
Great post, thank you!
As stated above the Chrome Extension changed recently and the code syntax is also different. I find that the code below works best for me for visited links.
A:visited {
color: #2fce0c
}
Reminder: The new link to the extension is
https://chrome.google.com/webstore/detail/stylish-custom-themes-for/fjnbnpbmkenffdnngjfgmeleoegfcffe
This is 2019. Your instructions are dated. II’m going to have to look elsewhere for up-to-date instructions.
Thaqnk you for showing me what look for.
My opinion as well, the instructions need to keep up with the changes to Chrome or else they are useless. It does seem like the process to change a visited link is much different now.
Please take a look at your Chrome explanation. I think things have changed because the Options has changed to Write a New Style and it is not clear from your instructions how to write the style.
Undeniably consider that which you stated. Your
favorite justification seemed to be on the net the simplest thing to take into
accout of. I say to you, I certainly get irked whilst people consider concerns that they just
don’t recognize about. You controlled to hit the nail upon the
highest and outlined out the entire thing with no need side effect , folks can take a signal.
Will probably be again to get more. Thanks
Your post is great and meaningful. Thank you for sharing this article. I would like to receive better and better articles.
The chrome extension is now called Stylebot!
Stylist extension for chrome is gone AGAIN.
The link to Stylist is longer longer working.
Thank you so much for this Blog. I didnt even know I couldnt make out the difference till I read your article. #Gamechanger
Thanks for taking the time, finally I don’t have to tilt my screen in order to distinguish visited links.
Just want to tip you about a much better link for this passage [sic: “is this” should probably be just “this”] in your article, under the word “here”:
> Note: The color of is this line is “green”. Feel free to change it to another color or an RGB code (255, 0, 0 for example). You can find more colors and their codes here.
For that link “here” above, there’s a much more useful CSS colors page: https://www.quackit.com/css/css_color_codes.cfm
(If you need to keep using w3schools, this page is also way better: https://www.w3schools.com/cssref/css_colors.asp)
I can also inform you that at least for the Windows Chrome extension, the Decimal Code RGB eg 147,112,219 totally doesn’t work,
while other than the Color Name eg MediumPurple, the Hex Code RGB eg #9370DB also works fine.
Also want to point out that at least for Windows, the Chrome extension is named “Stylish” (and always has been AFAIK), not “Stylist”, and it also looks quite different, have you checked out the latest version? It’s different enough to confuse esp. how to add the prefix rule so the instruction would benefit from an update, if you ask I can send you screenshots:
https://chrome.google.com/webstore/detail/stylish-custom-themes-for/fjnbnpbmkenffdnngjfgmeleoegfcffe
All the best,
Anders
Great. Easy. very well explained
Here is the link to the working Styles extension:
https://chrome.google.com/webstore/detail/stylish-custom-themes-for/fjnbnpbmkenffdnngjfgmeleoegfcffe
Hope it helps <3
Thanks! Looks like it just got updated. Anyway, good to know 🙂
The link is not working and I cannot find it in the Chrome web store extension list.
There are two extensions for just that:
Link Text Color
https://chrome.google.com/webstore/detail/link-text-color/djajcdbelhandnaichcbohaoefndhnde
Visited
https://chrome.google.com/webstore/detail/visited/bfcodeehkjogenemacopdbhabjebnbah
Hi JP,
Using Chrome! I have this Stylist extension on another computer and it works great.
However today, 14th February 2018, the link to Stylist is broken, and a search of the Google Store shows it has been removed for some reason.
Can I somehow copy it from my other computer?
Thanks
Robin
When I click on the “stylist” link in chrome it says 404. Now what?
extension not found in chrome web store
Is it now possible with Microsoft Edge?
On some sites, this browser doesn’t even display visited links in the default purple colour.
This is the case for at least Google search results and Reddit text posts.
However, it works on Bing as expected.
Not yet.
How do you change it back? I’ve changed firefox following the instructions on here and now I cannot use my colours on google docs, or see normal web pages properly – Help!!
Under Mozilla Firefox > Step 2 > Colors, change “Override the colors specified….” from Always to Never, then click “OK” to save the change.
If you only want to change visited color in search engines (without affecting other sites), try the Stylish extension. It’s compatible with FireFox as well.
How to Change Color of Visited Links in Norton Safe-search, please?
Thank you, thank you, thank you!!!!
I am color-blind (or hue-challenged, as the PC police might prefer). I and the other 8% are completely ignored by most software and web designers, even in games, etc, where color discrimination is of great importance. I have encountered exactly one dev which acknowledges the prevalence of color-blindness, and it exists to add greater functionality to a single app. I look forward to Windows 10’s implementation in the latest Update. I have hope, but not confidence.
There are many sites which detail using Stylist in Chrome, but they all parrot the same instructions, which (for me, at any rate) stalled at Name Style. I couldn’t find a blank in which to insert a name. Your screenshots with arrows saved the day!
Were this a civilized country, you would be King!
That’s a huge compliment. Thanks Kirk! I’m glad that you found the instructions helpful.
I found a extension for Microsoft Edge.it called “Custom Dark mode” but unfortunately I don’t know how to use and personalize it. You need to know developer options
The directions for Google chrome worked until recently, when Windows ran a huge update (it took 3 hours!). Now my color change is gone. Not only that, but I did it over again, rebooted, and it still doesn’t work! Help! I cannot tell the difference between the blue and the purple. I had it as lime green for visited sites and it was wonderful!
Thanks for the instructions. However when I do as instructed, the visited link color does indeed change, but it also turns off the display of graphics on all websites. This is apparently a bug in Firefox. I am using Firefox version 56.0 on Linux Mint 18.1 Serena 64-bit with the MATE desktop environment. I have yet to find a solution or file a bug report.
Carl
Hi Carl,
You’re right. I also noticed the “issue”, the color change affects all websites besides Google. I’ve now reset the color setting in FireFox, to be honest.
Out of curiosity, do you find Stylish work for FireFox? The extension works amazingly well for Apple Safari browser as I can set the color change specific to a website like google.com. Not sure if it can replicate the success in FireFox, yet to know.
JP
Thank you! This article was easy to follow and very thorough. It’s a relief not having to squint at that blue and purple text trying to tell the difference. My eyes thank you.
No problem! Glad you like the article 🙂
When I enable this feature, Firefox screws up and shows all images as text with a box abound it.